

-
Welcome to Tacoma World!
You are currently viewing as a guest! To get full-access, you need to register for a FREE account.
As a registered member, you’ll be able to:- Participate in all Tacoma discussion topics
- Communicate privately with other Tacoma owners from around the world
- Post your own photos in our Members Gallery
- Access all special features of the site
 Kayak lights?
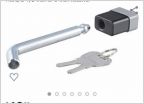 Hitch lock ??????
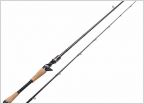 Rod/Reel and Lure help
 Climbing back into a kayak. From the water.
 Spearfishing & Abalone Diving
 Erik's fishing rants
1980 HydroStream Vamp resto-mod
Discussion in 'Boating & Fishing' started by 5nahalf, Oct 8, 2023.
Page 14 of 50
Page 14 of 50
Products Discussed in


