1. Welcome to Tacoma World!

    You are currently viewing as a guest! To get full-access, you need to register for a FREE account.

    As a registered member, you’ll be able to:
    • Participate in all Tacoma discussion topics
    • Communicate privately with other Tacoma owners from around the world
    • Post your own photos in our Members Gallery
    • Access all special features of the site

1996 Integra GSR Sedan

Discussion in 'Other Builds' started by danteisme, Aug 18, 2016.

  1. Oct 1, 2020 at 5:04 AM
    #321
    danteisme

    danteisme [OP] Well-Known Member

    Joined:
    Jan 14, 2008
    Member:
    #4248
    Messages:
    2,100
    Gender:
    Male
    South Western PA
    Vehicle:
    06 DCSB Sport, 96 Integra GSR
    So, lets fast forward to the last day of painting and when it all went downhill...

    The underside of the formerly red trunk lid.

    [​IMG]

    The setup for the other pieces, this was too crowded. I had to really calculate my walking path through the garage while doing this work. Here is everything in primer (except for my fix on the trunk lid) and sanded ready for green and gloss.

    [​IMG]

    [​IMG]

    [​IMG]


    At this point, everything was still going great.

    Here is the trunk all done

    [​IMG]

    [​IMG]

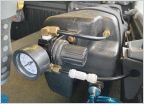
    A bit more orange peely than the car, but cut and buff will fix that. This is the only separate piece that came out good. As i was spraying the base coat on the trunk lid, i noticed as soon as i finished the trunk lid both air compressors were kicking on. Which was odd considering I had made it 3/4 of the way around the car before that happened before. As i continued moving through the garage, i could tell something was wrong. My pressure was steadily dropping well below where the gun could get proper atomization and was starting to spray inconsistently, which is great when spraying something with the amount of pearls this paint has (sarcasm). Because it wasnt atomizing efficiently, i quickly ran out of material and had to go buy more. After i got back from buying more paint, i had more mechanical failure. My second air compressor stopped filling up to fully capacity and it stopped letting air out. No idea what happened here. But, i was more than half way through so i just pressed on, spraying at well less than the required PSI. Not what i wanted to do, but it was going to be in the 50's for the rest of the week and the foreseeable forecast so this was the last day i could do this as it was in the lower 80's. I had one paint reaction between the paint and the primer on the front bumper as well, not sure if i was sweating and i missed a drop getting on the bumper or what happened there.

    [​IMG]

    And the rest of the pictures, most of these pieces will need redone next year.

    [​IMG]

    [​IMG]

    [​IMG]

    [​IMG]

    [​IMG]

    [​IMG]

    [​IMG]

    [​IMG]

    Overall, i'm still happy and proud of this work. I know now that if I dont have mechanical failures, i can lay down a halfway decent paint job. I'm going to take a closer look at these parts in the sun to check for coverage, and hopefully a cut and buff is all some of these will need. The front bumper, one fender, one side skirt, the mirrors, and the front lip definitely need redone with paint and clear. I can tell the paint is just too inconsistent with a couple of blotched areas where the pressure wasnt enough to get it to lay correctly. And the mirrors and the front bumper by the grill were an absolute PITA to get paint into all of the right places. The mirrors only need redone because i didnt get adequate coverage in some of their body lines and that will just drive me nuts if i leave it as is. Same with the bumper, even if i didnt have that reaction i would still need to redo the area by the grill. When i do this again, i'll do fewer parts at once and really take my time making sure the paint goes where it needs to on these more difficult parts. I think i'll figure out a different way to mount the mirrors too, hanging them was a little difficult. Between now and then i'll also look to replace my air compressors with one bigger one. Or, i'll paint 1 or 2 pieces at a time and just use my larger air compressor of the two that i have. Still, overall i'm really proud of myself with this and it was fun. At least the pieces that need to be redone are easily removable from the car and this didnt happen in the middle of the quarter panel or the roof or something.
     
  2. Oct 6, 2020 at 7:24 AM
    #322
    BadBrains

    BadBrains Spreading the Aloha

    Joined:
    Apr 28, 2010
    Member:
    #36179
    Messages:
    1,618
    AL
    Vehicle:
    '07 Tacoma TRD OR, '00 Integra GS-R, '75 C10
    King, TC +2"LT, 35's, Aluminum this and that.
    Hell yeah. You can start enjoying the car again, then touch those parts up later.
     
    Biscuits and danteisme[OP] like this.
  3. Oct 6, 2020 at 7:42 AM
    #323
    danteisme

    danteisme [OP] Well-Known Member

    Joined:
    Jan 14, 2008
    Member:
    #4248
    Messages:
    2,100
    Gender:
    Male
    South Western PA
    Vehicle:
    06 DCSB Sport, 96 Integra GSR
    Exactly, its time to enjoy the car! It won't be a big deal for a couple weekends over next summer to spray 1 big piece or 2 smaller pieces at a time. That way I won't be tied up in the garage for hours on end and the car won't be down for weeks at a time.
     
    BadBrains likes this.
  4. Oct 19, 2020 at 1:10 PM
    #324
    danteisme

    danteisme [OP] Well-Known Member

    Joined:
    Jan 14, 2008
    Member:
    #4248
    Messages:
    2,100
    Gender:
    Male
    South Western PA
    Vehicle:
    06 DCSB Sport, 96 Integra GSR
    Slowly slowly starting to look like a car again.

    [​IMG]
    [​IMG]
     
  5. Oct 19, 2020 at 3:01 PM
    #325
    Biscuits

    Biscuits Thorny Crown of Entropy

    Joined:
    Aug 8, 2010
    Member:
    #41397
    Messages:
    15,582
    Gender:
    Male
    Swiggity swangin' biggity bangin'
    Man that looks good already with all the love and care you have put into it already. Can't wait to see the final product.
     
    danteisme[OP] likes this.
  6. Nov 7, 2020 at 5:10 AM
    #326
    Heyyo_Friday

    Heyyo_Friday Will post memes for truck parts

    Joined:
    Nov 7, 2020
    Member:
    #346074
    Messages:
    327
    Gender:
    Male
    First Name:
    Derek
    Dfw, texas
    Vehicle:
    2014 DCSB SR5 V6
    CSF T4R/FJ radiator
    Hey man. Long time lurker finally joined the forums. Just dropping in to say I've been enjoying watch the progress as a fellow DC/DB owner. Paint is looking sharp:thumbsup:

    20200404_173117.jpg
     
    Biscuits and danteisme[OP] like this.
  7. Nov 8, 2020 at 7:11 AM
    #327
    danteisme

    danteisme [OP] Well-Known Member

    Joined:
    Jan 14, 2008
    Member:
    #4248
    Messages:
    2,100
    Gender:
    Male
    South Western PA
    Vehicle:
    06 DCSB Sport, 96 Integra GSR
    Thanks! Whats goin on with this one?
     
  8. Nov 8, 2020 at 7:16 AM
    #328
    Heyyo_Friday

    Heyyo_Friday Will post memes for truck parts

    Joined:
    Nov 7, 2020
    Member:
    #346074
    Messages:
    327
    Gender:
    Male
    First Name:
    Derek
    Dfw, texas
    Vehicle:
    2014 DCSB SR5 V6
    CSF T4R/FJ radiator
    Nothing special. 99 b20b swap. Ls trans with a m factory lsd. Whole slew of suspension parts. Me and a friend decided we wanted a track car to beat on that wasnt our cars (02 rsx-s and 95 GSR). So when I scrapped my old civic we picked this up as a shell and transfered it all over.
     
  9. Nov 9, 2020 at 11:01 AM
    #329
    danteisme

    danteisme [OP] Well-Known Member

    Joined:
    Jan 14, 2008
    Member:
    #4248
    Messages:
    2,100
    Gender:
    Male
    South Western PA
    Vehicle:
    06 DCSB Sport, 96 Integra GSR
    Still havent buffed this paint job yet, really slacking in that regard. So, i'm stilling messing around with a "partial" reassembly so that i have room to maneuver the buffer.


    Made some new gaskets for the OEM spoiler since they are discontinued.

    [​IMG]


    Finished up the re-wiring and mounting of the trunk lid.

    [​IMG]


    Mounted the jdm fogs (ignore the garage mess...). Should have the rep lip on next weekend.

    [​IMG]


    Finished the retrofit's harness wiring. Still need to finalize the cap for the rear of the headlight housing. Also finished mounting the boxes.

    [​IMG]

    [​IMG]


    Picked up a new part. Neuspeed short shifter kit. I'll install this when i remove the exhaust to fit on the type r exhaust.

    [​IMG]


    Then I pulled the car outside of the garage to hose down the engine bay. It was full of body filler dust, paint dust, grease and dirt from all the work over the last....well long time.

    [​IMG]

    [​IMG]


    Its slightly more presentable now, still need to finish cleaning up the HID harness wiring at the battery. I will be adding an aux fuse block at some point to keep the connections to the battery itself to a minimum. Once i clean up the garage a bit more and get the rest of the pieces on the car, i'll have a little more room to move around the garage. Then I can really attack the sanding and polishing. Right now, i'm sort of tip toing around the car trying not to step on any pieces not on the car yet or knock something over and cause more work for myself next year.
     
    Biscuits and Heyyo_Friday like this.
  10. Nov 23, 2020 at 6:17 AM
    #330
    danteisme

    danteisme [OP] Well-Known Member

    Joined:
    Jan 14, 2008
    Member:
    #4248
    Messages:
    2,100
    Gender:
    Male
    South Western PA
    Vehicle:
    06 DCSB Sport, 96 Integra GSR
    I've been seriously slacking with work on the car. I value sleep so much more right now lol. My daughter is hardcore teething and is up every 2 hours almost, every single night. And when she starts screaming, there is a 50-50 shot she wakes up my son. So lately, anytime I have had to work over night on the car, has been switched to catching up on sleeping lol. Hopefully that changes soon. I got about 2 hours of work done on the car recently lol. I got the side skirts mounted back on the car, started wring up the horns only to realize that the one does not work now and started putting the interior back together. I grabbed a very nice headliner from the U-pull yard for $15 that is 100X better than the one I had in the car.


    I started rinsing some of the car off to get ready for wet sanding, and I noticed water running down the front pillar on the inside of the car. WTF... so I start checking around the windshield and realized that I can push the glass off the car...not good considering this is a relatively new windshield. Called the glass company and said they would be out the next day. They came out and completely re-removed the windshield and determined that the adhesive did not bond to the surface that I had done some rust repair on. Even though it was something most likely I did, they did not charge me for the re-replacement. Good guys.


    Also, I had to flip the car around in the garage so that they had easier access to the front of the car. The new headlights are completely unaimed, but it was night so I thought it would probably be a good idea to turn some lights on. Even with them not aimed at anything, I love the cutoff of these S2000 retrofits.


    [​IMG]

    [​IMG]
     
    Biscuits and Heyyo_Friday like this.
  11. Dec 4, 2020 at 12:54 PM
    #331
    13tacosport

    13tacosport Well-Known Member

    Joined:
    Jul 4, 2019
    Member:
    #298330
    Messages:
    865
    Gender:
    Male
    First Name:
    Arbi
    818
    Vehicle:
    13 Trd Sport
    I think I have commented on here before...nice build.........man do I miss my milano red 92 gsr with that B17, had so much fun with that car back in HS in 2000-2001.

    I had tein coilovers, some kind of exhuast cant remember name, AEM short ram, DC 4-1 headers.
     
    danteisme[OP] likes this.
  12. Jan 25, 2021 at 9:28 AM
    #332
    danteisme

    danteisme [OP] Well-Known Member

    Joined:
    Jan 14, 2008
    Member:
    #4248
    Messages:
    2,100
    Gender:
    Male
    South Western PA
    Vehicle:
    06 DCSB Sport, 96 Integra GSR
    As per usual, i'm lacking on updates. I have quite a few - the car is 98% put back together, ordered more parts from restotuners, acura, and odds and ends from a few other places.

    [​IMG]
    [​IMG]
    [​IMG]
    [​IMG]
    [​IMG]
    [​IMG]
    [​IMG]
    [​IMG]
     
    Biscuits, Heyyo_Friday and naaack like this.
  13. Feb 1, 2021 at 10:44 AM
    #333
    danteisme

    danteisme [OP] Well-Known Member

    Joined:
    Jan 14, 2008
    Member:
    #4248
    Messages:
    2,100
    Gender:
    Male
    South Western PA
    Vehicle:
    06 DCSB Sport, 96 Integra GSR
    A couple of hours of work Friday night and Saturday night after the kiddos went to bed. After cleaning the car, I sanded the car with 2000 grit, and then followed up with 3,000 grit. I avoided the edges and around the door handles and such because I am not a fan of getting the buffer that close to the edges and because my buffer has a 7" pad. Too risky for me. I also realized that I definitely could've sanded a bit more in a few places, but I was nervous to sand much further. No real indication that this fear was warranted, but just getting too much passed my level of comfort given this is 100% DIY paint job by a guy that never previously painted a car before lol. A few pics:


    [​IMG]

    [​IMG]


    After one pass with meguiars 105 and a wool pad. This is the trunk lid:

    [​IMG]


    The hood:

    [​IMG]


    I think i'm going to go over the whole car one more time with the 105. I can't tell if some of what i am seeing is swirl marks or hazing from the wool pad or if its still 3,000 grit sand marks. I plan to follow up with 205 on a polishing pad and then with meguiars 7 with a finishing pad. Then i'll put a solid coat of wax on it. I think I have chemical guys butter wax and some meguiars nxt wax, i'll just pick one of them. So hopefully after a few more hours in the garage this weekend, i'll have all of the buffing done and protection done.
     
    Heyyo_Friday and 13tacosport like this.
  14. Feb 15, 2021 at 8:55 AM
    #334
    danteisme

    danteisme [OP] Well-Known Member

    Joined:
    Jan 14, 2008
    Member:
    #4248
    Messages:
    2,100
    Gender:
    Male
    South Western PA
    Vehicle:
    06 DCSB Sport, 96 Integra GSR
    Moar updates!

    Finished the polishing process with the car. There is a downside to this though. Now that the car is polished and "flat", you can really tell how badly i warped the doors when i was stripping the paint...However, if i you look at it at the correct angle, you can't tell lol.
    Door warpage. Well, maybe not so much warpage on this one. This is the one that had all of the damage to it that i tried to fix just because it was too late to try and track down a straight, rust free door in Western PA lol.
    [​IMG]
    You can also tell in this picture which pieces were the ones affected by my compressor regulator exploding. Look at the difference in the orange peel between the front fender and the front door.
    [​IMG]

    Some reflections
    [​IMG]
    [​IMG]
    [​IMG]
    [​IMG]

    Once the snow is cleared out, I'll flip the car around in the garage so i have a little more room to try and take care of the clear coat runs in the back passenger door. In the meantime, i'm going to clean up the overspray and junk off the windows, put some paint protectant on the car now that its all polished out, and attempt to clean up the compound splatter all over the car. its everywhere. I think i'll also pull one of the wheels to test a small spot for polishing these rotas out, just to see if its feasible / worth my time.

    Couple over overall shots and my newly installed emblems on the trunk (i'll have to wait until i redo the front and back bumpers to install the rest of the new emblems.

    [​IMG]
    [​IMG]
    [​IMG]
    [​IMG]
    [​IMG]

    Speaking of emblems, i'm really glad i bought mine when i did. i dont recall paying this much.

    [​IMG]
     
    Heyyo_Friday likes this.
  15. Feb 17, 2021 at 5:06 PM
    #335
    Heyyo_Friday

    Heyyo_Friday Will post memes for truck parts

    Joined:
    Nov 7, 2020
    Member:
    #346074
    Messages:
    327
    Gender:
    Male
    First Name:
    Derek
    Dfw, texas
    Vehicle:
    2014 DCSB SR5 V6
    CSF T4R/FJ radiator
    Speaking of emblems, i'm really glad i bought mine when i did. i dont recall paying this much.

    [​IMG][/QUOTE]
    Man. Theyre super proud of that emblem. Can't believe it's really 50 bucks for that
     
    danteisme[OP] likes this.
  16. Feb 17, 2021 at 5:12 PM
    #336
    IvanhoeTaco

    IvanhoeTaco Well-Known Member

    Joined:
    Aug 4, 2019
    Member:
    #301199
    Messages:
    2,256
    Gender:
    Male
    Eastern NC
    Vehicle:
    2005 DCSB 4x4 Converted Prerunner
    Total Chaos 3.5 LT, King Coilovers, 35x11.5r17 on Falcon T2, ADV 4 inch fiberglass, 4.88 gears, FJ cruiser transfer case, 4 runner front diff, Cab mount relocate, fox 12x2.0 relocated
    God bless people like you. No reason why beige interior cant look good. Kudos.
     
    danteisme[OP] likes this.
  17. Feb 18, 2021 at 5:06 AM
    #337
    danteisme

    danteisme [OP] Well-Known Member

    Joined:
    Jan 14, 2008
    Member:
    #4248
    Messages:
    2,100
    Gender:
    Male
    South Western PA
    Vehicle:
    06 DCSB Sport, 96 Integra GSR
    they are, the emblem is like 3" over all, maybe. a lot of $$$ for one emblem.


    thanks! I proudly rock the old man tan lol
     
    Last edited: Feb 18, 2021
    Heyyo_Friday[QUOTED] likes this.
  18. Feb 19, 2021 at 6:30 AM
    #338
    danteisme

    danteisme [OP] Well-Known Member

    Joined:
    Jan 14, 2008
    Member:
    #4248
    Messages:
    2,100
    Gender:
    Male
    South Western PA
    Vehicle:
    06 DCSB Sport, 96 Integra GSR
    I liked the way the car looked when i was taking out the trash. Warped doors and all lol.

    [​IMG]
    [​IMG]
     
    Heyyo_Friday likes this.
  19. Feb 23, 2021 at 10:22 AM
    #339
    TuffRuffDangerous

    TuffRuffDangerous Well-Known Member

    Joined:
    May 29, 2013
    Member:
    #105169
    Messages:
    748
    Gender:
    Male
    San Diego, CA
    Vehicle:
    2011 TRD Off Road 4x4 DCSB
    Salex glovebox/console organizers, Philips H4 MotoVision headlight bulbs, Optilux H10 Extreme Yellow XY foglight bulbs, csjumper2003 LED domelight & license plate bulbs
    I have yellow Stanley JDM fog lights on my 96 GS-R and clear Stanleys on my 94 RS. The beam pattern is so much better than the $40 OEM style fog lights from Amazon.
     
    danteisme[QUOTED][OP] likes this.
  20. Feb 23, 2021 at 10:36 AM
    #340
    danteisme

    danteisme [OP] Well-Known Member

    Joined:
    Jan 14, 2008
    Member:
    #4248
    Messages:
    2,100
    Gender:
    Male
    South Western PA
    Vehicle:
    06 DCSB Sport, 96 Integra GSR
    Its one of my favorite parts of the car. I'm so glad when I sold the car the new buyer kept them the entire time. It would not be cheap to replace the JDM stanleys at this point.
     

Products Discussed in

To Top