1. Welcome to Tacoma World!

    You are currently viewing as a guest! To get full-access, you need to register for a FREE account.

    As a registered member, you’ll be able to:
    • Participate in all Tacoma discussion topics
    • Communicate privately with other Tacoma owners from around the world
    • Post your own photos in our Members Gallery
    • Access all special features of the site

1st Gen Prerunner to 4x4 with ADD hubs

Discussion in '1st Gen. Tacomas (1995-2004)' started by SeanJohn, May 7, 2017.

  1. May 7, 2017 at 7:54 PM
    #1
    SeanJohn

    SeanJohn [OP] Member

    Joined:
    Mar 12, 2017
    Member:
    #213046
    Messages:
    9
    Gender:
    Male
    Vehicle:
    1999 Tacoma Prerunner
    This is a quick writeup for those who wish to convert their Tacoma's to 4x4 with the automatic diff disconnect four wheel drive system ("4 on the fly")

    I DO NOT HOLD RESPONSIBILITY FOR ANY DAMAGE OR MALFUNCTION

    disclaimer: I'm not great with writing on forums so bear with me

    Things you will need:
    - complete front ADD diff (usually indicated by a tag and vacuum ports)
    - CV axles
    - front spindles with ADD hubs
    - standard relay
    - ADD solenoids
    - vacuum hose
    - J- Shift transfer case
    - Front propeller shaft
    - front section of the rear prop shaft

    Step 1: Diff
    source and install an ADD front differential with matching CV axles and mounting brackets. Both Tacomas and 4runner share the same front diff. The front diff will be a 4.10 gear ratio with a 7.5" ring gear ( usually identified with an axle code of B03a for Tacoma's or A03a for 4runners)
    Source: http://home.4x4wire.com/erik/diffs/

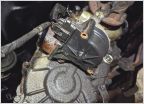
    8nNWC1_701a5e39bf6e57cc4a6913d65c4c7f62d9e995df.jpg
    ADD diff installed

    Step 2: Spindles
    Source and install 2 front ADD spindles. Both top and bottom ball joints and tie rods are the same between the 2wd and the 4wd models. When you remove your spindles, simply unbolt the lower balljoint ( this avoids pressing them out and keeps the tie rod attached), but you will need to fight with the upper ball joints. If the spindles are sourced from a 4runner, they will likely have ABS. Also, if sourced from a 4runner, you will need to use the Tacoma calipers and rotors, as the 4runner ones are larger.

    Step 3: T-Case
    as of now, I suggest sourcing a J-Shift transfer case (shifts in a "J" pattern) as oppose to the "4 wheel select" (shifts straight down and 4x4 is operated by a button). there is likely a way to make this work but it would require more wiring that I haven't attempted.
    When I put my t-case in I also did a manual transmission swap. there are many threads out there that describe the install of the front prop shaft and t-case much better than I will. To summarize, you will need a 4x4 transmission or you will need to mess around with the 2wd transmission to get the t-case to bolt up (to my knowledge), this will also require the speed sensor to be moved back and the wires lengthened and a shorter rear driveshaft.
    * slip-yoke faces the front diff

    Step 4: ADD system
    For this you will need a standard relay, an add-a-fuse (Canadian Tire or Lordco or whatever American equivalent like Autozone) the ADD solenoids (blue and brown) with pigtail connectors.

    -both white wires for the ADD solenoids are grounds (ground to the body if you wish)
    - Both 30 and 86 on your relay go to a switched power source that I chose to reference from the "horn" fuse ( you can reference it from the "4wd" fuse on the inside of the truck to add to the authenticity if you wish)
    - 85 on the relay will connect to the transfer position switch for 4wd, which is a switched ground. This will be on the passenger side of the transfer case (blue wire) and the white wire will connect to a ground.
    - the driver's side wires are for the 4 low position switch which enables the use of the rear e-locker. Best to leave it
    - 87 will connect to the engaging solenoid (green wire on whichever solenoid you choose, brown or blue)
    - 87a will connect to the disengaging solenoid
    Which solenoid you choose for engaging and disengaging does not matter as long as the hoses are connected to the diff correctly, if it's backward, simply switch the two diff hoses.
    Top ports of the ADD solenoid get a vacuum reference from the intake manifold and uses a filter in between (blue cylinder looking thing). The OEM system uses a vacuum canister (maybe for smoothing out engaging and disengaging?). I just plugged that line

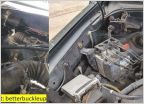
    xsw4I3_d4bde5c00d0650d7330e5c9c5b3dbc100e23bc82.jpg
    relay installed with fuse


    Step 5: 4wd indicator

    When I did this, I swapped the motor and transmission to a v6 manual with the associated ECU, during the dash harness conversion, I had the light work as it gets a signal from the ECU, that is controlled by both the ADD switch and 4wd position switch

    This is where my theory is untested. the simple option would be to have it light up a little Walmart LED bulb to indicate 4wd has engaged. Find a clear small LED (aforementioned Walmart or Canadian Tire), find a bulb socket (wrecking yard or dealer) drill a hole into the socket to get the wires through and insert the bulb and socket into the blank spot where the 4wd light would be. Ground one of the wires and power the other, using the ADD switch (on the back of the front diff) to interrupt the signal.

    Step 6: Don't break anything

    look at your identification plaque on the driver's door sill to check what your diff ratio is. you can find that information here: http://www.lcengineering.com/LCTechPages/TECHGEARJANUARY.html

    Unless you have a 4.10 rear end (B03a) you will have to swap it with a 4.10 rear diff. there are many ways to see what diff ratio you have

    It's a good idea to test the 4wd on loose dirt or gravel and at low speeds. even after you changed the rear diff, you want to be sure. I swapped a rear diff thinking it was a 4.10 (because that's what it was sold as :mad:) but ended up being a 3.91

    to convert the rear end, disconnect the prop shaft. Take the rear diff out of the carrier by removing the bolts on the outside and the 4 bolts on each side that hold the half-shafts in and slide them out about 4 inches. The brake lines can stay connected but it's really close so be careful, if you have 2 people, it may be in your best interest to take the lines off and bleed the brakes. Installation is the reverse of removal. remember to seal the diff with black or gray RTV and fill it back up with 80-90


    My next write-up will be a 3RZ-FE to a 5VZ-FE conversion :D
     
    jjsul likes this.
  2. May 7, 2017 at 8:54 PM
    #2
    BartMaster1234

    BartMaster1234 Well-Known Member

    Joined:
    Aug 21, 2016
    Member:
    #195197
    Messages:
    45,848
    Gender:
    Male
    First Name:
    Tyler
    Pittsburgh, Pennsylvania
    Vehicle:
    1998 PreRunner 4x4 2.7l Supercharged
    Flux Capacitor
    This was done on a 3RZ-FE?

    I don't know if I'm crazy but I noticed you're missing an engine? Can you do this without pulling it out?

    Nice work.

    I'm looking to do the same thing as you. PreRunner conversion and the 5VZ-FE swap. I'm planning on just buying a complete parts truck, how much did you pay?
     
    Last edited: May 7, 2017
  3. May 7, 2017 at 9:22 PM
    #3
    Dalandser

    Dalandser ¡Me Gustan Las Tacos-mas!

    Joined:
    Feb 19, 2015
    Member:
    #149090
    Messages:
    17,569
    First Name:
    Anthony
    Downey
    Vehicle:
    08 PreRunner Regular Cab / 98 4x4 Extra Cab
    Empty Wallet Mod
    You should be able to do it without pulling the engine - you can remove the diff with the engine in place and that's the only major component in the engine bay.
     
  4. May 7, 2017 at 9:37 PM
    #4
    BartMaster1234

    BartMaster1234 Well-Known Member

    Joined:
    Aug 21, 2016
    Member:
    #195197
    Messages:
    45,848
    Gender:
    Male
    First Name:
    Tyler
    Pittsburgh, Pennsylvania
    Vehicle:
    1998 PreRunner 4x4 2.7l Supercharged
    Flux Capacitor
    How difficult is the 5VZ swap? I heard you have to weld new engine mounts.
     
  5. May 7, 2017 at 9:47 PM
    #5
    Dalandser

    Dalandser ¡Me Gustan Las Tacos-mas!

    Joined:
    Feb 19, 2015
    Member:
    #149090
    Messages:
    17,569
    First Name:
    Anthony
    Downey
    Vehicle:
    08 PreRunner Regular Cab / 98 4x4 Extra Cab
    Empty Wallet Mod
  6. May 7, 2017 at 10:29 PM
    #6
    SeanJohn

    SeanJohn [OP] Member

    Joined:
    Mar 12, 2017
    Member:
    #213046
    Messages:
    9
    Gender:
    Male
    Vehicle:
    1999 Tacoma Prerunner
    I did a manual swap, v6 swap, and a 4x4 conversion all at once and the front diff was the first thing I did. you can do it with the engine still in. I had a rolled 4runner so most of the major parts are easy to source. the v6 swap isn't complicated but yes the engine mounts are different. we ended up cutting them off the 4runner and bolting them up to the engine, placed the engine in, tack welded the mounts, pulled the engine back out and finished welding. Since my engine was from a 4runner the wiring is very different for the dash harness. even if it's from a Tacoma, the dash harnesses are different. If you're savvy with electrical stuff it's not really complicated. 2 of the plugs off the ECU need to be merged (1 if you got it from a Tacoma). This is if you use the 3rz dash harness. there's a couple builds on here where the whole dash harness was swapped too. I'll post a more detailed write-up later
     
  7. May 7, 2017 at 10:33 PM
    #7
    SeanJohn

    SeanJohn [OP] Member

    Joined:
    Mar 12, 2017
    Member:
    #213046
    Messages:
    9
    Gender:
    Male
    Vehicle:
    1999 Tacoma Prerunner
    I may even just do a video on it, that way I can go into greater detail on the 4runner engine swap.
     
    Dalandser likes this.
  8. May 8, 2017 at 10:27 AM
    #8
    Slickster

    Slickster greentaco

    Joined:
    Nov 16, 2016
    Member:
    #202558
    Messages:
    135
    Gender:
    Male
    94025
    Vehicle:
    2002 pre
    please sticky this thread.
     
  9. May 8, 2017 at 4:59 PM
    #9
    istehwin

    istehwin Member

    Joined:
    May 8, 2017
    Member:
    #218533
    Messages:
    17
    Gender:
    Male
    First Name:
    Bryan
    Vehicle:
    2002 Double Cab PreRunner
    (Sub'd for Future conversion.)

    Back in March I picked up a 02 double cab prerunner (non-trd :( )

    The first thing I'd like to do is add an Elocker in rear... then start the journey to a full 4x4 conversion.

    I see people saying just sell mine and buy a 4x4... BUT... I don't have 4x4 Doublecab money

    I was rear ended in my '06 Scion xB back in Jan '17 and insurance totaled it. I used my full claim to buy my '02 Double Cab. (Paid under 6k... 1st gen 4x4 double cabs in Arizona are 10K+)

    Where do I start? What are my options?

    Halp!

    18359076_10158695245935584_7548423736745444919_o[1].jpg
     
  10. May 8, 2017 at 11:10 PM
    #10
    BartMaster1234

    BartMaster1234 Well-Known Member

    Joined:
    Aug 21, 2016
    Member:
    #195197
    Messages:
    45,848
    Gender:
    Male
    First Name:
    Tyler
    Pittsburgh, Pennsylvania
    Vehicle:
    1998 PreRunner 4x4 2.7l Supercharged
    Flux Capacitor
    Perfect.

    Any reason why you didn't just straight up use a 5VZ Tacoma dash harness instead of merging the 3RZ one? Seems like merging it is more trouble than it's worth. I read through @jacobrippey's v6 swap and it looks like he ran into a lot of trouble using the 3RZ dash harness and just ended up using the 5VZ harness.
     
  11. May 9, 2017 at 3:40 AM
    #11
    Dalandser

    Dalandser ¡Me Gustan Las Tacos-mas!

    Joined:
    Feb 19, 2015
    Member:
    #149090
    Messages:
    17,569
    First Name:
    Anthony
    Downey
    Vehicle:
    08 PreRunner Regular Cab / 98 4x4 Extra Cab
    Empty Wallet Mod
    Start scanning Craigslist and this forum for cheap parts and add to your parts pile until you're completely stocked with all the parts to make it happen. Once in awhile people part out almost all the parts you need in one vehicle and you can scoop them up for cheap. It's not necessary which parts you buy first - just find the best deals after you've looked around for awhile you'll get an idea of what each part is worth and be able to spot the good deals. I've seen most of the parts besides the trans for $100 to $150. You just gotta have that watchful eye or get really lucky!

    Here's an example:

    https://inlandempire.craigslist.org/pts/6121617376.html
     
    Last edited: May 9, 2017
  12. May 9, 2017 at 5:54 AM
    #12
    jacobrippey

    jacobrippey It’s always Taco Tuesday Instagram #rippstik

    Joined:
    Apr 26, 2014
    Member:
    #128494
    Messages:
    920
    Gender:
    Male
    First Name:
    Jacob
    Surprise, Arizona. USA
    Vehicle:
    2004 Tacoma DC 4wd
    Find me on Instagram: @rippstik
    the v6 swap was quite the project for this basic mechanic. Even still, it's manageable. You'll need:

    •5vz, r150 trans, and the correct transfercase.
    •engine wiring
    •ecus
    •interior/body harness (the body plug is the same, pinned different)

    I moved the mounts back 3/4". Tranny mount is different, but bolts up. Let me know if you have any questions.
     
  13. May 9, 2017 at 8:13 PM
    #13
    SeanJohn

    SeanJohn [OP] Member

    Joined:
    Mar 12, 2017
    Member:
    #213046
    Messages:
    9
    Gender:
    Male
    Vehicle:
    1999 Tacoma Prerunner
    My donor vehicle wasn't a Tacoma, It was a 4runner, and the interior harness is very different. primarily, the issues you will have is with the EFI relay and the opening circuit relay. having a dash harness from a Tacoma makes it easier if you feel like pulling all that shit out. I had an accurate diagram for both vehicles so it was easy for me to merge them. I made a spreadsheet of all the ECU pins and all the dash harness pins. I've been daily driving my Tacoma with a harness merged with a 4runner harness and every single thing works (tach doesn't read accurately because it's for a 4 cylinder, working on it).

    This is absolutely correct... plugs are the same, but the pins are in different spots.. if you plug it up, you'll blow fuses ( like i did :))
     
  14. May 9, 2017 at 8:22 PM
    #14
    SeanJohn

    SeanJohn [OP] Member

    Joined:
    Mar 12, 2017
    Member:
    #213046
    Messages:
    9
    Gender:
    Male
    Vehicle:
    1999 Tacoma Prerunner
    for my 5vz write-up, I will have the spreadsheet edited and easier to understand and available to see. It will be kinda specific to 4runner 5vz to a Tacoma 3rz but I feel like it will be useful as a reference to those who wish to take this project on :). interestingly, Toyota engines seem to run pretty easily. you could probably start the engine with limited things plugged in :rofl:.

    The swap is harder than plug and play, but easier than converting a Prius to a Duramax
     
    Dalandser likes this.
  15. May 9, 2017 at 8:33 PM
    #15
    SeanJohn

    SeanJohn [OP] Member

    Joined:
    Mar 12, 2017
    Member:
    #213046
    Messages:
    9
    Gender:
    Male
    Vehicle:
    1999 Tacoma Prerunner
    In my situation, it was definitely cheaper to swap all those parts to my Tacoma. Besides, I think completing conversions like this is greatly rewarding. Where I live, 4x4 are massively more expensive than their 2 wheel drive counterparts. Besides, your Tacoma looks like it's well worth converting! crazy clean truck!

    The best place to start would be searching around for a totaled Tacoma or 4runner. Now I understand that not everyone has space for a donor car, it does make things much cheaper in the long run. If you live in an area where the salvage lots are competitive with each other, it may be cheap enough to source everything from a wrecking yard. There are a couple tales of people on here doing swaps for less than 1500 dollars. I got my 4runner for 1000 dollars with a few issues and 370k km on it and I drove it daily until I wrecked it lol.

    For your E-locker swap, it would be easier to get a whole new rear carrier because the rear diff (AKA pumpkin) does not bolt into the non-elocker rear carrier. there is, however, a way to modify your rear carrier to make it work, it requires grinding, and drilling. But the wiring is relatively straight forward!

    Make sure you get a 4.10 e-locker if you plan to do a 4x4 conversion! :)

    p.s. too bad about your accident!
     
    istehwin[QUOTED] likes this.
  16. May 10, 2017 at 6:48 AM
    #16
    istehwin

    istehwin Member

    Joined:
    May 8, 2017
    Member:
    #218533
    Messages:
    17
    Gender:
    Male
    First Name:
    Bryan
    Vehicle:
    2002 Double Cab PreRunner
    Thanks for all the info :)

    I miss the mpg of my gen1 xB, but I fricken love my taco.
    15493564_10157943374025584_6833536050006_ea90e10d7ae1d2367fb380b606c9a2f8219ff184.jpg
    R. I. Pieces 06 Scion xB
     
    SeanJohn[QUOTED][OP] likes this.
  17. May 10, 2017 at 8:17 AM
    #17
    jacobrippey

    jacobrippey It’s always Taco Tuesday Instagram #rippstik

    Joined:
    Apr 26, 2014
    Member:
    #128494
    Messages:
    920
    Gender:
    Male
    First Name:
    Jacob
    Surprise, Arizona. USA
    Vehicle:
    2004 Tacoma DC 4wd
    Find me on Instagram: @rippstik
    I used to have an echo. I'm all about that 1nzfe life.
     
    istehwin[QUOTED] and Dalandser like this.

Products Discussed in

To Top