

-
Welcome to Tacoma World!
You are currently viewing as a guest! To get full-access, you need to register for a FREE account.
As a registered member, you’ll be able to:- Participate in all Tacoma discussion topics
- Communicate privately with other Tacoma owners from around the world
- Post your own photos in our Members Gallery
- Access all special features of the site
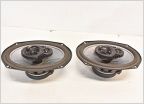 Good factory replacement speakers 2011 dcab (non jbl) with aftermarket HU
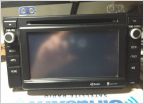 2014 radio into 2013
 Upgrade sound system in access cab?
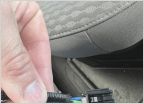 2022 Tacoma Speaker Wire Connectors
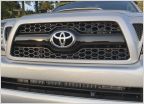 Front camera recs- 2011 honeycomb sport grille
2003 X-Cab 4x4 Budget Audio Build
Discussion in 'Audio & Video' started by rob feature, Dec 14, 2015.
Page 4 of 5
Page 4 of 5
