

-
Welcome to Tacoma World!
You are currently viewing as a guest! To get full-access, you need to register for a FREE account.
As a registered member, you’ll be able to:- Participate in all Tacoma discussion topics
- Communicate privately with other Tacoma owners from around the world
- Post your own photos in our Members Gallery
- Access all special features of the site
 DONE with HIDS!
 Looking for led pod recommendations
 Need help wiring Baja Design S8 light bar to Switch Pro 9100
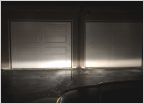 The H10 to 9011 HIR Foglight upgrade (brighter than LED)
 Help Me Find Warm White LED Dome/Map
 LED lights interior/ backup/tag installed
2005-2015 Morimoto Mini D2S Bi-Xenon projector install guide
Discussion in 'Lighting' started by TRSAndrew, May 4, 2015.
Page 5 of 5
Page 5 of 5


