1. Welcome to Tacoma World!

    You are currently viewing as a guest! To get full-access, you need to register for a FREE account.

    As a registered member, you’ll be able to:
    • Participate in all Tacoma discussion topics
    • Communicate privately with other Tacoma owners from around the world
    • Post your own photos in our Members Gallery
    • Access all special features of the site

2010 Tacoma Morimoto Mini D2S Retrofit

Discussion in 'Lighting' started by blawrie, Apr 16, 2011.

  1. Apr 18, 2011 at 12:41 PM
    #21
    jeverich

    jeverich Well-Known Member

    Joined:
    Mar 25, 2008
    Member:
    #5517
    Messages:
    2,230
    Gender:
    Male
    First Name:
    Jake
    PNW/Kodiak
    Vehicle:
    07 2.7 4x4
    OME 886/Old Man Doug Suspension Lift, ARB Bumper, Bruteforce High Clearance w/Swing Out, De-badge, Block Heater, Homemade IFS Skid, 7" Kragens, Blue Seas Fuse Block, BlitzPro Fogs, 12k BadLands Winch, BAMF Sliders, ARB Locker, 4.88s Yaesu FT-1900R, Larsen 150B NMO Mount Antenna
    Have any pics of how you ground down your shrouds?

    They have to contact the reflector bowl in order to prevent any scatter, right?
     
  2. Apr 18, 2011 at 1:52 PM
    #22
    krans

    krans Well-Known Member

    Joined:
    Feb 28, 2009
    Member:
    #14173
    Messages:
    416
    Gender:
    Male
    First Name:
    Kenny
    Huntington beach/ West min duh
    Vehicle:
    09 Sport mall crawler
    Icon extended travel with resi front and rear,Camburg UCA, All pro standard leaf pack, Fogs anytime, General grabbers AT2,Custom stainless steel brake lines,bed box, Bestop soft top,50' light bar, amber rigid pods,CBI ditch mounts with LED pods,TRD intake,Anti dark hoodlights/rock light/LED whip,FX-R retros and Gibson catback..more mods to come
    That makes sense, Do the wires plug straight into the OE headlight plug? Reason why im asking so many questions is because this might be my next mod!:cool: blawrie you made it seen so easy!
     
  3. Apr 18, 2011 at 1:58 PM
    #23
    Muy Grande

    Muy Grande Well-Known Member

    Joined:
    Feb 26, 2009
    Member:
    #14111
    Messages:
    1,400
    Gender:
    Male
    First Name:
    John
    Dallas, TX; RGV, TX
    Vehicle:
    06 DC TRD
    Suspension: DHoes up front, Dakar and OME out back. Audio: Alpine w205 w/ pair of Alpine Amps, Image Dynamic 6.5 Component Speakers up front and Image Dynamic Subs in the Back. Armor: ARB Bull Bar, Rocktek rear bumper and custom rock sliders. Other: Rigid Industries LED Light Bar, Platinum DieHard Battery, BlueSea Fuse Block, rear lights, bed lights, leds inside.

    It is easy, no need to spend your hard earned money paying someone $400 bucks in labor. Just take your time and follow some DIY threads on here. :D
     
  4. Apr 18, 2011 at 2:10 PM
    #24
    krans

    krans Well-Known Member

    Joined:
    Feb 28, 2009
    Member:
    #14173
    Messages:
    416
    Gender:
    Male
    First Name:
    Kenny
    Huntington beach/ West min duh
    Vehicle:
    09 Sport mall crawler
    Icon extended travel with resi front and rear,Camburg UCA, All pro standard leaf pack, Fogs anytime, General grabbers AT2,Custom stainless steel brake lines,bed box, Bestop soft top,50' light bar, amber rigid pods,CBI ditch mounts with LED pods,TRD intake,Anti dark hoodlights/rock light/LED whip,FX-R retros and Gibson catback..more mods to come
    Will do, I wasn't even close to having someone do it for me :cool:


    OP wheres the pictures at? :D
     
  5. Apr 18, 2011 at 6:09 PM
    #25
    blawrie

    blawrie [OP] Well-Known Member

    Joined:
    Mar 14, 2010
    Member:
    #33222
    Messages:
    83
    Gender:
    Male
    Red & Black wires are there to activate a solenoid when you flip on your high beams. The solenoid pulls the shield down to expose more light.

    And TRS now includes shroud centric rings with their shrouds so they literally clip right on. Guys this honestly could not have gotten any easier. Unless you order the gatling gun shrouds those ones need to still be epoxied on.
     
  6. Apr 18, 2011 at 6:10 PM
    #26
    blawrie

    blawrie [OP] Well-Known Member

    Joined:
    Mar 14, 2010
    Member:
    #33222
    Messages:
    83
    Gender:
    Male
    The apollo shrouds fit perfectly on without having to do any trimming. And I have no scattered light only the light that escapes through the "vents" that are built into the apollo shroud.
     
  7. Apr 18, 2011 at 6:11 PM
    #27
    blawrie

    blawrie [OP] Well-Known Member

    Joined:
    Mar 14, 2010
    Member:
    #33222
    Messages:
    83
    Gender:
    Male
    I'm going to aim the lights and snap some pictures tonight..so hopefully by tomorrow I can post them.
     
  8. Apr 18, 2011 at 9:16 PM
    #28
    krans

    krans Well-Known Member

    Joined:
    Feb 28, 2009
    Member:
    #14173
    Messages:
    416
    Gender:
    Male
    First Name:
    Kenny
    Huntington beach/ West min duh
    Vehicle:
    09 Sport mall crawler
    Icon extended travel with resi front and rear,Camburg UCA, All pro standard leaf pack, Fogs anytime, General grabbers AT2,Custom stainless steel brake lines,bed box, Bestop soft top,50' light bar, amber rigid pods,CBI ditch mounts with LED pods,TRD intake,Anti dark hoodlights/rock light/LED whip,FX-R retros and Gibson catback..more mods to come

    I see.. So where do the wires hook up too? Is there a connector that plugs into the OE headlight socket?:eek:
     
  9. Apr 18, 2011 at 10:02 PM
    #29
    blawrie

    blawrie [OP] Well-Known Member

    Joined:
    Mar 14, 2010
    Member:
    #33222
    Messages:
    83
    Gender:
    Male
    Everything is plug and play with the H4 wiring harness TRS includes in the kit.
     
  10. Apr 19, 2011 at 6:58 AM
    #30
    Bama_TACO

    Bama_TACO ROLL TIDE!!!!!!!

    Joined:
    Aug 3, 2010
    Member:
    #41157
    Messages:
    1,011
    Gender:
    Male
    Winfield, AL
    Vehicle:
    2006 PreRunner Double Cab TRD SPORT
    Looks great. I wish they had the rings for the shrouds when I got mine. I had to epoxy my shrouds on. I just upgraded my ballasts to the Five5 and it really improved the output.
     
  11. Apr 19, 2011 at 4:58 PM
    #31
    blawrie

    blawrie [OP] Well-Known Member

    Joined:
    Mar 14, 2010
    Member:
    #33222
    Messages:
    83
    Gender:
    Male
    Ok guys just waiting for it to get dark here and I will be out snapping some output pictures. Hopefully my camera works ok taking the pics. Anyways stay tuned and I will post them later tonight...
     
  12. Apr 19, 2011 at 5:09 PM
    #32
    memario1214

    memario1214 Hotshot Offroad Moderator Vendor

    Joined:
    Oct 1, 2009
    Member:
    #23628
    Messages:
    19,807
    Gender:
    Male
    First Name:
    Colton
    Missoula, MT
    Vehicle:
    SOLD - 05 Dub Cab TRD Sport 4x4, CURRENT - '21 Tundra MGM Limited
    When I talked to Matt, he talked me out of the Five5s for my D2S... Too much heat. How's yours holding up?
     
  13. Apr 19, 2011 at 7:12 PM
    #33
    blawrie

    blawrie [OP] Well-Known Member

    Joined:
    Mar 14, 2010
    Member:
    #33222
    Messages:
    83
    Gender:
    Male
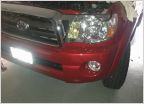
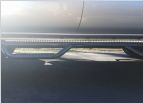
    Ok guys I finally snapped some output shots. Once again these are with the Osram 66240 bulbs. I know my drivers side projector is a bit tilted I guess the H4 adapter didn't come perfectly level. Gonna try to eventually fix it but for now its only off a couple degrees. First pic is the beam pattern, second is the color at the cutoff and the third and fourth I tried to capture the color flicker. This is only like 15 feet infront of the truck at 100ft+ away the flicker is amazing I can see it bouncing off cars and street signs. Anyways guys here they are...told ya I would keep my word.

    Full Beam.jpg
    Cutoff.jpg
    Color Flicker 1.jpg
    Color Flicker 2.jpg
     
  14. Apr 19, 2011 at 7:28 PM
    #34
    outxider

    outxider Never stop exploring. Rest in Paradise Big Bro.

    Joined:
    May 9, 2010
    Member:
    #36858
    Messages:
    2,083
    Gender:
    Male
    First Name:
    Sang
    East Bay, CA
    Vehicle:
    06 DCSB 4x4
    A few mods here and there and counting....
    That looks awesome. I can't wait for my kit.
     
  15. Apr 19, 2011 at 9:50 PM
    #35
    krans

    krans Well-Known Member

    Joined:
    Feb 28, 2009
    Member:
    #14173
    Messages:
    416
    Gender:
    Male
    First Name:
    Kenny
    Huntington beach/ West min duh
    Vehicle:
    09 Sport mall crawler
    Icon extended travel with resi front and rear,Camburg UCA, All pro standard leaf pack, Fogs anytime, General grabbers AT2,Custom stainless steel brake lines,bed box, Bestop soft top,50' light bar, amber rigid pods,CBI ditch mounts with LED pods,TRD intake,Anti dark hoodlights/rock light/LED whip,FX-R retros and Gibson catback..more mods to come
    :drool: That looks great! Now for sure im gonna order mine!

    Very Nice Job Blawrie:thumbsup:
     
  16. Apr 20, 2011 at 5:52 AM
    #36
    Bama_TACO

    Bama_TACO ROLL TIDE!!!!!!!

    Joined:
    Aug 3, 2010
    Member:
    #41157
    Messages:
    1,011
    Gender:
    Male
    Winfield, AL
    Vehicle:
    2006 PreRunner Double Cab TRD SPORT
    That's funny. Below is my conversation with Matt regarding the temperature and the 5Five ballasts. I am now running the Morimoto 5Five bulbs in 5,000k color. The 5Five ballast made the 85122+ look to yellow for me. Also, I have been running these for a couple of months and haven't had any problems.

    My Email to Matt

    Five5 Ballast with D2S Mini
    Matt, I bought my D2S kit and Apollo shrouds from you a few months back. Everything still works great. I'm running 85122+ bulbs and I'm thinking of getting the Five5 ballasts from you to replace my 35 watt ballasts. I read a warning from you on HID planet regarding this. Will I melt my shrouds if I use the Five5 ballasts?

    Matt's Reply

    Jamie,
    That was only a problem with the Mini h1's and the Mini Gatling shrouds, and its not even a problem anymore really as we upgraded the temp rating on the plastic they're molded from.

    With a high end 85122+ bulb, the larger Mini D2S, and the Apollo shrouds - no need to worry about the 5Five ballasts melting or destroying anything.

    Should be A OK

    thanks Jamie, let us know if there are any other questions we can help answer

    Matt @ TRS
     
  17. Apr 20, 2011 at 5:27 PM
    #37
    Chris(NJ)

    Chris(NJ) Well-Known Member

    Joined:
    Jan 21, 2010
    Member:
    #29777
    Messages:
    4,884
    Gender:
    Male
    First Name:
    Chris
    Usually in Central Jersey
    Vehicle:
    08 Indigo 4x4 DC OR
    Mods are currently being changed .....
    No problem when it comes time to reseal the lights, as far as having them (w/o bulb) installed in the headlight housing? I mean, I dont think theres any other way, but just had to ask :)

    And how did you go about removing the stock bulb shield?
     
  18. Apr 27, 2011 at 8:06 AM
    #38
    DocCisco

    DocCisco Well-Known Member

    Joined:
    Feb 11, 2011
    Member:
    #50967
    Messages:
    225
    Gender:
    Male
    First Name:
    David
    Utah County, UT
    Vehicle:
    LB TRD Sport 4x4
    +1 for easy to follow description and pictures. I'm not entirely sure I'll do it, but if I do this will help. Thx!
     
  19. Apr 27, 2011 at 1:19 PM
    #39
    Grande

    Grande Well-Known Member

    Joined:
    Aug 3, 2010
    Member:
    #41153
    Messages:
    908
    First Name:
    John
    Victorville, CA
    Vehicle:
    Thomas, The little truck that could
    Painted badges. Bedlined grille, wheels and lower valence. Billies 5100 @.85 up front. Dodger Jack Ball Mod. Custom trail damaged rear bumper (for the time being). Lil LED light bar on grill. Hard-wired Radar Det. Custom Projector fog lights, Anytime Fog Mod, HIDS, White LED accent lighting on a Single post double toggle swicht, so they light up wit my door/dome light, or always on, or never on. LED map and dome lights.
    when u said u had to aim them, did u have to aim them b4 u seal them back up, or r u able to aim them with the aiming screws that are located on the back headlight?
     
  20. Apr 27, 2011 at 4:01 PM
    #40
    blawrie

    blawrie [OP] Well-Known Member

    Joined:
    Mar 14, 2010
    Member:
    #33222
    Messages:
    83
    Gender:
    Male
    I aimed them with the aiming screws after everything was all sealed up in order to get the cutoffs to merge into one. you can adjust up and down and left and right. The only thing you cant do is adjust horizontally because the H4 adapter locks the projector into place.
     

Products Discussed in

To Top