

-
Welcome to Tacoma World!
You are currently viewing as a guest! To get full-access, you need to register for a FREE account.
As a registered member, you’ll be able to:- Participate in all Tacoma discussion topics
- Communicate privately with other Tacoma owners from around the world
- Post your own photos in our Members Gallery
- Access all special features of the site
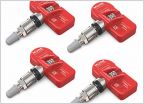 TPMS sensor for 2nd gen Beadlock wheels.
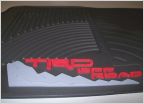 Good price on TRD floor mats
 Bugs in radiator
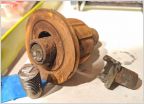 Replacing leaf spring bushings
 New Front Door Speakers in 2013 do not fit...
 Best quality splash guards / wheel well liners?
2011 4 cylinder transmission fluid replacement
Discussion in '2nd Gen. Tacomas (2005-2015)' started by Allnite, Apr 8, 2024.


