1. Welcome to Tacoma World!

    You are currently viewing as a guest! To get full-access, you need to register for a FREE account.

    As a registered member, you’ll be able to:
    • Participate in all Tacoma discussion topics
    • Communicate privately with other Tacoma owners from around the world
    • Post your own photos in our Members Gallery
    • Access all special features of the site

2011 DCSB 6 spd, 35’s & KINGS

Discussion in '2nd Gen. Builds (2005-2015)' started by greengrenade, Sep 7, 2019.

  1. Sep 7, 2019 at 3:37 PM
    #1
    greengrenade

    greengrenade [OP] Active Member

    Joined:
    Sep 25, 2018
    Member:
    #267452
    Messages:
    37
    Gender:
    Male
    Whatsup guys, I figured id start up a build thread on here after lurking for about a year. This is my first Tacoma, i daily’d an 85 Fj60 before i got the taco but aside from that i havent spent much time in the toyota community. Most of my “build” background has been in custom 50’s n 60’s cars and trucks, and tinkering with some old bikes as well. Anywho, onto the truck and the build.......

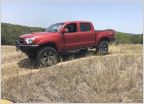
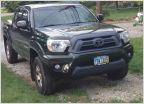
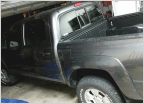
    I picked up this 2011 DCSB TRD Offroad in June/July 2018. Its magnetic grey, 6 speed manual, had 2 previous owners but only 41,xxx miles and came with a fully optioned ARE Z Series cap that i really liked. Considering the cap and mileage, i got the truck for a really nice price. It was sitting at a chevy dealer in the used lot after the previous owner traded it in on a new camaro if i recall correctly.

    Heres a couple shots after bringing it home....

    8D5EBF12-7CD6-457A-80D6-CAD12671DCCE.jpg
    3D315DE2-181E-48EA-80C7-0AE95E29CB26.jpg
    BF8D769B-38BB-4BC5-940E-6E63508AAF09.jpg
    225C3C7A-144D-460C-A266-CB4123E3B51A.jpg
     
  2. Sep 7, 2019 at 3:58 PM
    #2
    greengrenade

    greengrenade [OP] Active Member

    Joined:
    Sep 25, 2018
    Member:
    #267452
    Messages:
    37
    Gender:
    Male
    The first “mod” i did was a bedrug, the composite bed was super slick and i needed something to keep cargo in place, plus it matched the liner inside the ARE cap. After that was debadging everything with the exception of 3 or 4 logos. They all got plasti dipped black....

    A0F8BF40-866A-41AB-8E4D-49BFDD23B436.jpg
    B1470955-FF85-4EC5-A14E-FB8149FD9BEF.jpg
    BBD021E8-DADA-4800-9850-4618E41F62F2.jpg
    C14604CF-D9F9-41D0-8AD6-F871D65F3FFE.jpg
    2E822A0B-9CB8-4865-B117-8A1A2535C0EA.jpg

    Also got new TRD Offroad decals for the bedsides. I initially planned to leave it bare, but it just looked to plain so i got a set of matte black ones...

    62A5117A-AC51-4DF2-852D-7B80596461B5.jpg

    The plan for this truck from the start was some pretty extensive mods with 35’s, i wanted a decent trail rig that i can camp with but its also my daily driver like many of you guys, so it has to be reliable and function well on and offroad. After some research, I opted not to go long travel, I just dont see myself ever needing a long travel setup. Im sure itd be alot more fun to thrash on, but i dont think i really NEED it

    I opted for KING Coils up front with Total Chaos Uniball UCA’s and KING Shocks outback with OME Heavy Duty Dakar packs, which are rated for ~660lbs over stock i believe.

    A1F57751-8FAE-4927-BF7C-E1317B1D31EC.jpg
    6E484D45-BE10-4B86-AD76-3E5D78D572DC.jpg
    1305DC49-3838-48AA-BB66-9BBCC155F4C0.jpg
    D1B49BE7-78C9-4CF8-8512-EDA24C759BBF.jpg
    C4700C10-91C0-40CE-AE17-11124D84CDB5.jpg
    6F027AA1-64F9-42BA-94FF-E04211A1205E.jpg
    63E8655F-33FA-44AA-8865-CC2B510451A1.jpg
    5898AEE5-9559-4AD5-A16A-55CDE5D4B761.jpg
     
    Last edited: Sep 7, 2019
  3. Sep 7, 2019 at 4:25 PM
    #3
    greengrenade

    greengrenade [OP] Active Member

    Joined:
    Sep 25, 2018
    Member:
    #267452
    Messages:
    37
    Gender:
    Male
    Wheels and tires..... theres tons of options. The Km3 was pretty new on the scene when i was getting ready to order tires, the reviews were all pretty awesome, guys i follow on social media were all raving about there performance offroad and how quiet they are on road. I found a couple sweet deals online around black friday/cyber monday that included discounts and free shipping. So needless to say i pulled the trigger, 315/75r16 Km3’s and i decided on a set of SCS F5’s in 16x8 with a 3.5” BS. I ordered them in Matte Bronze, at the time i had never seen a set of bronze F5’s on a Magnetic Grey truck, but its since been done by a few people. I dig the color combo alot...

    9BBDF271-F817-46D6-A842-1404424A0B48.jpg
    A3239A91-69F6-4AC9-A8E9-F6E2528D1909.jpg
    A84579DE-0E35-4963-8059-4E76D3695497.jpg
    41211D18-AE0B-444A-B046-22D4C6089E95.jpg
    677C6531-0303-4A4F-BF39-0109A562F6BE.jpg

    A few weeks before i put the lift on, did the cab mount chop and hammered the pinch weld back on the firewall.....

    5EC92378-62D6-498F-B54B-CE05B260EEB8.jpg
    C2214EEF-3DDA-4D51-ACBE-58F44F75A80F.jpg
    48832DE3-7DC0-464E-B243-64994D1FAF6A.jpg

    Just an FYI, slightly out of order here, I did the CMC before i had the wheels and tires mounted or lift installed. I figured itd save me some time. Im going to be cutting the entire end of the cab mount off in the near future and modifying the previous chop. It still rubs slightly in certain situations, but ive been driving it for almost a year without much issue as is.

    After that, lift went on fairly easy. The rear was a breeze. Had it banged out within a few hours by myself. The front wasnt bad except for the pass side UCA bolt. I had to “massage” the inner fender a bit to get that bolt in and out haha. But otherwise not too bad. I trimmed the fenders, bedsides and flares all around 2.5”. Per usual, all the flare clips broke, so heres some flareless shots right after install.....

    52C5B568-919D-4302-85C7-8E22805DAA24.jpg
    594C5263-F317-4C08-9E70-C459ABF39C53.jpg
    70446756-35F3-48E8-BC68-E771AB6C8DFC.jpg
     
    Last edited: Sep 7, 2019
  4. Sep 7, 2019 at 4:33 PM
    #4
    greengrenade

    greengrenade [OP] Active Member

    Joined:
    Sep 25, 2018
    Member:
    #267452
    Messages:
    37
    Gender:
    Male
    The front end was a hair low, ended up pulling the coils out multiple times to adjust the height, this turned out to be alot more difficult than anticipated haha. Also got new clips and re installed the flares

    9BECCA88-D977-40E1-BE8C-6A65B011F6B8.jpg
    580CB0A1-4370-4806-B7ED-E37F46AF6196.jpg
    982C311E-1403-4C10-8705-91621902CAE9.jpg

    Winter rolled in, a very mild one, but I pretty much just drove the truck exactly like this for 4 or 5 months...

    ACE9ADB2-ACFA-4C07-B74B-4978760B7741.jpg
    E451EBCB-91FF-483C-9310-A3A064479684.jpg
     
    13txtaco and scottalot like this.
  5. Sep 7, 2019 at 4:58 PM
    #5
    greengrenade

    greengrenade [OP] Active Member

    Joined:
    Sep 25, 2018
    Member:
    #267452
    Messages:
    37
    Gender:
    Male
    The reason i havent posted a build thread until now is, me being a DIY guy and enjoying making parts for my projects, i had a hard time convincing myself to post a build thread for a truck that just had a lift installed and wheels/tires. I wanted to wait until i could start the actual build process. Another mod i did over the winter was extend the shifter and put a more traditional round knob on it. I cut some round stock, put a slight arch to it so the shifter would lean slightly to the driver, sliced the original shifter and welded in the roundstock extension. I believe it was around 3.5”. Feels so much better to me, more like a traditional truck shifter which i like

    43559032-6B4D-4EE4-9EA3-6CEDEB07FC49.jpg

    Next mod i did was a ram mount holder. I built my own set that bolts in by the HVAC controls. You can buy these from a couple places but they want $70-$80 for a pair. I ordered a piece of 6061 alu bar and built my own with some basic handtools. With the price of the alu bar and two 1/4-20 1” Ram mount balls i had around $18 in the pair when finished. I didnt have my metal countersink bit that day, so the countersinks arent perfect but, such is life haha

    F34BD92C-2BA3-4D4E-A4A0-1200E625552E.jpg
    67268925-4268-4CB7-9FB0-B0AA6FFA6C74.jpg
    482EC875-7052-492F-B9BC-DD761311F2A0.jpg
    EFEBE1C6-AA81-4063-8EC4-15B94E980248.jpg
    E80FC818-F8C5-4688-B62C-F4429184E941.jpg

    Next up was color matching the grill, im not a fan of the chrome grill and emblem, so i got some duplicolor and tried my hand at it. I used there adhesion promoter, then primer, then color and clear. Pretty stoked on the result. I ground the tabs off the back side of the grill so i could remove the chrome “shell” during this process and then re epoxied it on after paint

    B6E3CF0D-A0E9-45B5-879F-E3BAC38D4707.jpg
    3DACB143-DE27-4475-B6EF-3DDC0FC71BCD.jpg

    Shot of the grill on the left, hood on the right....

    AB909BE9-3210-4BB8-8895-3A205CC4FB29.jpg

    So as time went on, i continued to have major issues with flare clips braking, almost losing flares going down the highway multiple times. I had enough of that, so i decided to go with pocket flares. Bushwackers are like $500, so that was out of the question, as im going to be cutting alot of the flare off anyway. I ended up getting rdj flares ( i think thats what they were called ) from ebay. They were still like $279, so not “cheap” but alot better than $500. The fitment was really good too. I ended up installing those, cutting 2.5” off of those flares, and while i had the flares off, i cut the steel fenders and bedsides even further back almost to the bolt holes for the flares, looks alot cleaner. I had planned to color match the flares but im diggin the black, these opened the wheelwells up even more, plentyyyy of flex clearance.

    A7C47139-A22F-4A62-B475-58FD83AABECD.jpg
    D916AFA9-B21F-4958-A3FC-9FCA4FE14923.jpg
     
    This site contains affiliate links for which the site may be compensated.
    #5
  6. Sep 7, 2019 at 5:06 PM
    #6
    Dgoode9

    Dgoode9 Well-Known Member

    Joined:
    Apr 25, 2019
    Member:
    #291260
    Messages:
    170
    Gender:
    Male
    Columbus, OH
    Vehicle:
    2009 TRD Sport
    Love it so far! Looks awesome.
     
    greengrenade[OP] and scottalot like this.
  7. Sep 7, 2019 at 5:31 PM
    #7
    greengrenade

    greengrenade [OP] Active Member

    Joined:
    Sep 25, 2018
    Member:
    #267452
    Messages:
    37
    Gender:
    Male
    Initially, i was dead set on a Pelfrey front bumper. But they went upside down, so that wasnt an option. Then BAMF bought up all the old Pelfrey inventory and had some bumpers available, but the more i weighed in shipping costs, it didnt work out logistically. Soon after, BAMF dropped there own line of 2nd gen front bumpers, which were already a few hundred cheaper than pelfrey units, the BAMF design looks stronger, comes with there beefy frame reinforcement brackets and they were offering $200 off there already killer price for presale orders. So despite the shipping cost, i pulled the trigger on one of there front bumpers, and snagged a set of rear shackle hangers as well. They should be here next week. Stoked on this

    I really wanted to build both front and rear bumpers myself, ive done quite a bit of fabrication work on cars and trucks, and have my own mig, tig and plasma to work with. The main reason i didnt opt to build the front bumper, was the fact that i dont have a winch yet and didnt want to build a bumper without physically having the winch in house to use as i built the bumper around it. I am however still building my own high clearance rear bumper. Heres a shot of my initial sketch for the rear, with a full width single swingout.....

    5921799D-4D42-4463-B889-2E706857F421.jpg

    I have a set of 1” thick weld through shackle tabs and a chromoly spindle from TMR Customs that ill be using. 2” receiver hitch tube through the license plate area and high clearance all the way up to the wheel wells. Nothing too crazy, looks like most high clearance bumpers. I have a couple tricks for the swingout though to make it really clean

    Last week i started mocking it up in posterboard to get an idea of what im looking at, this was a couple hours of playin around

    3BDD11FE-0451-4D3F-9093-ED68532D4175.jpg
    D857986C-BE49-44A7-8D04-C825B5CA9E69.jpg

    Slightly more finalized design, the posterboard isnt dead flat but this should allow me to transfer patterns and plasma all this out at once which will save me a tonnn of time. Ill make small adjustments as needed in steel, obviously i cant mock up the high clearance sides untill i cut the bed next week, but were gettin there

    66F73D61-D2F6-40B0-9DB5-0844BEAFFA1E.jpg
    CF31EB8D-1F71-48C4-A35E-D76F5E906FB0.jpg

    The swingout should be a pretty straightforward build with 2x3 for the main frame, couple pull pins and an adj. latch

    Btw, mocked up my main brackets using scrap plywood. These will be cut out of 1/4” steel, rest of the bumper will be 3/16” plate

    953F8F34-353B-4159-831A-C21EE79C9423.jpg
    16EE9389-01C7-47C5-B8B8-84FD710894F4.jpg
     
    lechicklet and scottalot like this.
  8. Sep 7, 2019 at 6:12 PM
    #8
    greengrenade

    greengrenade [OP] Active Member

    Joined:
    Sep 25, 2018
    Member:
    #267452
    Messages:
    37
    Gender:
    Male
    I also started building my own Prinsu style roof racks. Theres a bunch of DIY threads on here for these. A cab rack and cap rack from prinsu wouldve set me back around $1300-$1400 for the pair. Im sure they’re incredibly nice racks, but i dont have that kinda spare coin for a pair of racks haha, so i got a sheet of .188 6061 aluminum and .125 6061 aluminum. Ordered 14 47” prinsu replacement crossbars from Tnutz at around $21 a piece and cut my own side plates from the .188 aluminum sheet with the plasma. Heres the rough mockup with plywood....

    3F9AE421-6041-4634-BA06-D3B1EE3D42E9.jpg

    The side plates sit out further than that, but i had to set them inboard more for mockup so they would stand, ghetto, but it works haha

    Transfer the patterns to the aluminum

    80FD30B1-4FE1-4E0F-A4D9-013315E78885.jpg

    Plasma’d

    640B78A2-5311-4EBB-8103-99BD88391E05.jpg

    & mocked up for the first time

    3B02458F-B8BC-49AF-BDD5-0D3B7AEEF061.jpg
    A0301C0D-CAEC-477A-B179-554C26E91CD6.jpg

    I also ordered a bunch of black stainless hardware for these, so ill be switching everything to black button heads, and ill be running 3, 1/4-20 eye bolts on each side for bungee hook points or whatever. More pics.....


    569E8239-F94C-45A2-8D48-68D06DA1B99F.jpg
    AB1EDE35-DDB9-4B52-8DCA-12B0D33D956B.jpg
    27108836-910E-4300-BEA8-E5FCD72D515C.jpg

    10EC4B38-7D54-4F96-A6C4-1BB796FCA533.jpg
     
    lechicklet and maxmccarver92 like this.
  9. Sep 9, 2019 at 4:07 PM
    #9
    greengrenade

    greengrenade [OP] Active Member

    Joined:
    Sep 25, 2018
    Member:
    #267452
    Messages:
    37
    Gender:
    Male
    For the top corners on the swingout frame, i wanted a mandrel bend in the 2x3, mainly just for a cleaner look than a square frame. Mandrel bent rect tubing isnt cheap and no shops around me have the capability to do it. So i bought these pieces from welderseries. There just tab and slot style design, slide together nicely and leave a nice 90 degree pocket on the corner to weld up. Heres a pic of the pieces sitting in place.....

    4F0FA09C-3AEC-4453-A394-6436D5DE7A01.jpg
    E1BB43F3-97AA-48F9-B37B-74456136B9E1.jpg
    3280D4A6-942B-4058-AD41-71BE8001AEF9.jpg

    Once they’re welded up and smoothed out, looks just like a mandrel bend....

    82AD61F1-CB7E-4C31-9241-49B653A53DE5.jpg
    37744DB0-77B2-41BE-890C-5A2477493550.jpg

    The pair of them welded and smoothed....

    5663C5CB-39A1-4DA0-8E0E-E54785C84957.jpg
    BE8CF82D-FCF4-479A-B8E8-2C3719B30413.jpg

    Im ordering steel in a couple days to get started on the bumper build at the end of the week. The bumper and shackle hangers from Bay Area Metal Fab should be here thursday also. Im off work all next week so im pretty stoked to see how much i can get done
     
    sasquatch95 likes this.
  10. Sep 10, 2019 at 4:31 PM
    #10
    greengrenade

    greengrenade [OP] Active Member

    Joined:
    Sep 25, 2018
    Member:
    #267452
    Messages:
    37
    Gender:
    Male
    Picked up steel from a local supplier after work today. Just laying out the patterns for now. Large sheet for all the bumper pieces is 3/16” , the smaller sheet with the main frame brackets is 1/4”

    0C343B24-A8D9-450B-ACF0-E16787E75EF9.jpg
    A44A92CE-D887-4DBC-A77E-6DB8C466957C.jpg
     
  11. Sep 11, 2019 at 4:56 PM
    #11
    greengrenade

    greengrenade [OP] Active Member

    Joined:
    Sep 25, 2018
    Member:
    #267452
    Messages:
    37
    Gender:
    Male
    Managed to get the plate cut with the plasma after work. Cutting by hand doesnt leave a dead perfect edge, but a few minutes with a flap wheel and the edges will clean up perfectly fine

    A1779B77-8965-4BA6-8FE0-9E2BAC9B1023.jpg

    Also cut the hole for the receiver hitch behind the license plate. Layed out my holes to drill for the corners, used a step bit to get the right size, then plasma cut the straight lines....

    B3349994-9101-4BB0-B797-64AB1DEC0910.jpg
    A42CFC6C-0129-425C-A68D-F628DAB3DAB3.jpg
    8A750AD1-75D8-479F-A599-50BF92417580.jpg
    C6329623-1CF5-47E8-97F8-42F6BC8CD777.jpg
     
  12. Sep 11, 2019 at 4:58 PM
    #12
    13txtaco

    13txtaco Well-Known Member

    Joined:
    Mar 7, 2016
    Member:
    #180469
    Messages:
    890
    Gender:
    Male
    Katy Texas
    Vehicle:
    2013 Tacoma 4x4
  13. Sep 11, 2019 at 5:09 PM
    #13
    GSPdog7

    GSPdog7 Well-Known Member

    Joined:
    Jan 7, 2017
    Member:
    #206868
    Messages:
    253
    Gender:
    Male
    First Name:
    Allen
    Central VA
    Vehicle:
    2015 Silver Sky Metallic TRD Off-road
    Bruhhhhhh :thumbsup:

    I'm loving that roof rack!
     
  14. Sep 11, 2019 at 5:20 PM
    #14
    greengrenade

    greengrenade [OP] Active Member

    Joined:
    Sep 25, 2018
    Member:
    #267452
    Messages:
    37
    Gender:
    Male
    Thanks dude!
     
  15. Sep 11, 2019 at 7:02 PM
    #15
    old55guy

    old55guy Well-Known Member

    Joined:
    Jul 9, 2016
    Member:
    #191623
    Messages:
    330
    Gender:
    Male
    First Name:
    mike
    Vehicle:
    2011 dcsb trd white
    none
    I like your build , Lucky man to find a manual trans ! With a fj cruiser xcase you would have a gold nugget
     
  16. Sep 11, 2019 at 7:35 PM
    #16
    greengrenade

    greengrenade [OP] Active Member

    Joined:
    Sep 25, 2018
    Member:
    #267452
    Messages:
    37
    Gender:
    Male
    Funny you mention that. Eventually, probably a year or two down the road, im planning on putting a marlin taco box in it, and i would really like to swap to a fj case while im in there. I need to figure out how to fit 3 sticks in that center console haha
     
    Last edited: Sep 12, 2019
    old55guy[QUOTED] likes this.
  17. Sep 13, 2019 at 9:03 PM
    #17
    greengrenade

    greengrenade [OP] Active Member

    Joined:
    Sep 25, 2018
    Member:
    #267452
    Messages:
    37
    Gender:
    Male
    Got a solid 4 or 5 hours in on the bumper today. Everythings shaping up nicely. Heres a shot of the main brackets that bolt to the frame. I made a few changes, this is the finished design for the most part....

    7EA8A763-2A2E-4976-AFBD-ED91104632EB.jpg

    Bolted in place... thats a piece of 1/4” roundstock thats slid into a hole i drilled. Ill weld this into place and trim the excess off after. This is for the little notch on the back of the frame rail that the roundstock will slide into

    50086B88-8004-47C5-A074-131123BD1345.jpg

    I then started tacking pieces in place. I used a couple washers as spacers so i could leave a nice corner pocket to fill with weld, then clamped pieces in place with a 90 degree jig to keep stuff relatively square while tacking. Not the best pics, but you get the idea

    2894EEC4-D372-4535-946E-737AFDEA1AC5.jpg
    0EAC35A3-A752-4390-A2E0-D9C59697918D.jpg
    351DF993-2ABB-41C3-AF5B-1E64015E0DEC.jpg

    Progress so far..... not too bad for a day one doing actual fab work. Everythings just tacked in place for now. Tomorrow ill cut the bedsides and flares and start building the high clearance sides

    EACC9AB4-A1A2-4894-8220-8B67F00C7C33.jpg
    E498CD18-0F6A-44CA-9885-3A6FFE0AF8CF.jpg

    Heres a shot of the fitment of the frame brackets to the inside of the shell. The posterboard mock up saved me a boat load of time while working with the steel

    127F5AF7-CE9A-4B4E-8CE9-50AD7B04BD3E.jpg
     
    old55guy, Matmo215 and Michaelo like this.
  18. Sep 14, 2019 at 8:32 PM
    #18
    greengrenade

    greengrenade [OP] Active Member

    Joined:
    Sep 25, 2018
    Member:
    #267452
    Messages:
    37
    Gender:
    Male
    Today started off with chopping the bedsides. I cut them a hair below the tail light so i would be able to trim them once the bumper was built and get a proper gap.

    C5CD91FB-5EC8-41DA-9B0D-F6BEFBCC97C9.jpg

    More posterboard mockups.....

    5B19C53C-EB9E-4FA1-A8B0-060649A2351B.jpg

    Transfer to steel, plasma, tacked up...

    49407A6C-B7D4-42E8-9C87-BE03CE4BB62F.jpg
    2F1499A8-5301-4226-9D70-004AEC461E8E.jpg
    5B3718E1-5AED-4DEF-AB1A-2C42A1390BAE.jpg

    I didnt take many picture during the drivers side process, but the bumper is almost completely tacked together now. Ill start finish welding tomorrow and smoothing everything out. Then ill start the integrated hitch and swingout build on monday. Heres a last second shot of how the bumpers currently sitting....

    14BB49BC-7B4C-4729-9B03-E686132B56EC.jpg
     
    old55guy likes this.
  19. Sep 15, 2019 at 5:00 PM
    #19
    old55guy

    old55guy Well-Known Member

    Joined:
    Jul 9, 2016
    Member:
    #191623
    Messages:
    330
    Gender:
    Male
    First Name:
    mike
    Vehicle:
    2011 dcsb trd white
    none
    WELDER UP nice work ! How much $$$$ in steel ?
     
  20. Sep 15, 2019 at 5:33 PM
    #20
    TACOVRD

    TACOVRD I Identify As A Prius

    Joined:
    Jul 11, 2015
    Member:
    #159264
    Messages:
    6,437
    Gender:
    Male
    First Name:
    TW Addict
    AZ/WA
    Vehicle:
    2019 T4R ORP - Formerly 2013 DCSB OR Spruce Mica
    Workin' on it....
    This is awesome!!! OP - You got mad skills :hattip:
     

Products Discussed in

To Top