

-
Welcome to Tacoma World!
You are currently viewing as a guest! To get full-access, you need to register for a FREE account.
As a registered member, you’ll be able to:- Participate in all Tacoma discussion topics
- Communicate privately with other Tacoma owners from around the world
- Post your own photos in our Members Gallery
- Access all special features of the site
 Setup for 1000 lbs loads?
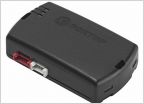 Fortin Evo-One & T-Harness for Remote Start
 Fj t case swaps
 Headlights in the snow
 All Pro Expos vs Standards (Or Dakars)
 Fox 2.5 Remote Reservoir Coil Overs
2014 Front Seats Reviving the Softex
Discussion in '2nd Gen. Tacomas (2005-2015)' started by HooDoo_Taco, May 26, 2024.


