

-
Welcome to Tacoma World!
You are currently viewing as a guest! To get full-access, you need to register for a FREE account.
As a registered member, you’ll be able to:- Participate in all Tacoma discussion topics
- Communicate privately with other Tacoma owners from around the world
- Post your own photos in our Members Gallery
- Access all special features of the site
 Bilstein 5100 vs 5125 Different valving question
 Shopping cart scratches
 Hey Toyota fans !
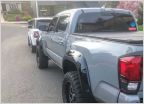 Does anyone know who makes these flares?
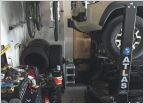 What floor jack, stand, & creeper are you all using?
 2017 Double Cab Subwoofer Box
2016 Sticky shifter remedy, TSB 0088-16 for RC62F 6 speed MT
Discussion in '3rd Gen. Tacomas (2016-2023)' started by Opihi59, Dec 5, 2017.


