

-
Welcome to Tacoma World!
You are currently viewing as a guest! To get full-access, you need to register for a FREE account.
As a registered member, you’ll be able to:- Participate in all Tacoma discussion topics
- Communicate privately with other Tacoma owners from around the world
- Post your own photos in our Members Gallery
- Access all special features of the site
 H11/H9 LEDs
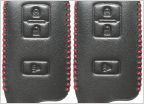 Key fob holder
 Clutch Pedal Creaking - how fast does it progress?
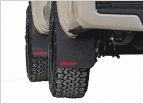 Largest tire size to not rub OEM mudflaps? (Stock suspension and wheels)
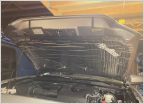 Hoodliner for Ticking is a FAIL
275/70/R17 Falken Wildpeak Rubbing
Discussion in '3rd Gen. Tacomas (2016-2023)' started by Red_Beard, Dec 2, 2022.
Page 2 of 2
Page 2 of 2


