

-
Welcome to Tacoma World!
You are currently viewing as a guest! To get full-access, you need to register for a FREE account.
As a registered member, you’ll be able to:- Participate in all Tacoma discussion topics
- Communicate privately with other Tacoma owners from around the world
- Post your own photos in our Members Gallery
- Access all special features of the site
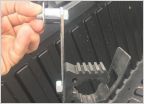 Shovel Mount for Under Tonneau Cover
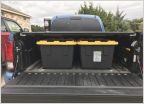 Bed Storage - Simple DIY
 Best way to get her top off.
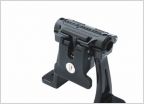 Mounting bike w/ Tonneau cover
 Replacing Camper Shell Gasket + Roof Rack Install Questions
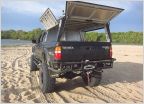 What brand / model is this camper shell??
2nd Gen bedside cap reinforcement.
Discussion in 'Tonneau Covers, Caps and Shells' started by Nixinus, Apr 13, 2019.


