1. Welcome to Tacoma World!

    You are currently viewing as a guest! To get full-access, you need to register for a FREE account.

    As a registered member, you’ll be able to:
    • Participate in all Tacoma discussion topics
    • Communicate privately with other Tacoma owners from around the world
    • Post your own photos in our Members Gallery
    • Access all special features of the site

2nd Gen Front Bumper Center Section .DXFs - Free Use

Discussion in 'Armor' started by Radioactiv, Jun 2, 2022.

  1. Jun 2, 2022 at 6:20 AM
    #1
    Radioactiv

    Radioactiv [OP] Well-Known Member

    Joined:
    Feb 20, 2014
    Member:
    #123567
    Messages:
    400
    Gender:
    Male
    Georgia
    Vehicle:
    2015 DCLB 4X4
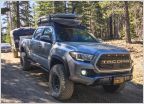
    Been wanting a hybrid style bumper for my 2nd gen for awhile. At first I ordered the center section from SOS, you can probably guess how that worked out. Luckily I got my money back. Finally got this finished up of about 2 months of half assed working on it. I figure I would save someone else the headache if they start down this route. This center section could be added onto to make a normal steel bumper or a hybrid like I did.

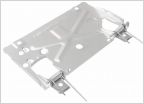
    Doesnt take a huge amount of brain power to tack up. Star with the mount then the 2 vertical braces. Then add the winch mount. Test fit the front plate but I would take it back off and go ahead and weld the underside of the winch plate and any bracing you may want to add to it. Wont be able to access it once the fronts on there.

    The front plate can be pressed braked starting from the top at 75 , 27 , 22 degrees respectively, or you could split the part up into 4 pcs and weld it all together if you dont have access to a brake.

    I used mostly 3/16" plate on everything other than the winch mount and 11ga on the cosmetic pcs (not pictured). They hide the small sections right below the headlights pretty well. You can almost make most the bumper fit on a half a sheet of plate thats 48 x 52ish. I used 1 - 5/8 HREW tubing instead of DOM just to save some cost, 1.25 (1.63OD) or 1.5 (1.9 OD) pipe would be pretty close in size also.

    I used this lightbar. The brand held up really well on my SXS for 2 years so figured I would give them a shot here too. It has about 1" of play on either side of the braces so I mounted it to them from the outside with longer screws and spacers.

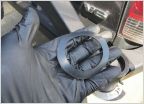
    Shackles I used.


    All files are free to use and edit to fit whatever you need, but are not for resale.


    If you use these please post up pictures as I would love to see more.


    [​IMG]

    [​IMG]


    [​IMG]
    [​IMG]
     

    Attached Files:

    Last edited: Aug 23, 2022
  2. Jun 2, 2022 at 6:30 AM
    #2
    AllTacosFloat

    AllTacosFloat If yours sank you’re entitled to compensation

    Joined:
    Nov 26, 2019
    Member:
    #311742
    Messages:
    6,876
    First Name:
    John
    Boston ish
    Vehicle:
    Has lockers a skewp and a bit of droop
    Looks great, you should make some. I'd buy:spending:
     
    Radioactiv[OP] likes this.
  3. Jun 2, 2022 at 6:34 AM
    #3
    Radioactiv

    Radioactiv [OP] Well-Known Member

    Joined:
    Feb 20, 2014
    Member:
    #123567
    Messages:
    400
    Gender:
    Male
    Georgia
    Vehicle:
    2015 DCLB 4X4

    This is my first big welding project I've done with mig so I wouldn't really be comfortable selling these. I also had to drive about a hour just to get the tubing bent since our shop still doesnt have a bender that will go this small. If work got slow I would for sure run it by the guys.
     
  4. Jun 2, 2022 at 6:41 AM
    #4
    AllTacosFloat

    AllTacosFloat If yours sank you’re entitled to compensation

    Joined:
    Nov 26, 2019
    Member:
    #311742
    Messages:
    6,876
    First Name:
    John
    Boston ish
    Vehicle:
    Has lockers a skewp and a bit of droop
    Well you pulled it off nicely! If you were closer I would beg and hound you for one anyway. Being 1000 miles away gets you off the hook:rofl:

    Great job!
     
    Last edited: Jun 3, 2022
    MSN88longbed likes this.
  5. Jun 2, 2022 at 7:36 AM
    #5
    DylanS4x4

    DylanS4x4 Well-Known Member

    Joined:
    Mar 9, 2022
    Member:
    #392192
    Messages:
    152
    Nice work, following
     
  6. Jun 2, 2022 at 2:11 PM
    #6
    Bradend88

    Bradend88 New Member

    Joined:
    May 7, 2019
    Member:
    #292597
    Messages:
    1
    Gender:
    Male
    First Name:
    Braden
    Vehicle:
    13’ trd off road
    Fox 2.5 coilovers Sliders Trd wheels
    Mind shooting these to me in an email? I can’t get the link to work for some reason
     
  7. Jun 7, 2022 at 5:49 PM
    #7
    Radioactiv

    Radioactiv [OP] Well-Known Member

    Joined:
    Feb 20, 2014
    Member:
    #123567
    Messages:
    400
    Gender:
    Male
    Georgia
    Vehicle:
    2015 DCLB 4X4
    Still waiting on fedex to admit they lost my harbor freight hook but its done. The one issue I overlooked on install was winch height clearance. Seems like alot of people have to cut some in the center anway. My control box could be mounted seperate so I just made some brackets and moved it off to one side. Could move the plate down some when you build the bumper but it would make the fairlead bind a bit more.


    [​IMG]
    [​IMG]
     
    Last edited: Jun 7, 2022
    Blake117 and BizzyB726 like this.
  8. Sep 2, 2022 at 9:40 PM
    #8
    Blake117

    Blake117 New Member

    Joined:
    Sep 1, 2022
    Member:
    #404922
    Messages:
    2
    Gender:
    Male
    First Name:
    Blake
    Vehicle:
    2011 trd off-road mica timberland
    Rock sliders grill lights
    Has anyone used the files? If so how did it work?
     
  9. Sep 4, 2022 at 8:48 PM
    #9
    Blake117

    Blake117 New Member

    Joined:
    Sep 1, 2022
    Member:
    #404922
    Messages:
    2
    Gender:
    Male
    First Name:
    Blake
    Vehicle:
    2011 trd off-road mica timberland
    Rock sliders grill lights
    Is the installation the same as the c4 bumper? In terms of what you have to cut where it mounts etc.
     
  10. Sep 5, 2022 at 5:37 PM
    #10
    Radioactiv

    Radioactiv [OP] Well-Known Member

    Joined:
    Feb 20, 2014
    Member:
    #123567
    Messages:
    400
    Gender:
    Male
    Georgia
    Vehicle:
    2015 DCLB 4X4

    This one isn't as low profile as the C4. It didn't require any cutting unless your winch mounts the control box on the center top
     
    Blake117[QUOTED] likes this.
  11. Nov 25, 2022 at 10:32 PM
    #11
    Patrikbrown

    Patrikbrown New Member

    Joined:
    Nov 25, 2022
    Member:
    #411577
    Messages:
    1
    Dude that’s sweet! I can’t get the file to work either. Take any pics of the bumper unmounted? I’m definitely gonna fab up my own bumper too and definitely looking for reference pics and such
     
  12. Aug 11, 2023 at 11:09 AM
    #12
    Radioactiv

    Radioactiv [OP] Well-Known Member

    Joined:
    Feb 20, 2014
    Member:
    #123567
    Messages:
    400
    Gender:
    Male
    Georgia
    Vehicle:
    2015 DCLB 4X4
    3D model for you guys that were having trouble with the dxf. They are just used for cutting but this should give you a idea of dimensions and all.
     

    Attached Files:

Products Discussed in

To Top