

-
Welcome to Tacoma World!
You are currently viewing as a guest! To get full-access, you need to register for a FREE account.
As a registered member, you’ll be able to:- Participate in all Tacoma discussion topics
- Communicate privately with other Tacoma owners from around the world
- Post your own photos in our Members Gallery
- Access all special features of the site
 Fender Flare Fix Suggestions
 Another dead battery thread
 2009 White Tacoma has Terrible paint!
 Mounted a Fridge?
 Can a clogged breather cause the front diff to leak.
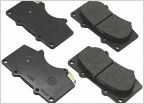 Toyota OEM brake pads
2nd Gen Prelander Build (Okie_LT_Taco)
Discussion in '2nd Gen. Tacomas (2005-2015)' started by Idkwhatimdoing, Oct 13, 2024.


