

-
Welcome to Tacoma World!
You are currently viewing as a guest! To get full-access, you need to register for a FREE account.
As a registered member, you’ll be able to:- Participate in all Tacoma discussion topics
- Communicate privately with other Tacoma owners from around the world
- Post your own photos in our Members Gallery
- Access all special features of the site
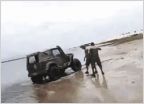 2017 OFF ROAD recovery advice
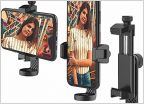 GoPro Mount
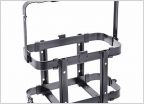 Mounting SmittyBilt Gas Can Holder to Max Modular (Kb Voodoo) Side Panel
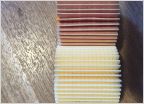 Napa Gold 7047 Oil Filter VS OE Toyota 04152-YZZA1 Filter
30" Light Bar Install - Easier Than You Might Think
Discussion in '3rd Gen. Tacomas (2016-2023)' started by rysingsun, Dec 16, 2015.
Page 21 of 34
Page 21 of 34
Products Discussed in


