

-
Welcome to Tacoma World!
You are currently viewing as a guest! To get full-access, you need to register for a FREE account.
As a registered member, you’ll be able to:- Participate in all Tacoma discussion topics
- Communicate privately with other Tacoma owners from around the world
- Post your own photos in our Members Gallery
- Access all special features of the site
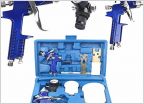 Understanding Air compressor cfm vs psi vs nozzle size
 Please recommend accessories
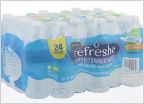 Door water bottles: what do you use?
 Yakima Blockhead Installation Instructions
 Any help to change LED fog lamp bulb
 Can't get into Temp Check mode on 2016 TRD
3rd Gen BHLM and light mods
Discussion in '3rd Gen. Tacomas (2016-2023)' started by Brick_26, Sep 14, 2016.
Page 21 of 51
Page 21 of 51
Products Discussed in


