1. Welcome to Tacoma World!

    You are currently viewing as a guest! To get full-access, you need to register for a FREE account.

    As a registered member, you’ll be able to:
    • Participate in all Tacoma discussion topics
    • Communicate privately with other Tacoma owners from around the world
    • Post your own photos in our Members Gallery
    • Access all special features of the site

3rd Gen Components - door wiring question

Discussion in 'Audio & Video' started by sureshot, Oct 20, 2016.

  1. Oct 20, 2016 at 12:01 PM
    #1
    sureshot

    sureshot [OP] Well-Known Member

    Joined:
    Oct 16, 2016
    Member:
    #199931
    Messages:
    235
    Gender:
    Male
    First Name:
    Jason
    Middle TN
    Vehicle:
    2016 TRD Sport
    Nothing yet...
    I've have searched and searched in hopes to find my answer, it might be right under my nose, but after days of searching in this forum, I can't find my answer.

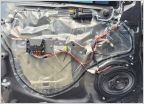
    So, I'm planning to get some speakers for my 3rd Gen Tacoma (bought on 10/15) . My question is, how are people running the wiring through the door (speaker to crossover)? Is it a difficult process (no real access) and thus, should I just get some 2 or 3 way 6x9s for the front doors? The sound is good for a truck (non JBL sound) but I'm wanting just a little more. No amp or sub route for me, just a little better sound from the stock HU.

    Also, has anyone installed components in the rear doors (double cab)?
     
  2. Oct 20, 2016 at 6:23 PM
    #2
    Jalos2004

    Jalos2004 Well-Known Member

    Joined:
    Oct 27, 2015
    Member:
    #167870
    Messages:
    76
    Gender:
    Male
    First Name:
    Juan
    Vehicle:
    2016 tacoma sr5
    I just bought some adapters that plug into the original wiring from *********. I haven't replaced them though. Will be replacing them 2 Saturdays from now will let you know how it goes
     
  3. Oct 20, 2016 at 6:54 PM
    #3
    solscooter

    solscooter Sh!t Outta Luck

    Joined:
    Nov 8, 2015
    Member:
    #169056
    Messages:
    1,910
    Gender:
    Male
    First Name:
    Brian
    Minnesota
    Vehicle:
    2016 TRD OR DCSB 4x4
    So you want to run new wires for speakers, but don't want to use an amp?

    Running wires isn't hard. Just time consuming if you haven't done it before.
     
  4. Oct 21, 2016 at 4:36 AM
    #4
    jmeitz

    jmeitz Audio Solutions

    Joined:
    Sep 23, 2016
    Member:
    #198045
    Messages:
    709
    Gender:
    Male
    First Name:
    Jeremie
    St. Louis, MO
    Vehicle:
    2016 Tacoma trd sport
    Remote Start Lift Stereo Leather LED lights
    Factory speakers will be louder than aftermarket with Factory head unit. At least I noticed that when I temporarily was running my aftermarket speakers prior to adding an amp.
     
  5. Oct 21, 2016 at 6:12 AM
    #5
    sureshot

    sureshot [OP] Well-Known Member

    Joined:
    Oct 16, 2016
    Member:
    #199931
    Messages:
    235
    Gender:
    Male
    First Name:
    Jason
    Middle TN
    Vehicle:
    2016 TRD Sport
    Nothing yet...
    I think that depends on the sensitivity and wattage, right? solscooter, I was more questioning access from the dash area to the doors through the side wall and side of the door (where all the wires go through). I've had fits trying to get a new wire to go through there.

    Is it true that the stereo goes to the tweeter, then a line piggy backs off of that speaker and goes to the door speakers?
     
  6. Oct 24, 2016 at 12:28 PM
    #6
    sureshot

    sureshot [OP] Well-Known Member

    Joined:
    Oct 16, 2016
    Member:
    #199931
    Messages:
    235
    Gender:
    Male
    First Name:
    Jason
    Middle TN
    Vehicle:
    2016 TRD Sport
    Nothing yet...
    So to bump this back up, I'm asking if I will be able to run a wire from the crossover in the door to the tweeter location under the dash through the ribbed black rubber tube where all the other wiring goes through the door to the rest of the truck. Is that tube open for more wires, or will I have to drill somewhere to get a wire from the crossover in the door to the tweeter?
     
  7. Dec 18, 2016 at 2:14 PM
    #7
    Jeddo

    Jeddo Member

    Joined:
    Dec 2, 2016
    Member:
    #203818
    Messages:
    23
    Gender:
    Male
    Vehicle:
    2016 Tacoma off road access cab
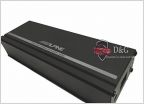
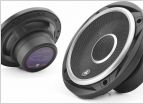
    Bed mat, step, and lights, huskie mud flaps, Polk components, Alpine amp, 3 layer sound proofing, B&I blackwood dash kit, fluid film, led cabin and footwell lights, tail letters, window tint, IGGEE seat covers. More to come.
    I have been attempting this wire running from the cab to the door for the past 2 hrs. I pulled the the grommet off of both sides to free up the connecting hose. The problem is that the grommet on the cab side is double sealed, inside and out with several wires inside. I carefully made a blind cut on the inner cab grommet only to find the wire would hit the outer seal. I am sure there are members who know how this is done on the 2016 models, but even the several u tube vids I watched did not show how this is done. Bump for some advice of somebody who has actually run the wires.
     
  8. Dec 18, 2016 at 2:51 PM
    #8
    solscooter

    solscooter Sh!t Outta Luck

    Joined:
    Nov 8, 2015
    Member:
    #169056
    Messages:
    1,910
    Gender:
    Male
    First Name:
    Brian
    Minnesota
    Vehicle:
    2016 TRD OR DCSB 4x4
    Weird. I removed the grommets on both the door and cab side. Took a little messaging and some quick detailer for some lube. Then squirted some detailer inside the thing. Speaker wire taped to a zip tie for a guide. Twisted till the rubber was almost straight and slowly massaged the zip tie through.

    No cutting needed.
     
  9. Dec 18, 2016 at 3:03 PM
    #9
    Jeddo

    Jeddo Member

    Joined:
    Dec 2, 2016
    Member:
    #203818
    Messages:
    23
    Gender:
    Male
    Vehicle:
    2016 Tacoma off road access cab
    Bed mat, step, and lights, huskie mud flaps, Polk components, Alpine amp, 3 layer sound proofing, B&I blackwood dash kit, fluid film, led cabin and footwell lights, tail letters, window tint, IGGEE seat covers. More to come.
    Thanks very much for the reply. I finally found a pic of the grommet showing an existing hole on the farthest inside next to where the wires enter the grommet that was visibly blocked by existing wires and not turned in a direction to make it visible. Main points you need to know if you are doing this job. 1) disconnect the three harness connectors on the wires so that you can pull them and the grommet part way out the door. 2) Even if you can't see it there is a factory opening where the cab wires enter that puts the fish tape in correct orientation so as not to have the outer grommet wall stop through passage. You may have to spin the assembly to see it. To release the body gromet I used a large flat end screwdriver and pushed it out from the inside.
     
  10. Dec 18, 2016 at 8:39 PM
    #10
    Jeddo

    Jeddo Member

    Joined:
    Dec 2, 2016
    Member:
    #203818
    Messages:
    23
    Gender:
    Male
    Vehicle:
    2016 Tacoma off road access cab
    Bed mat, step, and lights, huskie mud flaps, Polk components, Alpine amp, 3 layer sound proofing, B&I blackwood dash kit, fluid film, led cabin and footwell lights, tail letters, window tint, IGGEE seat covers. More to come.
    I have spent hours on this forum researching harness fabrication so I can avoid cutting factory harmess. I ordered the parts and fabricated the harness, lots of solder joints and connectors and wire and tape and shrink wrap. I thought the hard part was done and then I spend 2 hrs running wire through to the door (took 30 mins for the second door). I pulled the head unit and it appears that there is enough room to install the amp in the area around the HU (alpine ktp-455u). Also need to run wires to passenger tweeter/crossover. I don't know if it is easier to Pull the glove box to do this or if there is room to snake the line over the AC. If there is a thread or video that shows amp placement/bracket (in or under dash) or shows passenger side wire routing for 2016 off road could you please forward a link. Thanks all.
     
  11. Dec 19, 2016 at 7:29 PM
    #11
    zinger

    zinger Well-Known Member

    Joined:
    Oct 6, 2015
    Member:
    #165960
    Messages:
    339
    Gender:
    Male
    Vehicle:
    2016 Silver Sky Tacoma SR5
    I haven't heard of anyone who installed a new amp next to the HU, not nearly enough room in my truck. Most install them either behind the rear seat or under the front passenger seat. I installed my amp (and crossovers) behind the rear seat and ran new speaker wire from there to the doors. Had to run a speedwire cable from the HU to the amp, routed it behind the glovebox and down the passenger side cable run.
     
  12. Dec 19, 2016 at 8:16 PM
    #12
    Jeddo

    Jeddo Member

    Joined:
    Dec 2, 2016
    Member:
    #203818
    Messages:
    23
    Gender:
    Male
    Vehicle:
    2016 Tacoma off road access cab
    Bed mat, step, and lights, huskie mud flaps, Polk components, Alpine amp, 3 layer sound proofing, B&I blackwood dash kit, fluid film, led cabin and footwell lights, tail letters, window tint, IGGEE seat covers. More to come.
    Thanks zinger, I had no time to work on this today or probably tomorrow, but will finish this Wens. It is the unexpected details that get me. The info about running the wire behind the glove box will be helpful. The AC unit blocks the middle passenger under dash leaving above or below (=behind the glovebox) as my options. I want to run 3 wires, (2 to tweeter and 1 to pass front door) and was wondering if it is possible to fish them over the AC rather than under? I pulled head unit before quitting last pm and it looks like there may be room there for this small amp, I thought someone likely has mounted the amp there before (it's small, I have 3 in other vehicles) but could not find a post,. I figured someone whose been on the forum for a while might know. My truck doesn't have five hundred miles on it yet and I am anxious to get it done and on the road. Deep breath, new day, I'll get er done. Happy holidays. :D
    Hopefully sureshot is jammin by now, and others may find their project just a little easier from me learning the hard way.
     
    Last edited: Dec 19, 2016
  13. Dec 23, 2016 at 10:38 AM
    #13
    Jeddo

    Jeddo Member

    Joined:
    Dec 2, 2016
    Member:
    #203818
    Messages:
    23
    Gender:
    Male
    Vehicle:
    2016 Tacoma off road access cab
    Bed mat, step, and lights, huskie mud flaps, Polk components, Alpine amp, 3 layer sound proofing, B&I blackwood dash kit, fluid film, led cabin and footwell lights, tail letters, window tint, IGGEE seat covers. More to come.
    All installed, Alpine amp, it did fit behind head unit, but it is snug and settings need to be adjusted before buttoning up. I will likely pull head unit once more to fine tune and then forget about it. Everything looks stock. May install underseat sub in next few weeks so I have it prewired under passenger seat.
     
    Last edited: Dec 25, 2016
  14. Dec 25, 2016 at 5:31 PM
    #14
    BarberRider

    BarberRider Merit Badges: Scuba Cliff diving Mirror Awareness

    Joined:
    May 13, 2016
    Member:
    #186817
    Messages:
    2,185
    Gender:
    Male
    First Name:
    Fletch F. Fletch
    Trussville, AL
    Vehicle:
    1974 Dodge Monaco
    It's got a cop motor, a 440-cubic-inch plant. It's got cop tires, cop suspension, cop shocks. It's a model made before catalytic converters so it'll run good on regular gas.

Products Discussed in

To Top