1. Welcome to Tacoma World!

    You are currently viewing as a guest! To get full-access, you need to register for a FREE account.

    As a registered member, you’ll be able to:
    • Participate in all Tacoma discussion topics
    • Communicate privately with other Tacoma owners from around the world
    • Post your own photos in our Members Gallery
    • Access all special features of the site

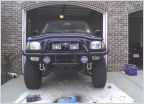
98 Tacoma ARB bull bar install

Discussion in '1st Gen. Tacomas (1995-2004)' started by indowaver, Sep 19, 2019.

  1. Sep 19, 2019 at 8:06 AM
    #1
    indowaver

    indowaver [OP] Well-Known Member

    Joined:
    Jan 6, 2013
    Member:
    #94606
    Messages:
    124
    Gender:
    Male
    Bumper is arriving tomorrow. I have researched a bunch on this install and found that an expedition west video, which has been highly recommended, is not able to load.. I believe the pre 2000 tacomas need cutting and I can't find anything on it. Timmy tool time's video on the 4runner is great however not the same install as for the crush cans and bracket mount. I have searched the forum pretty good but maybe someone can dig up something for me. The one video on youtube that comes up a lot with parts 1,2, and 3, the guy cuts the shit out of his frame ends and then welds some stuff. I'm looking for more of a text book install lol. As always, appreciate the help.
     
  2. Sep 19, 2019 at 8:31 AM
    #2
    penadam

    penadam Well-Known Member

    Joined:
    Feb 25, 2019
    Member:
    #284448
    Messages:
    267
    Denver
    Vehicle:
    2003 Double Cab Tacoma TRD
    Here's some in progress photos.

    Stock bumper removed
    nZsNXP9cwgRpWCoFmIqnSsE8P50qwgbx_DBgVSLK_983467dc74e4ce8453c92fd0bb092de55246856c.jpg


    Weak caps that should be replaced
    P38COKXdYZwgyGd0oLW1VRcxNOHsaj9hMXGFEP1F_6ee9dc2dfe6a23b2380b379e73058f730ae27111.jpg

    Replacement cap
    vWmNkHfyTnyIcN4M-hEPQ11tGONsRHe32oa8eA8K_a4c267f143b766172040a073ee32253483003440.jpg

    aSO3qfn9GeAXejigfIHn-IoZ_zde4HAyCJSL10tf_2152d8b43849e3748d019b1a50b29d3b2ff468e6.jpg

    Make sure to grind the weld smooth after this step to help everything line up correctly
    QroFEaC9yzvtSVlj7QiGqIk1Zzh2fRpSyyaohBNS_8848c23315dfc4ffe42dd6681f9485b651932dba.jpg

    Install the winch into the bumper. Make sure it's clocked correctly so you can access everything.
    wM3mwAiyynSNcrDpaN44ZY4_qcMwiu2PNllKLqkj_058340b7adbe6bde57173c3359576713d1ff2f35.jpg

    Bumper subframeinstall. Most of it bolts right on, but you do have to drill the frame for some vertical bolts. on each side.Biggest issues I had was the amount of extra hardware they sent and knowing what you had to use. I have an 03 double cab and I believe I did have to use the frame extension blocks to get everything to fit. Just dry fit it all and see if it clears and you'll know if you need them or not.
    M5IUBcXNkYV5WdshxbYjxixgRcHrk9Vr0KFzGZMH_d87f4be7f449da84999dc9ed8aeb807406392bdc.jpg

    Completed.
    Nz1Pf1NiWjAKz1rAnJzddpRar7YSLuHh3E6RWiAi_dcab50c21278322f19ce6a96f0bab9d47bc7300a.jpg
     
    Taco critter and indowaver[OP] like this.
  3. Sep 19, 2019 at 9:03 AM
    #3
    indowaver

    indowaver [OP] Well-Known Member

    Joined:
    Jan 6, 2013
    Member:
    #94606
    Messages:
    124
    Gender:
    Male
    Can you do mine :) Do you know if my 98 requires that same process? I like how that plate is welded in solid like that, tight work. Thanks, I just saw the your message about dry fitting ect.
     
    Last edited: Sep 19, 2019
  4. Sep 19, 2019 at 9:19 AM
    #4
    indowaver

    indowaver [OP] Well-Known Member

    Joined:
    Jan 6, 2013
    Member:
    #94606
    Messages:
    124
    Gender:
    Male
    Here is the video I referenced as possibly cutting more than necessary. I see you left your end bits and replaced them. In this video on a 98 it appears he cut them off (further back). Then he welded in the washer for his end bit. https://www.youtube.com/watch?v=_ndEMkGLeoM


  5. Sep 19, 2019 at 9:38 AM
    #5
    penadam

    penadam Well-Known Member

    Joined:
    Feb 25, 2019
    Member:
    #284448
    Messages:
    267
    Denver
    Vehicle:
    2003 Double Cab Tacoma TRD
    His original frame end looks way longer than mine was. I though I had to add the included spacer block to get everything to line up, but can't really remember and don't have photos. I can tell you that the crush cans have bolt holes on the bottom that need to line up with the recovery hook bolt holes. So add/remove as necessary to get that to work. I'll also tell you that the crush cans are designed to bolt into the frame end caps. If he just cut them off and didn't replace them, he missed part of the bolt up.
     
    indowaver[QUOTED][OP] likes this.
  6. Sep 19, 2019 at 10:27 AM
    #6
    indowaver

    indowaver [OP] Well-Known Member

    Joined:
    Jan 6, 2013
    Member:
    #94606
    Messages:
    124
    Gender:
    Male
  7. Sep 20, 2019 at 7:21 AM
    #7
    ThunderOne

    ThunderOne Well-Known Member

    Joined:
    May 20, 2009
    Member:
    #17473
    Messages:
    10,042
    First Name:
    Mitchell
    Nashville
    Vehicle:
    1ST GEN OR GTFO
    Toyota NERD
    that is quite a gap, do you have a body lift? If not, loosen the six bolts (just a little bit) that hold the actual bumper to the mounts and yank it upwards (or get on the ground and push it upwards with your knees or feet). There is some wiggle room to adjust for the gap. Just loosen the bolts enough that you can move the bumper around but not loose enough that it will not hold in the new position.
     
  8. Sep 20, 2019 at 7:49 AM
    #8
    1997tacomav6

    1997tacomav6 V6 5sp,RegCab,TVS1320 Supercharger,Haltech, 800k

    Joined:
    Oct 5, 2013
    Member:
    #113940
    Messages:
    10,367
    Gender:
    Male
    First Name:
    John
    Denver
    Vehicle:
    97 reg cab, v6 5sp 300hp supercharged, Methonal Injection, 800,001 plus miles, Original Owner
    V6 5sp,RegCab,TVS1320 Supercharger, 56mm pulley, methanol injected Haltech ECU, AC Tvs1320 supercharger,(MUST DO) every 125,000- 150,000 needs rebuild Projector headlights HID 5 speed manual Amsoil for all drive train Smaller 56mm custom pulley, (MUST DO) 2004 DESNO fuel injectors, zero ping ping, 2004 side door mirrors Dick Cepek Rims, Michelin tires LTX, ATM Pathfinders Dynopro ATM ( that last 100,000 miles) Now running Dynopro ATM mud and snow tires KN cold air intake Cat back dual exhaust with ss exhaust tip, Raised exhaust tail pipe to 2" below body line Optima*dry cell battery,red top Alpine sirius radio, 200 watt amp, focal is165 split door pod speakers Focal door speakers Subwoffer behind seat Viper alarm, Electric Locks Dark tinted windows, bucket seats corbeau lg1 Tacoma Rubber floor mats TRD fender extenders, Bilstien shocks, King shocks JBA UCA trailer iv hitch, electric brake control, Drilled slotted brakes, High carbon steel (MUST DO) EBS green stuff 7000 series pads(MUST DO) TRD engine oil cap TRD stick shift, Marlin crawl shift kit. Rear sliding window 2002 4Runner functional hood scoop cut into Tacoma hood, 4Runner dual overhead map light Gentex Auto dim + Compass + Temp, garage,rearview mirror Snow Methonal kit stage 2 Custom 3 core aluminum radiator Linex bed liner Haltech stand alone ECU, Intake supercharger gauge. Stainless steel brake lines, Custom leather wrapped steering wheel, Haltech stand-alone ECU,
    Before you put that bumper back on get those radiator body bush replaced .

    I would say your are past do!

    B7F35CB6-FE4E-45BE-8BB4-3FA5A61EA239.jpg
    6A6B9370-239B-46D1-9284-EE477CE80B4D.jpg
    E9D0F3B0-21FE-4A1B-BD2A-609F37335B54.jpg
     
  9. Sep 20, 2019 at 9:16 AM
    #9
    penadam

    penadam Well-Known Member

    Joined:
    Feb 25, 2019
    Member:
    #284448
    Messages:
    267
    Denver
    Vehicle:
    2003 Double Cab Tacoma TRD
    No body lift. That photo was just from before going through that process.

    Funny you should mention that. The bumper install was 3 years ago, but I just noticed how bad of shape they were in when I looked at these photos. I'll have to snag some for next time I have everything pulled apart
     

Products Discussed in

To Top