

-
Welcome to Tacoma World!
You are currently viewing as a guest! To get full-access, you need to register for a FREE account.
As a registered member, you’ll be able to:- Participate in all Tacoma discussion topics
- Communicate privately with other Tacoma owners from around the world
- Post your own photos in our Members Gallery
- Access all special features of the site
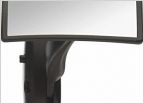 Would these mirrors interfere with the side airbags?
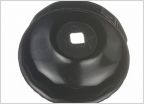 2.7L Toyota oil filter ... WTF?
 Bad FM reception - can you help?
 No grab handle on the A pillar on a Pro?!?!? Really?!?!?!
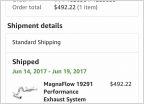 Exhaust choice? Magnaflow vs. MBRP
A fun trick for the Opt7 Interior lighting kit. (with pics)
Discussion in '3rd Gen. Tacomas (2016-2023)' started by WulfmanX, Mar 26, 2018.


