

-
Welcome to Tacoma World!
You are currently viewing as a guest! To get full-access, you need to register for a FREE account.
As a registered member, you’ll be able to:- Participate in all Tacoma discussion topics
- Communicate privately with other Tacoma owners from around the world
- Post your own photos in our Members Gallery
- Access all special features of the site
 Failed CA Smog "Gross Polluter" Help Please!
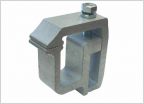 Camper Shell Clamps
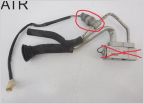 Found my A/C LEAK!!! Need help finding this one part (LOTS OF PICTURES)
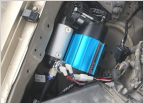 ARB CKMA12 Install in 2004 Tacoma
 MAF sensor resistance test
 Overheating - I'm stumped
Actuator locations and wires
Discussion in '1st Gen. Tacomas (1995-2004)' started by slodoug, Apr 24, 2024.


