

-
Welcome to Tacoma World!
You are currently viewing as a guest! To get full-access, you need to register for a FREE account.
As a registered member, you’ll be able to:- Participate in all Tacoma discussion topics
- Communicate privately with other Tacoma owners from around the world
- Post your own photos in our Members Gallery
- Access all special features of the site
 Help with my 2017 rear tailgate lock
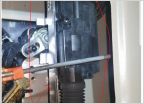
 2019 OR Firewall pass through
 Cell Phone Protective Cases Compatible/Functional with Qi
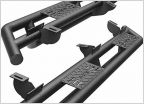 Oedro or Tyger Nerf bars
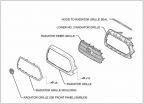 Looking for some grille info
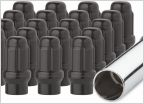 Propper Extended Lug Nuts (ET) for aftermarket wheels (Pro Comp 01 Series in this case) on Tacoma.
Aftermarket seats in 3rd Gen some info.
Discussion in '3rd Gen. Tacomas (2016-2023)' started by blackohio, May 24, 2019.
- Thread Status:
- Not open for further replies.
Page 2 of 3
Page 2 of 3
- Thread Status:
- Not open for further replies.

