1. Welcome to Tacoma World!

    You are currently viewing as a guest! To get full-access, you need to register for a FREE account.

    As a registered member, you’ll be able to:
    • Participate in all Tacoma discussion topics
    • Communicate privately with other Tacoma owners from around the world
    • Post your own photos in our Members Gallery
    • Access all special features of the site

All About My First 1st Gen Tacoma

Discussion in '1st Gen. Builds (1995-2004)' started by bwp, Jul 7, 2016.

  1. Jul 7, 2016 at 5:49 PM
    #1
    bwp

    bwp [OP] Well-Known Member

    Joined:
    Feb 27, 2013
    Member:
    #98632
    Messages:
    82
    Gender:
    Male
    Vehicle:
    98 Evergreen SR5 4x4 Access Cab V6
    1998, SR5, 4x4, Evergreen, Access Cab, V6, Auto Trans
    IMG_1061_zpsbxkhrksy_639dc839f7f70d2753d823da2a37efe1e289a61f.jpg

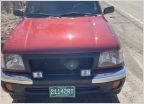
    Just purchased this Tacoma earlier this week for $3,250.00. Had about 248,300 miles when purchased. Reason for buying, wanted a great daily driving beater truck to replace my 2nd gen Tacoma for when I sell it. Main reason for selling the 2nd gen taco (its paid off, no lien)and buying this 1st gen taco, want to boost my savings for a down payment on a house. Most people would think their is something wrong with me, but I could give two sh#ts, doesnt bother me anymore caring about driving around in a nice car/truck in the meantime while I save money. Figured if it is going to be a beater vehicle why not try to get the best beater my money can buy for around 3k. Needs to be a truck cause I haul things a lot and other than that, anything extra would be a bonus, such as 4x4 :). Only concern was mileage, but was willing to give in for a high mileage truck at a low price as long as nothing major is wrong.

    So I found this Tacoma. Recent owner used it for work, actually had farm license plate on it, mostly highway miles. Forgot to snap a picture of the title before I gave it to the tag agency to keep for my records, dont remember what the mileage was when the previous owner bought it, oh well. He bought the truck from someone in Texas. Anyway, whenever it needed servicing, he was able to bill the company he worked for. I didnt have anything to look at, receipts wise, so didnt really take his word for it, just let the truck to the talking. Did my inspection and determined it to be a good buy. Bought it and now its mine.

    Went on my toyotaowners website and claimed the truck, and looked at the service history. The most recent dealer servicing was about a year and half ago. He had mentioned there was some engine work done to it, but not really sure he knew what everthing was that got replaced, didnt really seem to really know much about automotive stuff. Below is a picture of what was changed out. Pretty happy that all this was changed and happier that Toyota did it because I know or at least hope that they did a good job, if a shop did it then I would be pretty doubtful of the quality of work and rechecking their work, then again the techs at Toyota can have sloppy work too.
    98%20Taco%20latest%20dealer%20service_zp_f1de5ecbb68571a4679adf3162235b39e93be0cc.jpg
    IMG_1114_zpseyrhdaht_faa26a167df90e1859e45944c6498ed24a484a44.jpg

    The only issues with this truck so far are:

    Loose Steering - just ordered new inner and outer Moog tie rods and Energy steering rack & pinion bushings, I like my feeling tight.
    Rear Differential Pinion leak - Just bought a new oil seal to replace this weekend.
    IMG_1097_zpss99mmahe_47306639afb6a7632af793f979cf891cf0d95c54.jpg
    IMG_1128_zpsogtlcoks_1664578b7d8c606286aedd8f48d8b37942ddbe8e.jpg

    A possible Rear Main Engine Seal leak - As of now cant really seem to tell cause the engine was caked with oil (dry baked, not wet). I had degreased some of it and rinsed, needs more degreasing and rinsing. Below is a pic of of the bottom of the transmission bell housing. Hasnt gotten worse, seems to stay looking the way it is. For now just gonna keep an eye on it and see if it gets worse.
    IMG_1106_zpsgyhtg5q6_51f42b04c18cd82be9406e3fca59a7fa2937aad5.jpg

    Brakes - Havent had a chance to look yet, just know they need attention, the rear drums im sure need new pads, or adjusted.
    Body - There are some dings and scratches, but the major body issue is the tailgate. Previous owner backed into something and left a dent and a good size ding. Also the cross beam support for the rear end of the truck bed is dented, because of all this, tailgate wont shut smoothly. Will work on this later, as of now, not a high priority. Also the front bumper needs some aligning, never been hit upfront and dont see any damage. Overall body is decent, Paint is actually in good shape, just one area on the driver side fender, clear coat wore off.
    IMG_1063-2_zps8ajmcv1i_04196917ec4d1d608201d2e38ad54de621a97219.jpg
    IMG_1065_zpskn1ugxui_2f2c686b0916489bab88537064961f739e17a08c.jpg
    IMG_1064_zpsotwnpbgb_a434af70a352218aea12ebd99b1868a7a688d424.jpg
    IMG_1066_zpswkcovbr2_10746e8846c217bcca71392df94a1d6e7a83c527.jpg

    As of now those are the only major issues I see/know of.

    The frame and body is extremely clean, pretty must rustless, couldnt believe it. Havent had a chance to clean anything, much of what you see is just dirt.Take a look...
    IMG_1091_zpsvoo3udrc_3d6fb0282e4120d275ca8fc266eaa3c987b465d7.jpg
    IMG_1093_zps0z400yzs_6a51d2ccf01f98274667320e37fef8914b3c7824.jpg
    IMG_1094_zps62jqvzcv_ef7ba66b440e85be299471b0630ae59ac7243c2f.jpg
    IMG_1096_zpsdafaqpmu_c3ebecc3c50a8c967ad6fc10bdc9e49145f33948.jpg
    IMG_1095_zpsrz3uqlfc_7e2025beb611a155db0435efbf7a5d360b62b485.jpg
    IMG_1098_zpsvxyejp8b_9cc057cde88c302849a289db64f274f9a0c763bb.jpg
    IMG_1099_zpscftid5u2_5b8d9a9de96c5bd1207f2fb0b8944ab8704a1be8.jpg
    IMG_1102_zpsbhodaynt_6f81abd70ec4cd161205485ee7824bfbefc5d140.jpg
    IMG_1100_zpsmeb8rxav_f0fa345451b6a2967b14f43500965aac83d3cafe.jpg
    IMG_1104_zpss6ybc9uy_5fe1ccb775257376e7aed3387638fcaa8d63232b.jpg
    IMG_1101_zpsmca9p9bb_46eb61c109dda8723848ce43cd37adeee040feec.jpg
    IMG_1103_zpskkq1z1h8_509fdd42235f355708c4d4a085fc2ba2caee7167.jpg
    IMG_1108_zpsneh8zyvk_e956082b1ee5cc1c0a17cbd220a6938ab9fb3a01.jpg
    IMG_1110_zps3bo0eqmu_a856b005476d2baa2224f7662d241f2dc71e6dbf.jpg

    Pictures of the whole truck, interior and engine, again havent had a chance to clean yet.
    IMG_1058_zpswyhhkgyj_7f21c1e27563a55cb929cf1aa791403a44db3bcb.jpg
    IMG_1060_zpsjrnysjwj_b37de983e66a82f94dcd8ef778e2946822412e11.jpg
    IMG_1061_zpsbxkhrksy_639dc839f7f70d2753d823da2a37efe1e289a61f.jpg
    IMG_1062_zpsrvj4dnjq_71a9aa6e26b05aeafda8e7c4975d84016096d62d.jpg
    IMG_1069_zpsdyazltwu_b8ecc0a1e016b66f9762d2b81ecc247a89932e89.jpg
    IMG_1070_zpsdcybmn5z_b2ed86ae23e91e48fce5690460aaaf42e9173198.jpg
    IMG_1071_zps7qlghifu_832035b01f2f627309ec0fc18f254f6e4a8832e1.jpg
    IMG_1072_zpsrjj0hsvn_df51baba8a82a2ab6f025ff8747bd448fbcda3a4.jpg
    IMG_1074_zpsh9mvujon_b7fee97b5881d3bf6fd507c48e88aaffd1b002cb.jpg
    IMG_1075_zpsefv7bxsh_50b6ab7dbfc3554977e2a891acd258ec48ae54b4.jpg
    IMG_1076_zpswjaehxfp_945ac3ee7107b1adeca62fa77f37c1cdb0fa15b0.jpg
    IMG_1077_zpslbtjei3c_c63412a6974083d7d7b939cb078fe0d26f2c5322.jpg
    IMG_1078_zpsxpoyjand_9467aed08cd72baea36029f79150198313e197a0.jpg
    IMG_1079_zps03j3dubw_38bdbdf3b8b1b12dd8bf2b59be874125d2fe12aa.jpg
    IMG_1080_zpshhcviel3_3a2707303ce39579697bee05f8f4b2601ab0ee29.jpg
    IMG_1081_zpszsy79iqc_c090981372c7c7b031c796dd9d7c1bc166043cb5.jpg
    IMG_1082_zpswxq4wxxm_f29ed5a12a592e41e7f99d0364df72d8e90c98bf.jpg
    IMG_1084_zpsge5flv8z_2a7798b08e43a5c620eb5374670d33a767adb82c.jpg
    IMG_1085_zpsrov3huca_17068a74e39f575b718c85949bcd7a585334eede.jpg
    IMG_1086_zpsivi5sqpw_43260a765583e72672d243011a6d484875ba564e.jpg
    IMG_1088_zpsubqci1nz_a5b8b3634090452a0016adc1a612772ab285c068.jpg
    IMG_1089_zpshhlqf2rx_39d4ec7f98cf5178a44e6be8bedb0b0f4cc8ce10.jpg
    IMG_1090_zpsneuratf1_7ea64704b0aadf98bd22b35230b03cb59659655d.jpg

    Would like to put Factory Plug wires on so they fit around the engine like they are supposed to.
    IMG_1115_zpsoukttlir_9500d417825f5249ab85018caee4d4a52bd38fa7.jpg

    IMG_1116_zps4gsfrnll_3f2cd56edcbbb7ed01255070b40e39db3169831f.jpg
    IMG_1117_zpsbyocmytc_1f9cb6080df134843736f2b8b89daba7636713c7.jpg

    In this picture, you can see the firs coil pack was replaced as the previous owner stated. Would be nice if it was a Denso pack, I think that is factory brand...
    IMG_1120_zps9k12yvor_4f57d80e80f3aa4e67266bd5b8c3fca54afe74cd.jpg

    Accessory belts replaced during the last dealer servicing.
    IMG_1122_zpsvahdndgr_c74ed34b4a1ca7712b78e044a9ceb9d089225e32.jpg

    IMG_1125_zpsjxks5cgv_b1017f246373e8e1cbe881f30854d11b5a81bb6d.jpg

    Edit: forgot to add these are my lower engine guard pans. Took off to search for leaks and to clean it.
    IMG_1109_zpsgvuk27tm_5b19eadd41bac1db3815af99b955fba54b61722f.jpg

    Thats it for now. Will update as I work on it.
     
    Last edited: Jul 9, 2016
    Jon G likes this.
  2. Jul 9, 2016 at 5:13 PM
    #2
    bwp

    bwp [OP] Well-Known Member

    Joined:
    Feb 27, 2013
    Member:
    #98632
    Messages:
    82
    Gender:
    Male
    Vehicle:
    98 Evergreen SR5 4x4 Access Cab V6
    Just finished changing out the Rear Diff Pinion Oil Seal. Forgot to take pictures until I was half way through.
    Old Oil Seal still in, just had taken off the pinion flange. used a 3 armed 4" pully jaw to take the flange off.
    IMG_1131_zps6xuuhkfq_ac67e23dfa2e3c8fae8ec26744b24cb4dea485ec.jpg
    IMG_1133_zpsu9yasbx1_3e4010c989d03caa449b0236f3aee223a6b6bdcf.jpg
    IMG_1136_zpscgl6eohm_24e3ebf61c8cf40ab5418ffb709dc7727e7dcc6d.jpg

    Pulled it out using my seal puller.
    IMG_1140_zpslrg8sfr3_7b366ed3bc4c94acf554db6561052a927b6d8bcf.jpg
    IMG_1141_zpsyxs7nepu_a6873110e0ce7cb75749e947b4304ef814de5bfe.jpg

    New replacement oil seal.
    IMG_1144_zpszeyatzue_9549d14578b8050fcc7687843899dcc82f2f13bc.jpg
    IMG_1145_zpslyqfvnjx_6e07e2dad33df55a2ec3f9853516b2abb865e3fd.jpg
    IMG_1146_zpsljwqo5y6_e3324c907da8546235abc6151ce4075ab93a703c.jpg
    IMG_1147_zpsaattiilh_59d65cad7d424329bc337e7f856b86cc484c191e.jpg

    Some notes I wrote on the pinion flange for when it goes back on.
    IMG_1143_zpsnhq0kntu_10521fa2a03dff7f4eccca8343ffba378773a8f1.jpg

    So I found this thing in my metal scrap pile, fits perfectly around the oil seal, going to keep this in my tool box.
    IMG_1148_zpsm9zzwvz5_c2f765002f7a31df0aaf2c50f3b3996d308fa7e7.jpg
    IMG_1154_zpsrjgc9rsv_3a7e46d59f4786be4e712299344bbea06e418e02.jpg
    IMG_1153_zps7ovbd92e_4a68203770fbe8abe0fd115ae7a89b0bdbbc38c9.jpg
    IMG_1155_zpsqkgg8srj_fc3cbfc1bae7dfe4eb208b5d98b7ba504a47b0ca.jpg
    IMG_1152_zpshucxgop7_5edb64c06c89c2c649cf63224b20b8ccf804446e.jpg

    Everything oiled up for installation. That Redline oil in this pictures isnt what i used to put in the rear diff, just had some left and was already opened to oil up the parts.
    IMG_1157_zpsse2j8vym_2aaf1218b2a7176fa8dccb2f4b77aee0e902e6ca.jpg

    Seal installed.
    IMG_1159_zpsrg6abwl0_50aab2904f90af8ef4681b6939be8e5d38375d1b.jpg
    IMG_1160_zps8so5h7so_9af11ebf4fb9f95723f197468626d46594d40623.jpg

    Used the socket to take the nut off as a punch to hammer the pinion flange back in.
    IMG_1169_zpsavwktybp_134684bb1a53c9ef0dca6278c9d35e050322fbfd.jpg
    IMG_1165_zpshwoukc9l_33165a9ef840e7961e6ff9bbd6f7fb7e6b7fdbb1.jpg

    About how far the threads were sticking out before I took off the flange.
    IMG_1170_zpsnhkz7ryd_6a2269d8d579aabf588f67ce511d63c9c2f4d26b.jpg

    Nut put back on and indented the edge of the nut. Just an FYI, dont recommend using a chisel to indent the nut other wise it may cut it like mine. Just used a flat head to indent what was left.
    IMG_1172_zpse38m3cti_8633a561f165c4c194ad5d375399d0b883347013.jpg

    Rear Diff cleaned and drive shaft put back on.
    IMG_1174_zpss6mz0qku_8f2da6e3b2ea4e1efb119e54c95c166d7994021b.jpg

    While I was under there, decided to go ahead and grease up the drive shaft joints.
    IMG_1178_zpsxghpexck_8125ce545931bc8ae86da7730eb0f2f40b277294.jpg
    IMG_1179_zpshn9mcumw_5ff7f55441e72479bd64c20978a9ed0a3e0f1340.jpg
    IMG_1181_zps6pxjtqqx_6133243c98516cde46d4bd0dff199b94333a64e5.jpg
    IMG_1180_zpsgizdcssx_b1a85cb7fe4477b2cd18a41b59ff424e8521c768.jpg

    Also decided to go ahead and check the brakes and bleed them. Truck jacked up on stands.

    IMG_1182_zpsreymddpp_05a387e1927d3ad92e81a2832ed0b92f3cf014b2.jpg

    Rear drums looked great!! Lots of meat left on those pads and better yet, no axle leaks. Only problem was that they needed adjusting, way to loose, all better now.

    IMG_1184_zpspgwzhmis_76bcb34de8c6cfa3a2703b71c29051e3833feb89.jpg
    IMG_1185_zpsavgqlj5s_6ec81c5a97308cf7b81dc11c9ee49c298da9c083.jpg
    IMG_1186_zpsjzyg7rmk_f7e72cd4100005dbbadc9f65750712f585274ca5.jpg
    IMG_1187_zpsoyrowxvf_ff5ad631028cce4719041ade1c405faf3ac4e571.jpg

    Nasty brake fluid pushed out.

    IMG_1188_zpstrmphfue_a47d8c2fb2ed5ac443674f293058297f9d7d4f42.jpg

    While at it, took the rear diff breather off to clean it. May end up relocating it, but this is just a daily driving city truck.

    IMG_1189_zpsvyweueew_f2bf8830a368e1294f72e07ecf86d8cc29d06c28.jpg

    Both front brakes were good, lots of meat left.

    IMG_1193_zpsvhzikpjv_93c52f62a134082001f2286c4b6331524f257fb2.jpg

    So after all that, I filled the diff up with Redline 75w90ns oil. Instead of pumping, was able to get a bendable funnel to fit.

    IMG_1190_zpsbnxyvgot_d63a7f73902964d37aa5a5b0a2d6a2f28ec5098f.jpg

    Thats all I have for now. No more leak.

    Trying to get a hold of a guy to buy his Topper, not sure what brand it is...
    [​IMG]
     
    Last edited: Jul 9, 2016
    Jon G likes this.
  3. Jul 15, 2016 at 5:47 PM
    #3
    bwp

    bwp [OP] Well-Known Member

    Joined:
    Feb 27, 2013
    Member:
    #98632
    Messages:
    82
    Gender:
    Male
    Vehicle:
    98 Evergreen SR5 4x4 Access Cab V6
    Cleaned the Interior as best I could without taking anything apart.
    IMG_1194_zpsxhozx2z4_d7a67b21209638b8883d96aa39a9b18e0705aa75.jpg
    IMG_1195_zpsfdehzyyu_053fc54fd1a3b850c1cb78f4b0df56dc4811d1d2.jpg
    IMG_1196_zpsy2rspmzz_eb5153711357ac22af7a98b5bbf026057cf4ce0d.jpg
    IMG_1197_zpsykhgfl3l_97188d95f33b5432646071fc366bff70862f85ee.jpg
    IMG_1198_zps36chr0cb_f4fbcabf35117ae9f6219e9ae487e3d8d7c86c87.jpg
    IMG_1200_zpsjelq8j92_93ee3d4a94cb67a6bceb162c784b8b585cbf9c67.jpg
    IMG_1201_zpsgstggo6s_e00757ad3d47d526a3777203ed2732fa2230ff76.jpg

    Changed the Tranny fluid, a hell of a lot more than a couple of qts as the Owner Manuals recommends putting back in.
    IMG_1203_zpsdfofdbco_a89d408ddd0498d2dd2c34c769acd29b24e9c1c0.jpg

    Redline Auto trans fluid.
    IMG_1204_zpskeg2wmpd_beeba0c19d3a716c57bb843fab20caef3b56f8b4.jpg

    About where i felt comfortable filling it up at.
    IMG_1208_zpshovgarx2_ce97a0060daf59c0e2701254a2b7f2489b877e21.jpg

    Changed out my Steering rack bushings and inner and outer tie rods.
    IMG_1209_zpsenk8tmeo_ce3cdb0ef3149fd5759ce83063e8cc40c46844cd.jpg
    IMG_1210_zpsgcohl5k2_30afa8bf314cb1be3d893eb1d107dc1fad6181d6.jpg

    Outer rod removed from the knuckle.
    IMG_1212_zpshmc8pcb6_b57a0bd44006eaf09f34ddca4c63b98fd5250ee4.jpg
    IMG_1213_zpsnzjiqnov_fcd48cbc4acb85606e77b8c087a13571ba64fa80.jpg

    Removed the clamps holding the boots on.
    IMG_1214_zpsmqvxizne_25301e099b6ce8eab535e0c08fd56f76376e5dcb.jpg
    IMG_1215_zpseubrtz1j_9ff7569dd43da69ed700bcc834099fda2907b766.jpg
    IMG_1216_zps1iimqh7v_acc290ab0692b1763fa84c0f540e79b1e145030b.jpg

    So the driver side inner tie rod came off with out much of a fight, however the passenger side gave me hell. I didnt have a wrench/adjustable wrench big enough, so I had to get creative with using what I did have available.
    IMG_1217_zpserind7a6_2d9cfa209c00c643931d11080c05f3efe48889e9.jpg
    IMG_1218_zpsmp74tygl_cd3c571c2d007fd074df6fbd6056d77130f959dc.jpg

    All the clamps, bolts, nuts removed.
    IMG_1219_zpsjbujfi4f_62373f8f5ca68dc8d8e0f4daeff1aac5296b0306.jpg

    I removed the bolts holding the steering lines from the driver side frame and in the front to give me more room wot work with the steering rack.
    IMG_1220_zps2zljr29u_5023d7791d0e1016716d9057938324d3d6966b6a.jpg
    IMG_1222_zpsqs7lxs25_2d55beae4126f579d16f6fee39e8a6d5d39c495b.jpg

    Bushings came out alright, didnt have a bushing remover tool, so again had to get creative to get them out. Ended up cutting the lips off the old bushings, heating them up and spraying PB Blaster to soak in, then hammered them out. Worked great and didnt put up a fight.
    IMG_1223_zpsyfw6rdi6_e8e1ba56b7dfbf59b48038d0ad6f66f3e960b482.jpg

    Getting the Energy bushings preped.
    IMG_1224_zpskvs446tp_e461e398646dca145acff69d2b032b523629010b.jpg

    Old on top and new on the bottom inner and outer Moog tie rods.
    IMG_1225_zpsiakuxhd4_5cfefed3663809796166e83a511efa9ee7330fe3.jpg
    IMG_1226_zpskzpsoktj_1424643a1bc3768e298bab122573538c450d7f1b.jpg
    IMG_1227_zps7wqrudtz_48be88a0f9e3aa0300486fef300e26fb43032ab3.jpg

    Everything put back together.
    IMG_1228_zps614op0k7_f60402a4b6b4a9e31cd9fcc60319ff57537322af.jpg
    IMG_1229_zpsszqmsnpg_6f6da524e1bfbec63987a0c27867da0c0aa2a031.jpg
    IMG_1230_zpskcopxzsy_76d977e23cef7b719029412361d469593f3e6fbd.jpg

    Took my truck in today to get it aligned and the shop I took it to was unable to align it.... I really hate taking shit to automotive shops to get stuff worked, always some kind of issue and not only that in my experience the techs have no respect for other peoples property. My steering wheel is all crooked, My passenger side steering boot was all twisted when I got home to look things over. Had my a/c blowing on highest setting, why the fu#k do you need the a/c on all the way up blowing on highest setting when working on alignment? I am scheduled with my local Toyota dealership to get it aligned for about $100. Here is what they handed me, they didnt charge me, just said come back and we can try to align it again... ugh screw you.
    IMG_1241_zpsablk813j_6737508bd1207fd2b469918a639eb0030a30d349.jpg

    Weathertech floor liners arrived today, fit nicely.
    IMG_1231_zpscxsu8cdh_fe2391b469920cef53bc2ac147e198e411fc9158.jpg
    IMG_1236_zpspecaeeub_a8b03521d37ba9a214a1dbe03a4b13cb6f2a1c34.jpg
    IMG_1237_zpscfibuhip_9753e47451c61022e5e6102537dd1968079b0d30.jpg
    IMG_1238_zpsmllhk7lh_004d60dc18f34545b290f4742489c2fff878275b.jpg
    IMG_1239_zpshbvu4q3w_d8a513e0fa4c29b3817751fc6b6c7a7bcb3b5e13.jpg
    IMG_1240_zpshgloepi3_6aaddac091d3a82a3f0b1135c887d485bcac856e.jpg

    The driver side floor mat that was in the truck when i bought it
    IMG_1235_zpsw5ukuvof_ecd2aee3748cb0ac9f6f05ee6fac47bf62c3d375.jpg

    Thats it for now, Another issue I am going to address is the loose shaking auto shifter handle, so damn loose I can literally push the handle from D to N with out holding down the button and from R to D aswell...
     
    Jon G and MCObray like this.
  4. Jul 19, 2016 at 6:18 PM
    #4
    bwp

    bwp [OP] Well-Known Member

    Joined:
    Feb 27, 2013
    Member:
    #98632
    Messages:
    82
    Gender:
    Male
    Vehicle:
    98 Evergreen SR5 4x4 Access Cab V6
    Took my truck in to one of the better local Toyota dealers to get the truck aligned. It cost me $104. In my experience they did an awesome job and the truck feels like it should and the steering wheel is actually straight... Service rep I talked to said the previous shop I went to probably had lower quality alignment equipment and the calibration of their equipment may had been off. Showed me a before and after specs, DAMN!!! previous shop fuked my shit up. Just glad everything is good now. Ordered some automatic shifter bushings from them as well and they even price matched.

    Gathered all the stuff for a tune up, front diff oil, transfer case oil, engine oil, oil filter, air filer, fuel filter and plugs.
    IMG_1258_zpslgomq6hp_3809cc72a63bcbfd3e60680426844d182f6553f6.jpg
    seems like a lot of engine oil...
    IMG_1259_zpscgrmoeq4_817ec01e35754fd0ba73dc50f6077e6a723b7c0a.jpg
    seeds in my air box?
    IMG_1261_zpszef57d5r_f7dff10d21aa76cba5dab388522ef49a19757315.jpg


    To get started on changing out the shifter bushings, unscrewed the center console cover screws bolts and 4x4 shift knob.
    IMG_1262_zps7ao7fjsh_445cfb53cf77514dca6919976c23f37346602088.jpg
    IMG_1265_zpstewiply7_742ea90d05a578c96aaf62cfa958376f3bf24e21.jpg
    IMG_1266_zpsz2qlcpb5_fcec2a0555dc3faa0d639e1ee0f97f3c80d3116d.jpg

    These are the bushings that wore out (nothing taken apart at this time).
    IMG_1243_zps1rq6ee3g_50cb0183f9d73c2a2b7a929704991c12a9e67bfd.jpg
    IMG_1250_zpsynagokdd_aa3dbdd7ec29ed180725b647ad82e247212509b6.jpg
    IMG_1254_zpsdacknfei_786811b9a7702699bddb03f76bea0fac4fab7f06.jpg

    You probably dont have to tak everything apart like me, I just did it for easement. Started with underneath the truck, unlinking the linkage.
    I took it apart from here. Just be sure to put it back on in the exact spot if taking apart from here.
    IMG_1256_zpsuktn1bfs_9b46c6f9d0c62934f5ed1d5793a641f1f4b1ba4d.jpg
    IMG_1276_zpsyj8yohfx_fe67234ca32641d60ec15660ea8a481ab8064bae.jpg

    Took the wiring apart and shifter.
    IMG_1267_zpsmpi96owe_50cdd62929f0ba656f5b09ad89aab9e88928b15b.jpg
    IMG_1268_zpsfcuqcpsw_c57537ed8156b008b69c8ea84a2a5fc41478b34d.jpg
    IMG_1269_zpseol4l2li_87b5b48eeeb0c9cbe8c6044fb18b8d4a40e3b730.jpg
    IMG_1274_zpsjklayv39_d12f41c324d6f63e05543ec35f033eee1ba845cf.jpg
    IMG_1275_zpsiskwwmog_550e8f58b2b7656961c27b367873fb8757707f1f.jpg
    IMG_1277_zpsjhx43uwg_3892ae3bf77123acf87d45d248f4b6619ebb1353.jpg
    IMG_1278_zpsnpzitzpm_0cc0cd3d7a8360203a576e41bc661dd1526b2520.jpg

    The lower bushings literally disintegrated.
    IMG_1279_zpschbdy3v2_48ab1fab9a55b14fbc292f67683618c6c8552f39.jpg

    Upper bushings looked alright compared to the new ones.
    IMG_1273_zps7mesjocv_be80f85992e73ab8400363fde8c382d0df454e48.jpg

    Bushings installed, they are not pressed in tight so they just slip right off. I also lubed up the bolts.
    IMG_1281_zpsjejgriy9_e17ce1b700d6f8d88ca7985b8ae512ab2f614e8e.jpg
    IMG_1282_zpso7fx26if_b7c9e623e9c5166caa1545e3695636f5f9c2d6ce.jpg

    So this small little metal spring fell off. took me a little while to figure out what it went to and how it worked.
    IMG_1283_zpsjlrnggft_8aca5f680f4e62ac0903ae723d3ee9cb0bb73c07.jpg

    It goes to this.
    IMG_1284_zpsguspl9lj_bab3fd09aaceadc292b7f3f20ab1b93c20129729.jpg

    How it goes on.
    IMG_1287_zpsuvyqdrjq_f4692179e569845efbe187026eb6a3b6e9e1f842.jpg

    Never knew what this was for, but now I do. when this is pressed towards the rear of the truck, the lever its attached to presses in a "button" which allows you to shift into gear without the key in the on position and brake pressed in.
    IMG_1293_zpsxmvnm1cv_ae0aa13515a69397f564ae66868c876730716df7.jpg

    here is the "button"
    IMG_1289_zpso1qjxo6v_4fd6df200ece2a64626d9432e98f2ad20755c175.jpg
    IMG_1291_zpsmopzifay_58dea301aa2dc0614d55f62830f87bb3f8be7f57.jpg

    When you press the lever it contacts with the "button" and presses it. The spring just forces the lever to stay away from the "button"
    IMG_1292_zps6c8ptlqn_69ab11751269d355f00ff041781fe9ad89595fe6.jpg

    Everything back together.
    IMG_1294_zpsmp1tqfmo_b570bff47fd59552b8e62fb0a330c914eef79d99.jpg
    IMG_1295_zpskfi2n449_86ab2cd7b8a131cc41c99d34584df2b60c2130f5.jpg[/URL

    Shifter feels brand new. All I have for now and I think thats it for fixing any problems and maintenance this truck had.
     
    Jon G likes this.
  5. Jan 23, 2017 at 8:05 PM
    #5
    1HItaco

    1HItaco Well-Known Member

    Joined:
    Apr 19, 2016
    Member:
    #184685
    Messages:
    198
    Gender:
    Male
    what is the part numbers for the new bushings for the automatic transmission shift lever?

    did you change all the bushings? do you remember what the part numbers were for all the bushings?

    need to replace all the bushings on my shifter as well.

    thanks
     
  6. Feb 16, 2017 at 12:17 PM
    #6
    Jon G

    Jon G Hoarding Tacomas one at a time,

    Joined:
    Jan 25, 2017
    Member:
    #208594
    Messages:
    1,851
    Gender:
    Male
    First Name:
    Jon
    St John's Newfoundland Canada
    Vehicle:
    02, 04 & 07 Tacoma
    Magnaflow 2.5 Catback Exhaust K&N filter
    I am in
     
  7. Feb 16, 2017 at 12:31 PM
    #7
    ruffbytes

    ruffbytes Member

    Joined:
    Jun 23, 2016
    Member:
    #190393
    Messages:
    15
    Gender:
    Male
    First Name:
    Dan
    None
    Nice write ups! Keep 'em, coming!
     
  8. May 23, 2017 at 8:05 AM
    #8
    JamesW4554

    JamesW4554 Active Member

    Joined:
    Mar 6, 2017
    Member:
    #212471
    Messages:
    26
    Gender:
    Male
    First Name:
    James
    brunswick ga
    Vehicle:
    2001 doublecab Tacoma black
    You wouldn't happen to know the inside and outside diameter of the shifter bushings? I can machine them at work if I know the dimensions.
     

Products Discussed in

To Top