1. Welcome to Tacoma World!

    You are currently viewing as a guest! To get full-access, you need to register for a FREE account.

    As a registered member, you’ll be able to:
    • Participate in all Tacoma discussion topics
    • Communicate privately with other Tacoma owners from around the world
    • Post your own photos in our Members Gallery
    • Access all special features of the site

Another Copy/Paste build, Now with LS swap and new frame

Discussion in '2nd Gen. Builds (2005-2015)' started by WormSquirts, Aug 24, 2016.

  1. Aug 24, 2016 at 11:36 PM
    #1
    WormSquirts

    WormSquirts [OP] Armageddon

    Joined:
    Dec 18, 2015
    Member:
    #172583
    Messages:
    2,485
    First Name:
    Braeden
    BC
    Check last page for newest updates on cage, LS swap, trailing arms, 40s, etc.

    IMG_5165.jpg
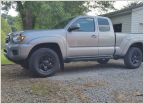
    2006 Tacoma, used for camping and driving and stuff. (Many more pics on Instagram @overlandoutfitters)

    Walk around video here PRE-REBUILD


    20210103-IMG_5882.jpg

    EDIT: none of the following applies anymore.

    Armor:

    -Pelfreybilt Aluminum front
    -Pelfreybilt HighClearance rear
    -Home Made sliders

    Electrical:

    -2x Odyssey AGM's relocated to cab
    -BlueSea 12 fuse block
    -Ultragauge
    -Sony XAV-100AX headunit

    Lighting:

    -RI SR20 lightbar
    -RI amber flood duallies
    -RI SR-Q flush reverse lights
    -KC Cyclone rock lights

    Steering/Suspension:

    -JD SUA real long travel kit
    -Deaver H70HD
    -Custom Bed Cage
    -16" IBP smoothie Kings
    -8" coilovers kings
    -JD Fabrication +2.25" kit
    -JD Fabrication LCA Pivot Relocation
    -King 2x2.0 bumps rear and 1x2.0 front bumps
    -Howe steering pump/resi/cooler
    -JD slide rack

    Drivetrain:

    -nitro 4.88 gears
    -arb lockers front and rear
    -JD Fab 934 CV Conversion
    -Custom Driveshaft with double cardan joint.

    Wheels/Tires:

    -Black Rhino Riot Beadlock
    -Nitto Ridge Grappler 37x12.5R17

    Camping:

    -ikamper mini
    -Tepui 4ft awning off the prinsu
    -ARB Fridge

    Misc:

    -arb twin compressor
    -viair 2.5g tank
    -Prinsu CabRack
    -Hood swap (scoops are lame)
    -Replace the 40 split rear seat with fridge platform
    - @At The Helm bed stiffener gussets
    -SS extended brake lines
    -energy poly cab bushings
    -Amazon heated seats
    -Clazzio seat covers
    -Weathertech floormats


    IMG_0677.jpg
    IMG_4869.jpg
     
    Last edited: Apr 23, 2023
    essjay, Ricardo13x, Squirt and 18 others like this.
  2. Aug 24, 2016 at 11:37 PM
    #2
    WormSquirts

    WormSquirts [OP] Armageddon

    Joined:
    Dec 18, 2015
    Member:
    #172583
    Messages:
    2,485
    First Name:
    Braeden
    BC
    Pics! Will try to keep at least a few up to date ones in here!
    20201228-IMG_5682.jpg 20210102-IMG_5828.jpg [​IMG] [​IMG]
    IMG_0503.jpg
    2D6A1412.jpg
    2D6A3193.jpg
    0Q0A9516.jpg 0Q0A9436.jpg 0Q0A9223.jpg 0Q0A9427.jpg
    2017-01-28 12.14.27 1.jpg IMG_20170127_190550_806.jpg IMG_20161220_191742_412.jpg 2016-08-27 09.28.35 1.jpg 2016-08-27 09.28.36 1.jpg 2016-08-27 09.28.39 1.jpg
     

    Attached Files:

    Last edited: Jan 4, 2021
    MY50cal, Kefka, Road_Warrior and 24 others like this.
  3. Aug 24, 2016 at 11:37 PM
    #3
    WormSquirts

    WormSquirts [OP] Armageddon

    Joined:
    Dec 18, 2015
    Member:
    #172583
    Messages:
    2,485
    First Name:
    Braeden
    BC
    I always see people saving spots in their build thread and I'm a sheep.
     
    Last edited: Dec 6, 2017
    boston23, Bocsy44 and ChadsPride like this.
  4. Aug 24, 2016 at 11:39 PM
    #4
    BLaPointe

    BLaPointe Well-Known Member

    Joined:
    Apr 10, 2015
    Member:
    #152891
    Messages:
    153
    Gender:
    Male
    First Name:
    Brandon
    Fairbanks, AK
    Vehicle:
    15 TRD Off-Road, White
    I'll sell you this spot for a dollar...

    Jk, excited to see what comes of the build!!
     
  5. Aug 24, 2016 at 11:46 PM
    #5
    WormSquirts

    WormSquirts [OP] Armageddon

    Joined:
    Dec 18, 2015
    Member:
    #172583
    Messages:
    2,485
    First Name:
    Braeden
    BC
    haha is that a US dollar or Canadian?
     
    Bocsy44 likes this.
  6. Aug 25, 2016 at 12:28 AM
    #6
    BLaPointe

    BLaPointe Well-Known Member

    Joined:
    Apr 10, 2015
    Member:
    #152891
    Messages:
    153
    Gender:
    Male
    First Name:
    Brandon
    Fairbanks, AK
    Vehicle:
    15 TRD Off-Road, White
    Haha I'm gonna have to stick to good old USD! However I'll be driving from Alaska through Canada into Montana then to New Hampshire so that Canadian dollar would be useful to eventually!
     
  7. Aug 25, 2016 at 1:06 AM
    #7
    SixthSnail

    SixthSnail I have no idea what I'm doing

    Joined:
    Oct 3, 2014
    Member:
    #139599
    Messages:
    13,291
    Gender:
    Male
    First Name:
    Matt
    Los Angeles
    Vehicle:
    '14 Tacoma Sport
    See Build in Sig
    Subs! Good luck!
     
    WormSquirts[OP] likes this.
  8. Aug 25, 2016 at 8:55 AM
    #8
    WormSquirts

    WormSquirts [OP] Armageddon

    Joined:
    Dec 18, 2015
    Member:
    #172583
    Messages:
    2,485
    First Name:
    Braeden
    BC

    Sounds like an awesome trip [to rent a roof top tent on]!

    I'll give you a dollar off :p
     
  9. Aug 25, 2016 at 9:10 AM
    #9
    WormSquirts

    WormSquirts [OP] Armageddon

    Joined:
    Dec 18, 2015
    Member:
    #172583
    Messages:
    2,485
    First Name:
    Braeden
    BC
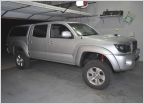
    So the first real mod that was actually aesthetically noticeable was wheels and tires, then shortly after, the lift!

    I went with 265/75r16 because I really wanted to put them on asap, and not wait until I could get a lift on. Glad I did though because I later found out that my LCA cam bushings are seized and any bigger would have rubbed baaaaad. Once I get around to fixing that, I'll likely go up to 255/85r16!

    The lift is your standard ome setup with Dakar's out back and 887x springs up front. I'm not sure if I would go 886 in retrospect or not to be honest! Would be nice to keep a bit more lift, but the ride is good as it is. I also put on spc lr uca's while I was at it. And with the seized cams, they were what enabled me to get aligned in spec, so that saved a lot of headache!

    This is prelift
    IMAG0227.jpg

    And this is post lift
    IMAG0272.jpg

    Unfortunately I've definitely lost some lift since then after it broke in, then adding bumpers etc.

    No rubbing on the passenger side, but my cam issue on the driver's side gives me a bit of rub when turned and compressed.
     
    Squirt and tacoma16 like this.
  10. Sep 8, 2016 at 10:34 PM
    #10
    WormSquirts

    WormSquirts [OP] Armageddon

    Joined:
    Dec 18, 2015
    Member:
    #172583
    Messages:
    2,485
    First Name:
    Braeden
    BC
    I'm sitting in an airport on a layover making my way to Texas to finish my firefighting schooling, so what better time to post up something!

    I think next up came my sliders. My friend and I designed and welded these up from scratch.
    IMAG0287.jpg

    We didn't have access to a tube bender, so decided to make these a little more vicious looking than you may be used to! We went overkill with 2" DOM tubing. Dclb needs all the support she can get!

    IMAG0286.jpg

    From there we fabbed up some brackets and gussets to bolt these to the frame. Welded some nutss to plate as a giant washer. Used existing holes on the frame, and just drilled through the bottom. I will have to get some better pictures of that when I get home!

    I used my hilift to test it, and I can lift both side wheels off the ground with minimal deflection!

    Here's a pic painted and mounted. I will try to get some better ones of that too when I'm home! This project took a while to complete due to our schedules, so I actually got my bumpers on before we finished them haha
    IMAG0286.jpg
     
    3pooches, fasteddieyj and Phoosa like this.
  11. Sep 8, 2016 at 10:46 PM
    #11
    WormSquirts

    WormSquirts [OP] Armageddon

    Joined:
    Dec 18, 2015
    Member:
    #172583
    Messages:
    2,485
    First Name:
    Braeden
    BC
    I might as well post a few pics of the bumper install while I'm at it! @Pelfreybilt did great getting these to me despite an insane winter for them both in business and personally.

    I got the aluminum front because I'm not trying g to pretend I'm a rock crawler. The weight savings and better approach angle and winch mount ability is enough. And obviously aluminum or not, it's better than plastic!

    I have a Smittybilt xrc 9.5 winch, rigid sr20 and amber duallies in the front

    Mounted up very easily with the help of a couple friends!
    IMAG0236.jpg

    The rear hc was a little scarier to do! Threw the rigid srq lights in there

    If you have a forklift....
    IMAG0237.jpg
    IMAG0238.jpg

    All installed and next to my friends extra sick taco
    IMAG0241.jpg
    IMAG0239.jpg
     
    Last edited: Nov 19, 2016
    Squirt and Bocsy44 like this.
  12. Nov 19, 2016 at 9:31 PM
    #12
    WormSquirts

    WormSquirts [OP] Armageddon

    Joined:
    Dec 18, 2015
    Member:
    #172583
    Messages:
    2,485
    First Name:
    Braeden
    BC
    So this is a bit out of order, but I just recently built some bed mounts using the method found in the excellent DIY thread HERE

    you can also see that I decided to tackle putting lights into the bed. I decided to do two strips velcroed to the carpet lining, as well as one strip along the bottom edge of the rear glass, to light up the tailgate when cooking etc. works great! I put them on two separate switches which I installed in the hinge part of the canopy. I looked a long time for a good spot, and this seems the best (though not necessarily the cleanest, wiring wise) because they are easily accessible from either outside or inside the bed and with the hatch open or closed.
    IMG_0881.jpg
    IMG_0886.jpg
    IMG_0885.jpg

    I also figured I'd throw in a pic of my current fridge set up with the Indel-B 50L model. I took out the 40 split rear seat, wired a 12v socket into the storage area that is behind the seat to plug the fridge into, and made a very very simple platform to mount it on. I lack carpentry skills... But it has served us well in this spot, and leaves sort of 2 seats in the back, which can come in handy! The only problem with this spot is that the door doesn't quite open all the way, so you have to hold it open while looking inside, which can get annoying. I'm trying to devise a way to either hold the door open, or add a strut that would hold it up.

    IMG_0888.jpg
     
    DavesTaco68 likes this.
  13. Jan 9, 2017 at 8:33 PM
    #13
    WormSquirts

    WormSquirts [OP] Armageddon

    Joined:
    Dec 18, 2015
    Member:
    #172583
    Messages:
    2,485
    First Name:
    Braeden
    BC
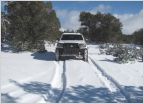
    been a while, so thought i would add a pic from a winter excursion in the snow from a couple weeks ago!

    IMG_20161220_191742_412.jpg
     
    Pirhett likes this.
  14. Jan 14, 2017 at 1:31 PM
    #14
    R09ster

    R09ster Well-Known Member

    Joined:
    Apr 6, 2013
    Member:
    #101482
    Messages:
    621
    Gender:
    Male
    First Name:
    Josh
    OK
    Vehicle:
    06 SSM DCSB TRD Sport
    debadged, Bilstein 5100 all around (fronts at 1.75" sport coils), Skyjacker softride 1.5" AAL, Firestone Ride Right Airbags, 17X8.5 Method NVs, 285/70/r17 Falken Wildpeak AT3W, US Offroad hidden winch mount, grillcraft grill, Sypder Auto projector headlights, blackedout LED taillights, bed extender, bedrack w/CVT Mt Shasta tent,
    Digging the SWB.
     
    WormSquirts[OP] likes this.
  15. Jan 15, 2017 at 3:28 PM
    #15
    WormSquirts

    WormSquirts [OP] Armageddon

    Joined:
    Dec 18, 2015
    Member:
    #172583
    Messages:
    2,485
    First Name:
    Braeden
    BC
    Thanks man! When I got the truck I just took what I could get for a good deal, but now I really like it!
     
  16. Jan 26, 2017 at 11:23 PM
    #16
    tacorgidor

    tacorgidor I4C4LO

    Joined:
    Nov 15, 2014
    Member:
    #142419
    Messages:
    1,054
    Gender:
    Male
    SoCal - LA area
    Vehicle:
    '15 MGM DCLB 4X4
    Billie 5100's all around, 885's, Dakars, Wet Okole front seat covers, Weather Tech mats front and rear, NFab nerf bars, front mud flaps removed, hoseclamp tailgate mod, front badge color match, cb antennae mount in a bed cleat, 4' Wilson antennae, salex console organizer, led's in map and dome lights, plasti dip all badges black, bedside stickers removed, OEM exhaust tip, plastidip hood scoop black, bed rail mounted military can, maglite seat mount mod, TRD shift knob, OEM bed mat, bottle opener bed mod, window tint on fronts, uniden 520xl cb, Redline hood struts, OEM front skid plate(silver),RuggedT bedside decals, Yakima cross bars and Yakima Load Warrior basket, cali raised amber pod, cali raised 31" light bar in lower valence, painted engine cover, 7 pin relocate. Blue sea fuse box, Softopper black. Shmelfab sliders
    Great build bro, that is one sweet trail limo!! Wheel and tire combo look great. Jealous you get to explore BC. I love it up there, Van and Squamish and i've driven over to Jasper too. Outdoor activity heaven up there. Keep the photos and stories going!
     
    WormSquirts[OP] likes this.
  17. Jan 27, 2017 at 12:00 PM
    #17
    WormSquirts

    WormSquirts [OP] Armageddon

    Joined:
    Dec 18, 2015
    Member:
    #172583
    Messages:
    2,485
    First Name:
    Braeden
    BC
    Wow thanks! Yeah I am always on awe about how beautiful this place is. My wife and I have been really wanting to head down your way though! I've yet to explore California outside of Disney Land!

    My plan is to work way harder this year at keeping this thread updated and writing more about our trips and the mods I do! So thanks so much for the encouragement!
     
  18. Jan 28, 2017 at 12:34 AM
    #18
    WormSquirts

    WormSquirts [OP] Armageddon

    Joined:
    Dec 18, 2015
    Member:
    #172583
    Messages:
    2,485
    First Name:
    Braeden
    BC
    Okay, very lame mod, but it works awesome;

    Interior LED's!!!

    I went with a regular white driver map light, a red passenger map light, and I got an adapter to make the dome light have a tonne of LED's in it, and it is super bright! I'm really pleased with it!

    I decided to go with a red passenger map light because I found that when my wife is using the map for navigating, I really hate having her light on driving back roads at night. I'm hoping the red makes a big difference for that! I figured that if I ever need the driver map light, I'll be stopped, so white would be better. I'm not sure if I should have gone red for both or not though... it's cheap and easy though, so i can always switch it later. There is a local guy who I get all of my LEDs from and he sells them for the best price I can find anywhere (even online).

    I know these are shot in the day, which isn't super helpful, but it really shows how bright these are. I do want to get some night shots, but didn't have time today.

    20170127_165218.jpg 20170127_165240.jpg 20170127_165254.jpg
     
    ohcaltexscar likes this.
  19. Jan 28, 2017 at 1:16 AM
    #19
    WormSquirts

    WormSquirts [OP] Armageddon

    Joined:
    Dec 18, 2015
    Member:
    #172583
    Messages:
    2,485
    First Name:
    Braeden
    BC
    I wanted to share some pics of a recent trip my friend and I took for just 1 night in the snow and cold. Turned out this would likely be the last real snow trip of the winter (unless we get another crazy snow storm out of nowhere!), as well as the first camping trip of 2017!

    It was just the two of us, my Tacoma, and his stock 100 series Land Cruiser. We only had the weekend, so we decided to stay closer to home. Nahatlatch seemed like a perfect destination within a 4 hour drive from us, so we set off late saturday morning, after taking some time to do a few last minute things on our vehicles.
    Screen Shot 2017-01-28 at 1.03.56 AM.jpg

    We both had just bought our new HAM handheld radios, and were so stoked to be able to actually communicate. It makes such a difference! suddenly you're not just driving by yourself, but actually feel like a team. We had an uneventful drive up to Boston bar, thought it was my friend's first time heading north that way, and the Fraser Canyon is an extraordinary piece of highway. We turned off before some of the best bits, but he still really enjoyed it.

    Crossing the Fraser River at Boston Bar, we started driving down the backroads. Here is where the snow started! We aired down where the snow stopped being hard pack, and was more tracked from sleds than vehicles.
    IMG_0976.jpg

    We met a couple guys on sleds who said that there had been no vehicles other than sleds past a point just about a kilometer up the road. They said that the snow got pretty deep past there, and we probably wouldn't make it very far. We decided to just press on as far as we could before setting up camp for the night.

    it wasn't long before we hit... UNLIMITED.... POOOWDEEEEER!!! (that is a StarWars reference if you're confused...)
    IMG_20170127_190550_806.jpg
    IMG_1000.jpg

    We passed where there were a few vehicles parked, and hit the road where it was obvious only sleds had been. I was expecting to get stuck right away, but the super crisp cold snap we had been having for the last couple weeks had turned the snow to a really light, fine champagne powder. We were able to mash through it with relative ease, and it made for some really really fun driving! I took the lead to blast some tracks from my friend's stocker.

    We made it as far as about halfway up the third lake before I was starting to struggle moving uphill. reversing to get momentum to plow trail every five feet got old pretty quick. We decided to turn around and head back to a beautiful spot we had seen a little ways back. We set up camp, lit up a fire, and got to staying warm! I had my chainsaw, so found some deadfall that was in decent shape under the snow and bucked it up. once the sun fell, we watched the temperature drop from about -7C to -18C before we stopped caring. Not arctic cold, but cold enough to make your boogers freeze!
    2017-01-27 06.54.41 1.jpg

    Before going to sleep we decided to warm ourselves and our sleeping bags up in my friend's LC100 and watched some of the LOTR return of the king in the dash touch-screen... for a 2001 the 100 had some crazy tech!!

    I decided not to bring my RTT just because I was sleeping solo and didn't feel like putting it on just for such a short trip. mattress in the back was just fine for the (frigid) night.

    I walked out onto the ice a ways and got a shot of the sun setting on a beautiful untouched frozen lake.
    IMG_1027.jpg IMG_1032.jpg some animal tracks on the lake

    Next day we ate some yogurt and granola, packed up, and drove home! blasting through the snow was so much fun getting wild! We explored a few more turn offs etc before getting back to the main road and airing up. Got to use my new compressor (write up coming) for the first time which was very exciting!

    It was a quick trip with just the two of us, but was just incredible to get out in such awesome snow and freeze our butts off. It's always good to escape the city, even if it's just for one night.

    I'll just leave a few more pics here! =]

    2017-01-27 06.54.42 1.jpg 2017-01-28 12.14.27 1.jpg IMG_0990.jpg IMG_1017.jpg
     
    Last edited: Jan 28, 2017
  20. Feb 22, 2017 at 10:41 AM
    #20
    WormSquirts

    WormSquirts [OP] Armageddon

    Joined:
    Dec 18, 2015
    Member:
    #172583
    Messages:
    2,485
    First Name:
    Braeden
    BC
    Original Thread: https://www.tacomaworld.com/threads/cheap-diy-shell-roof-rack.476955/

    A while ago, I needed to put a roof rack on my rack-less Leer 100xq canopy. I wanted a system that used tracks, and a rack that slides in them, rather than hard mounted towers. I checked out all the usual suspects, Thule, Yakima, etc. and found that just the tracks cost around $250 (CAD) and then the towers, cross bars, and locks were an additional $600 or so. There's no way I could spend that kind of money, so I decided to go a different direction.

    I headed over to the Pick n Pull, and searched around looking for anything that might work. What I found was a very large number of Ford Windstar minivans with stock roof racks on them! The crossbars themselves are basically useless for anything more than maybe 1 ski, but the tracks they slide in are absolutely perfect. Five bolts each to remove them, $10, and I was out the door!

    Cleaned them up, and they were the exact right length for my Long Bed.

    To install, I measured them to be about equal front to back. I discovered that the canopy isn't straight, but sort of tapered towards the back, so I measured across to make sure the tracks would remain parallel to each other, so I could slide my rack up and down as needed. I drilled through the canopy and used 1/4" bolts, fender washers, nylock nuts and silicone to bolt them on and make sure there were no leaks.

    BONUS: As a little side note, I used longer bolts than I would need for mounting the tracks to the cap, so that I would have extra threads on the inside of the canopy. These I used to bolt up some cheap stretchy netting on the inside so I could throw blankets or sleeping mats or whatever light thing you can think of up on the top out of the way. Netting: https://www.amazon.ca/gp/product/B011ARI7TC/ref=oh_aui_detailpage_o00_s00?ie=UTF8&psc=1 I just used fender washers and wingnuts to attach it!

    [​IMG]

    From here, you can just buy regular Thule or Yakima towers and crossbars, and call it a day knowing you saved yourself about $240. I decided to carry on and build my own rack as well. The reason was I wanted the rack to be as low profile as possible for my roof top tent. The bought racks generally end up being about 5-6" high, and that wasn't going to work for me. That and I didn't really want to spend $600 bucks.

    So, with the tracks complete, I moved on to the rack itself. I bought 10' of 1" square tubing, and had some 1" flat bar lying around. All in all I think I spent about $80 on steel and bolts etc. For this part, I'm sorry I don't have many good pictures.

    I cut 8 sections of flat bar 3" long. I did have to grind them down just slightly narrower to slide easily in the tracks.

    Taking 8 - 5/16x1" bolts, I cut the heads off. I then drilled 2 - 5/16" holes through all of the pieces of flat bar, about 1/4" in from each end. Taking 4 of these pieces, I welded my studs into the holes so I had 4 pieces with 2 studs each, something like this: _||____||_ . These would be what slide in to the tracks.

    [​IMG]

    I then built the rack part using the 1" square tubing. These you can make as wide or narrow as you want. I ended up going with 56" wide so I would have some more mounting options even with the RTT on. You can also go as high or low as you want. I went with towers 1.5" tall (2.5" from the track to the top of the crossbar, or 3" from the canopy to the top of the crossbar). I decided on this height to accommodate for the cab of the truck. I don't know if AC are the same, but my DC raises up a bit towards the front. I wanted to be able to put long things on my rack, with out it hitting the roof. However, I also wanted the rack to be as low as possible. This is the height I settled on, but your mileage may vary. This 1" steel square tubing is quite strong. I propped it up on either end and stood my 180lbs in the middle, and we couldn't see any deflection at all.

    From here, the rack was a simple matter of welding the tubing together with 2 supports per cross bar, and the remaining 4 pieces of flat bar with holes in them as feet on each upright. Paint or powder coat or whatever you want to do (I spray painted), then finish off the rack with 4 end caps from Home Depot to give it a nice clean look.

    Now you can slide the four pieces with the studs into the tracks. Take your crossbars and line up the feet with the slides, and use 8 nuts to bolt them down, squeezing the tracks in between the 2 pieces of flat bar.

    And for a grand total of $100, and a few hours of time, you're done! I've now been using this set up for about 8 months, and have done hundreds and hundreds of km's of nasty dirt roads with my RTT on, and had no problems what-so-ever. Also, I will admit that I once forgot that I had the RTT on, and drove into an underground parking. That is A) a mistake I will never make again B) really super embarrassing, and C) a testament to the strength of the rack and canopy set up!

    If you have any other questions, let me know and I can grab more measurements or pictures!


    [​IMG]
    (I'm not sure why my third brake light looks blacked out, but it's not...
    [​IMG]
     
    Jgheck, tacorgidor and Pirhett like this.

Products Discussed in

To Top