1. Welcome to Tacoma World!

    You are currently viewing as a guest! To get full-access, you need to register for a FREE account.

    As a registered member, you’ll be able to:
    • Participate in all Tacoma discussion topics
    • Communicate privately with other Tacoma owners from around the world
    • Post your own photos in our Members Gallery
    • Access all special features of the site

Any tips on removing the bank 1 sensor 1 o2 sensor?

Discussion in '2nd Gen. Tacomas (2005-2015)' started by KickAss, Aug 10, 2024.

  1. Aug 10, 2024 at 7:01 PM
    #1
    KickAss

    KickAss [OP] Well-Known Member

    Joined:
    Jul 7, 2008
    Member:
    #7789
    Messages:
    255
    Gender:
    Male
    First Name:
    Chuck
    Florida
    Vehicle:
    2015 Limited 4x4 DCLB
    Big body sittin on chrome
    Hey guys,
    I've fished around for awhile here but couldn't find anything specific,,,,
    so,
    Any tips on removing the bank 1 sensor 1 o2 sensor? some way to get to it or how you did it, and then find the connector after it's installed.
    Got the Denso part, just having a hell of a time trying to get to and break it free,, it's soaking in PB Blaster now
    Any help is appreciated.
    Thanks
     
  2. Aug 10, 2024 at 7:16 PM
    #2
    TnShooter

    TnShooter The TacomaWorld Stray

    Joined:
    Sep 2, 2010
    Member:
    #42625
    Messages:
    21,068
    Gender:
    Male
    First Name:
    Deogee
    Vehicle:
    07' TRD Off-Road, Auto
    STOCK
    Will removing the front wheel and going through the fender well help?
     
    KickAss[OP] likes this.
  3. Aug 10, 2024 at 7:32 PM
    #3
    KickAss

    KickAss [OP] Well-Known Member

    Joined:
    Jul 7, 2008
    Member:
    #7789
    Messages:
    255
    Gender:
    Male
    First Name:
    Chuck
    Florida
    Vehicle:
    2015 Limited 4x4 DCLB
    Big body sittin on chrome
    Hmmm,,, didn't think of that, I will check first thing in the morning. Thanks TnShooter
     
  4. Aug 10, 2024 at 7:33 PM
    #4
    Bishop84

    Bishop84 Well-Known Member

    Joined:
    Dec 17, 2015
    Member:
    #172494
    Messages:
    11,882
    Gender:
    Male
    Through the fender.

    If its really hard, cut the wire and use a deep 22mm socket as a fail safe removal.
     
    TnShooter and KickAss[OP] like this.
  5. Aug 10, 2024 at 9:44 PM
    #5
    lynlan1819

    lynlan1819 Well-Known Member

    Joined:
    Mar 14, 2016
    Member:
    #181268
    Messages:
    6,539
    Gender:
    Male
    First Name:
    Tacoma
    Lifted
    Yeap this ^
     
  6. Aug 11, 2024 at 4:56 AM
    #6
    KickAss

    KickAss [OP] Well-Known Member

    Joined:
    Jul 7, 2008
    Member:
    #7789
    Messages:
    255
    Gender:
    Male
    First Name:
    Chuck
    Florida
    Vehicle:
    2015 Limited 4x4 DCLB
    Big body sittin on chrome
    I like it, thanks man!

    Thanks guys,,, gonna get on it this morning, I'll report back, again,, thanks so much!
     
    TnShooter likes this.
  7. Aug 11, 2024 at 10:45 AM
    #7
    KickAss

    KickAss [OP] Well-Known Member

    Joined:
    Jul 7, 2008
    Member:
    #7789
    Messages:
    255
    Gender:
    Male
    First Name:
    Chuck
    Florida
    Vehicle:
    2015 Limited 4x4 DCLB
    Big body sittin on chrome
    Got it!
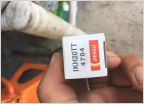
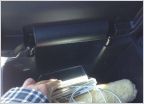
    That worked,,, turned the wheel, jacked it up, removed wheel, was able to get to it with that special socket and a long extension bar connected to my impact driver and off she came! PB Blaster helped overnight I'm sure, but it worked, wasn't easy and the plug was a pita also.
    Thanks again! Here's a pic of the socket if it helps someone else. :cheers:

    thumbnail_IMG_0012.jpg
     
  8. Aug 11, 2024 at 11:00 AM
    #8
    TacoTuesday1

    TacoTuesday1 Well-Known Member

    Joined:
    Jun 19, 2019
    Member:
    #296781
    Messages:
    7,747
    Gender:
    Male
    FL
    I did mine from the top laying accross the engine bay

    soaked in AeroKroil which is hard to find for a good price
    And MAP gas
     

Products Discussed in

To Top