1. Welcome to Tacoma World!

    You are currently viewing as a guest! To get full-access, you need to register for a FREE account.

    As a registered member, you’ll be able to:
    • Participate in all Tacoma discussion topics
    • Communicate privately with other Tacoma owners from around the world
    • Post your own photos in our Members Gallery
    • Access all special features of the site
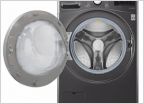
Any woodworkers?

Discussion in 'Garage / Workshop' started by Forster46, Mar 31, 2013.

  1. Nov 3, 2024 at 11:09 AM
    dfanonymous

    dfanonymous Well-Known Member

    Joined:
    Apr 9, 2019
    Member:
    #289657
    Messages:
    1,633
    Gender:
    Male
    Vehicle:
    2019 Voodoo Blue Tacoma TRD Pro.
    -Shmellfab rocksliders.... -BD ditch lights -Cali raised ditch light brackets -Sway bar discos -Auxbeam aux 6 gang -Uptop Bravo -Rci trans skid -Rci cat guards -Trd pro eibach lift springs -Hypertech speedo calibrator Etc.
  2. Nov 3, 2024 at 3:22 PM
    Tiny's Taco

    Tiny's Taco The Wanderer

    Joined:
    Apr 6, 2019
    Member:
    #289265
    Messages:
    5,795
    Gender:
    Male
    Shenandoah Valley
    Vehicle:
    2018 Inferno TRD Sport
    That's a horrible idea. What time?
    The top is now banded with sapeli and walnut. Belt sander with 120 and orbital with 80. Focused on the bottom getting some fill practice. Threw a coat of finishing paste on the bottom for a preview of the top. Hickory really came to life.
    20241103_172436.jpg
     
    wilcam47 and DoubleB like this.
  3. Nov 6, 2024 at 12:50 PM
    Tiny's Taco

    Tiny's Taco The Wanderer

    Joined:
    Apr 6, 2019
    Member:
    #289265
    Messages:
    5,795
    Gender:
    Male
    Shenandoah Valley
    Vehicle:
    2018 Inferno TRD Sport
    That's a horrible idea. What time?
    Sanding in progress. Currently at 180 with 400 being the goal. Water popping started at 120.

    I saw a comment somewhere else when researching finishes about a guy who doesn't "allow" sapwood in his projects. I'm not sure I'd like this without it.

    Question. I'm deciding between tung oil and BLO. I like the BLO option because the cure time is shorter, but I've read that it adds a yellow sheen or tint like a varnish would. Any thoughts or good combinations you guys have used and really liked?

    upload_2024-11-6_15-50-7.jpg
     
    Last edited: Nov 6, 2024
    wilcam47 likes this.
  4. Nov 6, 2024 at 2:26 PM
    RichochetRabbit

    RichochetRabbit Ping Ping Ping

    Joined:
    Mar 6, 2023
    Member:
    #419488
    Messages:
    5,884
    @woodtickgreg
     
    wilcam47 likes this.
  5. Nov 6, 2024 at 3:21 PM
    woodtickgreg

    woodtickgreg Well-Known Member

    Joined:
    Jun 10, 2021
    Member:
    #368186
    Messages:
    3,223
    Gender:
    Male
    First Name:
    Greg
    Michigan
    Personally I like sapwood. Any oil wether it be tung or blo will darken the wood up somewhat. I don't know if I would call it yellow. I do like blo but like any oil finish it takes a long time to cure, about a week between coats. Wipe on, let sit for awhile and then wipe off the excess, let cure and repeat until the wood no longer absorbs oil. I finish it up with a blo and wax blend, very warm and not plasticy looking and very easy to touch up and top coat from time to time. And from a fire safety stand point be sure to lay the rags spread out and flat. Blo is very likely to spontaneously combust and start a fire.
     
    308savage likes this.
  6. Nov 6, 2024 at 5:41 PM
    Tiny's Taco

    Tiny's Taco The Wanderer

    Joined:
    Apr 6, 2019
    Member:
    #289265
    Messages:
    5,795
    Gender:
    Male
    Shenandoah Valley
    Vehicle:
    2018 Inferno TRD Sport
    That's a horrible idea. What time?
    Thanks for the info. I'm going to have to get a small bottle of them and see what it does on a sample. I'm not sure I want to darken it, more of a wet look.

    And the rags, very aware. Bourbon Moth Woodworker did a study on it after his friends shop burned down. He had some surprising results in the various tests he set up.

    https://youtu.be/3Gqi2cNCKQY
     
  7. Nov 6, 2024 at 5:58 PM
    woodtickgreg

    woodtickgreg Well-Known Member

    Joined:
    Jun 10, 2021
    Member:
    #368186
    Messages:
    3,223
    Gender:
    Male
    First Name:
    Greg
    Michigan
    Another option is water based polyurethane, it dries absolutely clear. And you can get several coats on in a day as it dries really fast. It looks like skim milk when you apply it and it turns clear when it's dry. Offers good protection. If you want it shiney choose gloss. Also it's not flammable and very low odor. Cleans up with warm water.
     
    Tiny's Taco likes this.
  8. Nov 6, 2024 at 7:01 PM
    wilcam47

    wilcam47 Keep on keeping on!

    Joined:
    Jan 27, 2016
    Member:
    #176243
    Messages:
    54,332
    Gender:
    Male
    First Name:
    Will
    Bourbon state
    I like Salad bowl finish
     
    Tiny's Taco[QUOTED] likes this.
  9. Nov 6, 2024 at 7:22 PM
    RichochetRabbit

    RichochetRabbit Ping Ping Ping

    Joined:
    Mar 6, 2023
    Member:
    #419488
    Messages:
    5,884
    My experience with finishing is limited, but I did learn, I think, a fact about finishes. Gloss means it it is not diluted with "satin-effect light diffusers", and these "diffusers" weaken the finish a little. Some people will do "n-1" coats in gloss for strength, then satin for finishing effect.

    Or is the JackDaniels kicking in?
     
    Tiny's Taco likes this.
  10. Nov 6, 2024 at 7:27 PM
    Tiny's Taco

    Tiny's Taco The Wanderer

    Joined:
    Apr 6, 2019
    Member:
    #289265
    Messages:
    5,795
    Gender:
    Male
    Shenandoah Valley
    Vehicle:
    2018 Inferno TRD Sport
    That's a horrible idea. What time?
    I actually have some of that. Another test sample.
     
    woodtickgreg[QUOTED] likes this.
  11. Nov 7, 2024 at 4:37 PM
    woodtickgreg

    woodtickgreg Well-Known Member

    Joined:
    Jun 10, 2021
    Member:
    #368186
    Messages:
    3,223
    Gender:
    Male
    First Name:
    Greg
    Michigan
    Well I was working on my scroll saw tonight and making some good progress until I went to adjust my magnifying light. The clamp for the swivel broke. Grrr. I bought this thing years ago at an auction so it really owes me nothing, but I like it because it has a large viewing window. It came with the original clamps that where broken, tied to it. 20241107_190059.jpg
    Someone at one time made some plastic clamps for it and they worked for a long time. I said I'm a genius (think wiley coyote) and I made some wood ones up real quick, they lasted about 2 seconds and broke as I was tightening them up, lol.
    20241107_190135.jpg
    So the plan for tomorrow is to make some out of this 1/4" brass stock I have. I wanted to use aluminum but I didn't have any 1/4"
    My metal cutting saw is in the garage.
    20241107_190203.jpg
     
  12. Nov 9, 2024 at 3:53 PM
    woodtickgreg

    woodtickgreg Well-Known Member

    Joined:
    Jun 10, 2021
    Member:
    #368186
    Messages:
    3,223
    Gender:
    Male
    First Name:
    Greg
    Michigan
    I got some shop time today so I worked on the magnifying light clamp. I started by cutting the brass stock on my garage mitersaw. I clamped those 2 pieces in a small machinist vice and drilled the thru hole for the clamp.
    20241109_132352.jpg
    Then I re positioned the pieces to drill the pilot hole for the light shaft.
    20241109_132704.jpg
    Then I enlarged the hole, staying under the size of the shaft diameter.
    20241109_133740.jpg
    Then it was off to my vintage Burke no.4 mill to machine a notch.
    20241109_134229.jpg
    Here's the set up.
    20241109_134236.jpg
    This notch is for clearance of a tab on the light shaft.
    20241109_134700.jpg
    A 2 flute cutter made quick work of the task.
    20241109_134715.jpg
     
    308savage likes this.
  13. Nov 9, 2024 at 3:57 PM
    woodtickgreg

    woodtickgreg Well-Known Member

    Joined:
    Jun 10, 2021
    Member:
    #368186
    Messages:
    3,223
    Gender:
    Male
    First Name:
    Greg
    Michigan
    Then I rounded all the corners and edges on the multi grinder.20241109_135633.jpg
    This is what I ended up with.
    20241109_135733.jpg
    Installed on the light.
    20241109_135905.jpg
    And the light is in the clamp. Here you can see the little tab that I machined the notch for.
    20241109_140216.jpg
    And I'm back in business!
    20241109_140331.jpg
     
  14. Nov 9, 2024 at 5:09 PM
    DoubleB

    DoubleB Well-Known Member

    Joined:
    May 9, 2010
    Member:
    #36812
    Messages:
    1,028
    Gender:
    Male
    Bakersfield CA
    Vehicle:
    22 TRD Pro / 06 PreRunner
    10 succulent propagation stations. Scrap wood holiday gifts. Just freehanded them out on the bandsaw. Then, freehand the inside on the scroll saw. Will try to get some finish on them tomorrow.


    9B6F8154-2133-4D53-9DAC-CA80973D9CFB.jpg DC3A9D7C-DF48-4C18-B41B-C413DB7AAA2E.jpg
     
    TomTwo, wilcam47, Tiny's Taco and 2 others like this.
  15. Nov 10, 2024 at 1:39 PM
    Scott B.

    Scott B. Well-Known Member

    Joined:
    Nov 11, 2014
    Member:
    #142118
    Messages:
    4,470
    Gender:
    Male
    First Name:
    Scott
    Georgia
    Vehicle:
    2015 ACLB SR5 4x4 Expo
    I haven't posted in a while, so here is a recent project.

    I used some leftover (never "scrap") walnut and maple from other projects and made a screwdriver stand for my gunsmithing bench.

    IMG_1938.jpg

    Unfortunately, my forstner bits were not quite the right size for some of the holes. A drum sander on the drill press fixed that.
     
    jwctaco, woodtickgreg and Tiny's Taco like this.
  16. Nov 10, 2024 at 2:34 PM
    woodtickgreg

    woodtickgreg Well-Known Member

    Joined:
    Jun 10, 2021
    Member:
    #368186
    Messages:
    3,223
    Gender:
    Male
    First Name:
    Greg
    Michigan
    I finished cutting out the Mesquite crosses, got 38 out of the batch of thin boards.
    20241109_172249.jpg
    So I pulled some more shorts and cut offs, scraps out of the wood rack to get some different species and colors.
    This was all re sawed to split in half, walnut was re sawed twice.
    20241109_150905.jpg
    All run thru the planer to 3/8" thickness.
    20241109_155700.jpg
    Then I traced the patterns out on the thinned stock, cut them free on the bandsaw, and drilled the entrance holes. Another 50 blanks to be cut. A good day in the shop.
    20241110_171109.jpg
     
    TomTwo, 308savage, jwctaco and 2 others like this.
  17. Nov 10, 2024 at 2:41 PM
    Tiny's Taco

    Tiny's Taco The Wanderer

    Joined:
    Apr 6, 2019
    Member:
    #289265
    Messages:
    5,795
    Gender:
    Male
    Shenandoah Valley
    Vehicle:
    2018 Inferno TRD Sport
    That's a horrible idea. What time?
    Productive weekend in the garage.
    20241110_164416.jpg

    A month or so ago I found two 6/4 walnut cutoffs and two 6/4 sapeli cutoffs at the local hardwood shop. Yesterday I wore out a set of blades on the planer getting the walnut flat. Started on the sapeli and started seeing some smoke from the exhaust and scorch marks on the sapeli. Shut her down and changed the blades after they cooled off.

    The plan is to rip the walnut in 2.5" strips and build a box frame with a computer shelf for the left side of the desk.

    The shelf. I want to use the hickory I have left for the shelf, but it isn’t wide enough for the computer. I pulled out some scraps of the woods I've used and started what will be an insert for the middle of the hickory which I will split down the middle.
    20241110_164326.jpg 20241110_164342.jpg

    The right side will have a simple box frame about the same size. Still need to figure out the attachment method as it needs to come apart to move.

    Also thinking about a cross brace between the two for some lateral stability.

    Desktop is done.
    20241107_164834.jpg 20241107_164852.jpg
     
  18. Nov 10, 2024 at 4:09 PM
    DoubleB

    DoubleB Well-Known Member

    Joined:
    May 9, 2010
    Member:
    #36812
    Messages:
    1,028
    Gender:
    Male
    Bakersfield CA
    Vehicle:
    22 TRD Pro / 06 PreRunner
    Final count of 20. Used the rest of a bottle of Mahoney’s Walnut Oil as a finish.

    11CC0354-C5AA-4002-9429-FB4B3E753049.jpg 0A5E3BBC-5A2E-4270-985D-FD5BE587E04D.jpg
     
    wilcam47 and woodtickgreg like this.
  19. Nov 11, 2024 at 12:23 PM
    Tiny's Taco

    Tiny's Taco The Wanderer

    Joined:
    Apr 6, 2019
    Member:
    #289265
    Messages:
    5,795
    Gender:
    Male
    Shenandoah Valley
    Vehicle:
    2018 Inferno TRD Sport
    That's a horrible idea. What time?
    Computer shelf for the desk is ready for glue. Hickory, walnut, sapeli. I may add a thin strip of walnut to the edge. We'll see after glue. Right now it still fits through the planer.
    20241111_151456.jpg 20241111_151503.jpg

    The light in here has some room for improvement.
     
    Last edited: Nov 11, 2024
    woodtickgreg and wilcam47 like this.
  20. Nov 11, 2024 at 3:01 PM
    Tiny's Taco

    Tiny's Taco The Wanderer

    Joined:
    Apr 6, 2019
    Member:
    #289265
    Messages:
    5,795
    Gender:
    Male
    Shenandoah Valley
    Vehicle:
    2018 Inferno TRD Sport
    That's a horrible idea. What time?
    Got a little crowded in here. Had to flag the end of the clamps after walking into them a couple times.

    20241111_160910.jpg

    I have the walnut milled down to 2.5 x 2 inches for the frame the shelf will sit in. Added a 1/4 inch strip of walnut to the shelf and have that in clamps. Hope to start getting the frame marked out tomorrow.
     
    Last edited: Nov 11, 2024
    woodtickgreg likes this.

Products Discussed in

To Top