

-
Welcome to Tacoma World!
You are currently viewing as a guest! To get full-access, you need to register for a FREE account.
As a registered member, you’ll be able to:- Participate in all Tacoma discussion topics
- Communicate privately with other Tacoma owners from around the world
- Post your own photos in our Members Gallery
- Access all special features of the site
Quick Links: Help needed: Just bought an 06 SR5 PreRunner Doublecab - Has an open differential Carrier bearing and ujoints
 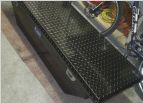 New UWS Low Profile Toolbox Showed up Today!
 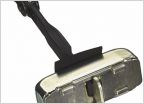 Door Check and Front Door Glass Run LH Replacement Quick Rear Differential Oil Question
 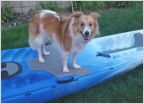 How to Make the back seat more dog friendly (and less slippery) in general
Anyone running the 4x Innovations Bolt On Rear Bumper with Tire Carrier
Discussion in '2nd Gen. Tacomas (2005-2015)' started by SLCGUY, Apr 14, 2020.
Page 2 of 4
Page 2 of 4


