

-
Welcome to Tacoma World!
You are currently viewing as a guest! To get full-access, you need to register for a FREE account.
As a registered member, you’ll be able to:- Participate in all Tacoma discussion topics
- Communicate privately with other Tacoma owners from around the world
- Post your own photos in our Members Gallery
- Access all special features of the site
 Steering rack replace
 Motorex Trail Gear Oil 75w?
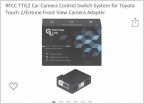 Installing Front Camera
 Advice for changing my own brakes
 Guage Cluster Plastic Cleaner
 Any tips for removing fender flares properly/safely?
Atl-atl's TRD Off Road Access Cab documentation thread
Discussion in '3rd Gen. Tacomas (2016-2023)' started by Atl-atl, Aug 18, 2018.
Page 6 of 8
Page 6 of 8


