

-
Welcome to Tacoma World!
You are currently viewing as a guest! To get full-access, you need to register for a FREE account.
As a registered member, you’ll be able to:- Participate in all Tacoma discussion topics
- Communicate privately with other Tacoma owners from around the world
- Post your own photos in our Members Gallery
- Access all special features of the site
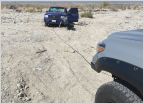 The Taco saves the day yet again
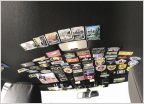 Velcro interior?
 Planning an ice road trip for work. What should I bring?
 Changing brake fluid out on off road
 Metal oil filter housing
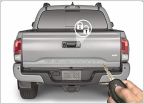 Remote Tailgate Lock 2023 Tacoma
AVS Ventshade Debadge
Discussion in '3rd Gen. Tacomas (2016-2023)' started by TacoHugger, Jul 23, 2020.


