

-
Welcome to Tacoma World!
You are currently viewing as a guest! To get full-access, you need to register for a FREE account.
As a registered member, you’ll be able to:- Participate in all Tacoma discussion topics
- Communicate privately with other Tacoma owners from around the world
- Post your own photos in our Members Gallery
- Access all special features of the site
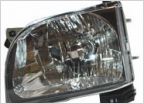 2004 OEM or at least OEM like headlight and turn signal assemblies
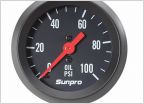 3.4L Tacoma Oil Pressure Gauge Install?
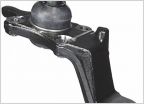 Lower Ball Joint Part Numbes
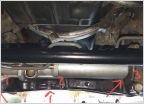 Steering rack bushing suggestions
 Full Tune
 Adjustable compression/rebound rear shocks?
Backup Camera and Rearview mirror display install
Discussion in '1st Gen. Tacomas (1995-2004)' started by jcasteel, Oct 31, 2017.
Page 1 of 2
Page 1 of 2


