1. Welcome to Tacoma World!

    You are currently viewing as a guest! To get full-access, you need to register for a FREE account.

    As a registered member, you’ll be able to:
    • Participate in all Tacoma discussion topics
    • Communicate privately with other Tacoma owners from around the world
    • Post your own photos in our Members Gallery
    • Access all special features of the site

Balance shaft removal

Discussion in '1st Gen. Tacomas (1995-2004)' started by willeebow, Oct 31, 2018.

  1. Oct 31, 2018 at 10:59 AM
    #1
    willeebow

    willeebow [OP] New Member

    Joined:
    Oct 17, 2018
    Member:
    #269760
    Messages:
    4
    Gender:
    Male
    First Name:
    Billy
    Vehicle:
    01 Tacoma kingcab 2.7 3RZ_FE
    Stock factory
    Can anybody tell me what I need to do to my 4banger after I pull the balance shafts out of my 2.7 2001
     
  2. Oct 31, 2018 at 11:16 AM
    #2
    Russianman92

    Russianman92 Well-Known Member

    Joined:
    Sep 15, 2014
    Member:
    #138340
    Messages:
    825
    Gender:
    Male
    Dunwoody GA
    Vehicle:
    1995 White Tacoma 3RZ 4x4 5 speed
    bilstein shocks/struts Add-a-leaf Mostly stock. Running 31x10.5 r15
    What do you mean by "What do you need to do"?

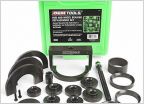
    When you remove the balance shafts you need to also put in 2 plugs in to where the bearings are for the shafts to block the oil ports or you will lose oil pressure. There are a few more steps that need to be done to keep the chain and guides lubricated. LCE Performance makes the kit to do this. You don't want to just take them out....you need to make the modifications with their kit or you will lose oil pressure and have issues.

    https://www.lceperformance.com/Balance-Shaft-Removal-Kit-3RZ-2TR-p/1015050.htm

    As per LCE Installation instructions using their kit:

    1. Remove all chains, sprockets, and counterbalance shafts etc... from engine.
    2. Remove the Dowel pin (A) above balance shaft opening (Passenger's side of block). THIS WILL NOT BE RE-USED.
    3. Using the supplied drill bit, drill out the Oil Pressure Port (B) . Then using the supplied 1/16” tap, Tap block so that plug will fit flush into block. ALWAYS USE TAP LUBE AND TAP WITH CAUTION.
    4. Be sure to clean all metal shavings from engine. Use a shop vac if installation is done in the truck.
    5. Install supplied pipe plug into Oil Pressure Port (B) using Teflon sealant or Loctite.
    6. Use supplied driver to remove front (only) shaft bearings (C). Check rear shaft bearing if damaged, remove.
    7. Deburr block and then proceed to install the new Aluminum bearing insert into balance shaft block holes. THIS IS TO BLOCK OIL FLOW. **FOR EASE OF INSTALL: Place new Aluminum Bearing Inserts in the freezer for approx. 30 min. prior to installation.**
    8. Install the new billet oil jet where tensioner was removed (driver’s side of block). Longer bolt (M8-1.25x40mm) goes on the guide rail mount location (D). (Stock studs must get removed and will not get re-used)
    9. Torque oil jet bolts to 14 Ft-Lbs.
    10. Install cam timing chain and guides according to factory service manual.
    11. DO NOT RE-INSTALL ANY COUNTER BALANCE COMPONENTS.
     

    Attached Files:

Products Discussed in

To Top