1. Welcome to Tacoma World!

    You are currently viewing as a guest! To get full-access, you need to register for a FREE account.

    As a registered member, you’ll be able to:
    • Participate in all Tacoma discussion topics
    • Communicate privately with other Tacoma owners from around the world
    • Post your own photos in our Members Gallery
    • Access all special features of the site

Barlowrs 06 Taco Expo Build Thread

Discussion in '2nd Gen. Builds (2005-2015)' started by barlowrs, Feb 12, 2010.

  1. Sep 15, 2010 at 9:39 PM
    #81
    Kappes03

    Kappes03 Legend of the UG

    Joined:
    Jul 2, 2009
    Member:
    #19187
    Messages:
    8,832
    Gender:
    Male
    First Name:
    Mike
    Colorado
    Vehicle:
    2014 Tundra CM
    Awesome build man. Love the truck
     
  2. Sep 15, 2010 at 9:51 PM
    #82
    TacoTron

    TacoTron Tacotronn

    Joined:
    Nov 30, 2009
    Member:
    #26782
    Messages:
    2,343
    Gender:
    Male
    First Name:
    Anthony
    Denver, CO
    Vehicle:
    07 Toyota Tacoma
    straight badass!
     
  3. Sep 20, 2010 at 7:33 PM
    #83
    MOT

    MOT Prez of @BattleBornToyotas

    Joined:
    Nov 21, 2009
    Member:
    #26325
    Messages:
    8,111
    Gender:
    Male
    First Name:
    Daniel
    Las Vegas
    Vehicle:
    08 DB DC 4X4 Sr5 Sport
    Black Housing Head, Custom Retro fit, T-Rex #2 Eyelids 50 inch ToughLight Radius Bar and 2 20 inch Bars behind grill with BAMF mount, T-Rex #2 Eyelids, Custom Vegas Dezert Fab Front Bumper and Rock Sliders,Wet Okole's, WeatherTech Mats, Magnaflow Exhaust, Pro Comp 6 InchStage 2 Lift, K&N Intake,
    SEXY!
     
  4. Sep 20, 2010 at 7:37 PM
    #84
    iSTIZO99

    iSTIZO99 Well-Known Member

    Joined:
    Jun 3, 2010
    Member:
    #38297
    Messages:
    1,780
    Gender:
    Male
    First Name:
    Mike
    Jax, FL
    Vehicle:
    2010 TRD Sport 4x4 DC/SB
    This is one of the best, most organized build threads I have seen so far. Dude sweet build! :thumbsup:
     
  5. Sep 21, 2010 at 2:35 PM
    #85
    barlowrs

    barlowrs [OP] Well-Known Member

    Joined:
    Feb 12, 2010
    Member:
    #31230
    Messages:
    612
    Gender:
    Male
    First Name:
    Robert
    So Cal
    Vehicle:
    06 Toyota Tacoma Sport 4x4
    Build Thread: http://www.tacomaworld.com/forum/builds/74926-barlowrs-06-taco-expo-build-thread.html OME Lift, FJ SE Wheels, 255/85 KM2, Allpro Plate Bumper, 8K Winch, Synthetic Line, Yaesu FT-8800R, Custom Sliders Sockmonkey bedside decals, BHLM, base model grille, TRD offroad (black) trim

    Thanks for that, I appreciate it. That is what I was trying to do, make this as easy as possible for people to search and get useful information.
     
  6. Sep 29, 2010 at 10:45 AM
    #86
    nrspence

    nrspence Well-Known Member

    Joined:
    Sep 14, 2010
    Member:
    #43274
    Messages:
    47
    Gender:
    Male
    First Name:
    Nate
    Monroe, Utah
    Vehicle:
    02 Tacoma
    OME 881/bilstein 5100's JBA upper control arms. All pro expo leafs rough country 2.0 rear shocks.
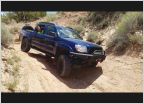
    The trail pictures on your first page, what trail are you on? That trail looks pretty tough. I hope your do not mind, but im useing your truck for a blue print for my 08 4 banger im building. Thanks
    Nate R Spence
     
  7. Sep 29, 2010 at 12:30 PM
    #87
    barlowrs

    barlowrs [OP] Well-Known Member

    Joined:
    Feb 12, 2010
    Member:
    #31230
    Messages:
    612
    Gender:
    Male
    First Name:
    Robert
    So Cal
    Vehicle:
    06 Toyota Tacoma Sport 4x4
    Build Thread: http://www.tacomaworld.com/forum/builds/74926-barlowrs-06-taco-expo-build-thread.html OME Lift, FJ SE Wheels, 255/85 KM2, Allpro Plate Bumper, 8K Winch, Synthetic Line, Yaesu FT-8800R, Custom Sliders Sockmonkey bedside decals, BHLM, base model grille, TRD offroad (black) trim
    The trail is Gold Mountain in Big Bear (3N69). Forest Service rates it "Most difficult" but its not TOO bad....probably a setp below John Bull.

    No problem on using my truck, that is what the build thread is for, to give others idea. If you have questions, let me know.
     
  8. Sep 30, 2010 at 11:06 AM
    #88
    nrspence

    nrspence Well-Known Member

    Joined:
    Sep 14, 2010
    Member:
    #43274
    Messages:
    47
    Gender:
    Male
    First Name:
    Nate
    Monroe, Utah
    Vehicle:
    02 Tacoma
    OME 881/bilstein 5100's JBA upper control arms. All pro expo leafs rough country 2.0 rear shocks.
    Ya It looked like a few trails we have out here in utah. Ill give ya a holler if i have any questions. Thanks

    Nate R Spence
     
  9. Oct 3, 2010 at 9:50 PM
    #89
    Special_K

    Special_K o_o

    Joined:
    Jul 7, 2010
    Member:
    #39920
    Messages:
    3,407
    Gender:
    Male
    First Name:
    Eddie
    Alexandria, VA
    Vehicle:
    2019 Tacoma Cav Blue
    Wow...sick rig man, hope to see it in person sometime.
     
  10. Jan 9, 2011 at 6:24 PM
    #90
    barlowrs

    barlowrs [OP] Well-Known Member

    Joined:
    Feb 12, 2010
    Member:
    #31230
    Messages:
    612
    Gender:
    Male
    First Name:
    Robert
    So Cal
    Vehicle:
    06 Toyota Tacoma Sport 4x4
    Build Thread: http://www.tacomaworld.com/forum/builds/74926-barlowrs-06-taco-expo-build-thread.html OME Lift, FJ SE Wheels, 255/85 KM2, Allpro Plate Bumper, 8K Winch, Synthetic Line, Yaesu FT-8800R, Custom Sliders Sockmonkey bedside decals, BHLM, base model grille, TRD offroad (black) trim
    Well after getting stuck over seas for work for a few weeks, I am back on schedule with my compressor install. So, here it is, hope it helps some people or give them some inspiration.
    My plan was to have a compressor that could fill tires, blow out filters, etc, while at the same time, run some basic air tools for trail. I wish I could fit a york or belt driven compressor, but if you have ever looked inside the engine bay of one of these V6 tacos, that was clearly not an option. I researched a lot, and came to the conclusion that the PD-1006 compressor that is strapped onto the top of a Puma assembly was the best option. Here are the stats for the compressor:

    ¾ HP Running
    1 HP Peak
    3.4 CFM (not bad for a 12V compressor)
    135PSI Working pressure
    150PSI Max Pressure

    In addition, here is a list of some of the other toys that go along with it:

    2.5 gallon Viar Tank (yes the puma came with a tank, but it was too small for my liking)
    90 PSI On / 120PSI Off Pressure Swtich
    140 PSI Blow Off
    18” Steel Leader Hose
    PA61A Load Genie Unloader/Check Valve
    80A Resetable Water Proof Breaker
    100 A Relay
    Interstate Metal encased water separator
    75 ft of Nylon Tubing
    7 port manafold
    A LOT of compression fittings and other fittings
    A lot of 4 AWG Wire

    Hmm, there is probably a bunch of other stuff, but that is the basics….The scheamit I ended up coming up with went something like this. (Red is Electrical, Black is Air):

    schematic_d136b3a5447a7e3f41cee569a5af86b22fcfd553.jpg

    So…now it came time to mount it all. I wanted the compressor out of the elements best I could, but under the hood posed a few problems, first of all, it is very hot there, and heat is bad for compressors. Also, as we already established there is not much room, and this compressor is not a small one by any means. I thought about under the rig, but that is to exposed to the elements. Finally I fount a nice solution. Behind door number 1!

    IMG_3453_9ac3502b405bd6411fecefa815647f9e8103f5cd.jpg

    First thing I had to do was relocate the factory 120V plug. I do use this a lot, so I didn’t want to just get rid of it. Instead I made a harness and extended it to the other side of my bed.

    IMG_3284_85f7933b3087355e8156c0e424c884b4cb242eae.jpg

    That left me a nice opening to play with. Because I have the CBI rear bumper, I have a large opening behind the cubby hole, and a lot of steel to weld to. I created a little shelf that welds directly to the bumper. Because this compressor is pretty hefty, I needed the shelf to be strong since it is cantilevered off the bumper, I used ¼” Plate and added some nice gussets for bracing. Here are few pics of the shelf and the bracing.

    IMG_3287_902dfcf9122d45379f7fa101d8ae35a35dfd2e4d.jpg

    IMG_3285_16661a824fc68d65e88c13c7eed26279dbcbe9e0.jpg

    This also give me a nice place to mount the 100A relay. Here you can see the relay. In addition I added a separate ground strap..just to be safe. Non proper grounding is a bad thing.

    IMG_3449_3cf812ae6ff229bdd77d4646147b78119d6d849d.jpg

    IMG_3451_08d03bf8408abb848051f07c86fbe4fc8ce6c2d2.jpg


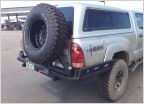
    Next was to mount the compressor and trim the cubby to fit around it. The cubby provides some nice protection for the compressor while also proving enough space for her to breath. I also added some fiberglass heat shielding behind it so my body paint doesn’t start to melt on the outside. With the cover closed, you would never know I had a compressor there (the first pic in the post is with the compressor already mounted….didn’t see it did you!?)

    IMG_3448_6f11c3fe8e874807baadc83345f4c7ff2c29000f.jpg

    Cubby Mounted:

    IMG_3452_b120a5abe18630d91c7d670f85df4ecf14cf12a1.jpg

    Now for all the accessories. The water filter is mounted right above my rear shackle, This makes it accessible to drain, but protects it because the suspension would hit before any rocks hit it. I also opted for a metal encased filter to be safe.

    IMG_3450_ada31769b80287afe3429dc8fea4d6537dbf32a1.jpg

    The tank is mounted right in front of my rear bumper. It is just the perfect height to not hang below the bumper (even the drain cock).

    IMG_3457_906550a6f8b31c777bb81d576df64bdf80ec1e40.jpg

    I then decided to go with two quick connects, one up front and one out back. I made a little bracket for the front one and bolted it to my Allpro bumper

    IMG_3283_cdf42e98a85d8a431110a87ecb38a589f3c66132.jpg

    IMG_3460_6a2e53ab0c6d63c31ee7b0d59c4e9ecc6ba1156f.jpg
    IMG_3461_531d12fd048ae4c051ac87905b21796da699b837.jpg

    For the rear, I decided to mount it vertically off of the antenna tab on the CBI bumper. Mounting it vertically is a bit risky as moisture could flow down into the system, but I have some nice covers grabbed from work.

    IMG_3280_0b93f899870523cd990529c03290d5fb28c60325.jpg

    IMG_3458_50030f886c5b64d36d5409e04be7c70fc2b07457.jpg

    IMG_3459_80aeae1ce493788257dca31eb89212002eec8ae9.jpg

    The wiring will be in another write-up as I revamped my aux fuse block mount to make room. That should be up in a week or two.


    Thanks
     
  11. Jan 9, 2011 at 6:35 PM
    #91
    Kappes03

    Kappes03 Legend of the UG

    Joined:
    Jul 2, 2009
    Member:
    #19187
    Messages:
    8,832
    Gender:
    Male
    First Name:
    Mike
    Colorado
    Vehicle:
    2014 Tundra CM
    Nice work!
     
  12. Jan 10, 2011 at 2:17 PM
    #92
    silver07taco

    silver07taco Well-Known Member

    Joined:
    Apr 27, 2008
    Member:
    #6241
    Messages:
    4,541
    Gender:
    Male
    First Name:
    COIL
    Maryland
    Vehicle:
    13 Tundra RCSB 5.7 4x4,07 Tacoma AC 4.0 4x4
    2013 Tundra RCSB 5.7 4x4, 2007 Tacoma AC 4.0 4x4
    Nice work!, Good idea with the front and rear chucks.
     
  13. Jan 14, 2011 at 1:40 PM
    #93
    barlowrs

    barlowrs [OP] Well-Known Member

    Joined:
    Feb 12, 2010
    Member:
    #31230
    Messages:
    612
    Gender:
    Male
    First Name:
    Robert
    So Cal
    Vehicle:
    06 Toyota Tacoma Sport 4x4
    Build Thread: http://www.tacomaworld.com/forum/builds/74926-barlowrs-06-taco-expo-build-thread.html OME Lift, FJ SE Wheels, 255/85 KM2, Allpro Plate Bumper, 8K Winch, Synthetic Line, Yaesu FT-8800R, Custom Sliders Sockmonkey bedside decals, BHLM, base model grille, TRD offroad (black) trim
    Well, as some of you may know I have recently installed my OBA system (OBA Install). This has required me to add a 80A breaker to my arsenal. While doing this, I decided to upgrade my 100 Fuse that was wired to my Aux fuse block to a resettable breaker as well. The last thing I want is to be out somewhere and blow the fuse and not have a spare. The resettable breaker allows me to not have to carry spares (those fuses are pretty pricy too). So this led to a re-design of my under hood mount…let’s call this V 2.0.

    While my original mount worked well (Aux Fuse Block V-1.0), I did have one complaint after having it for a while. Because my winch solenoid was mounted to the bottom, it made it very difficult to remove to gain access to the firewall grommet, or to remove for other reasons. In my original design, I never thought I would be removing it, but over the past year or so, I have had to do this multiple times, and it proved to be a pain, so my redesign had to have the following requirements:

    - Easy to remove the fuse block
    - Room for Fuse block and 2 breakers (100A and 80A)
    - Still maintain my winch solenoids
    - Room for at least 2 light relays
    -
    After messing around with a few ideas, this is what I came up with…now out with the old and in with the new!

    The new design is two parts, the lower shelf is smaller, so it can stay permanently mounted and still five me good access to the firewall, etc. This lower shelf is where my solenoid mounts too. This is hard mounted to the truck.

    The upper shelf which holds the relays, fuse block and breakers is no longer bolted to the truck itself, but rather the lower shelf through the use of 2 bolts that get bolted into stanchions that stay on the lower shelf. This allows me to EASILY (2 bolts) remove the upper shelf, and the stanchions stay in place such that I don’t even have to mess with nuts on the back side.

    Like my original, this is built with 18 gage stainless steel.

    Here you can see the two parts and how they fit together:
    IMG_1495_da843f8a75a4aa2f80b59fe04fa40a4c099c6ecd.jpg

    IMG_1497_0706dd36995fdfa5344e1defc20031f32c73f6d0.jpg

    IMG_1498_7de1d8a657a05242580878888f5554dda40b60c6.jpg

    IMG_1496_4b9409481d89d7036f47790fadf0f1f167a355af.jpg

    Now, time to mount under the hood. The small shelf gets hard mounted to the fender (same as original design) with the winch solenoid mounted below it. Here you can also see the box that contains my winch solenoid mounted.
    IMG_1500_fa989d86cc518502faaeb02989a9ac8ae2916fe6.jpg

    The upper shelf gets equipped with the fuse block and breakers. (The relays get mounted to the two holes on the vertical side once it is mounted in the engine bay).

    IMG_1499_739a0bf8d034a3dbfc2f8eb71f467ed54b20fc5c.jpg

    Lastly, it is simply bolting the two bolts in place to mount the upper shelf to the lower shelf and there you have it.
    IMG_1501_a6f0831f98d8f9d036f5550fb0d03c76d2881037.jpg

    I think this should serve my purposes well.
     
  14. Jan 14, 2011 at 4:01 PM
    #94
    s10nick

    s10nick Well-Known Member

    Joined:
    Aug 15, 2009
    Member:
    #21228
    Messages:
    1,579
    Gender:
    Male
    First Name:
    nick
    Greeley, CO
    Vehicle:
    base mod. debaged
    3inch hbs lift toytec diff drop grillcraft grill hella 500s conv. to 8k hids xentec hid head light conv. 5% tint more to come
    looks awesome and fits beautifully right there good job keep up the good work!
     
  15. Feb 11, 2011 at 11:39 AM
    #95
    navysealboy93

    navysealboy93 Well-Known Member

    Joined:
    Sep 10, 2010
    Member:
    #43020
    Messages:
    384
    Gender:
    Male
    First Name:
    Zach
    Fort Lewis, WA
    Vehicle:
    Isuzu Trooper
    ARB front bumper, wagon wheels, 235/85 wranger's, OME 1.5 in. lift and Dakar springs.
    What kind of gas mileage is this truck getting?
     
  16. Feb 11, 2011 at 11:48 AM
    #96
    chaz834

    chaz834 Tacoma 4 Life.

    Joined:
    Nov 10, 2010
    Member:
    #45986
    Messages:
    1,455
    Gender:
    Male
    First Name:
    Chase
    Kendrick, Idaho
    Vehicle:
    2012 Sport MGM
    3'' Tuff Counrty Lift, Moromoto Mini H1 Projectors 5000K 35W, BHLM, 30'' LED Light Bar, Black TOYOTA Emblem, Excelon Touch Screen Deck, Hertz Speakers,Excelon AMP, 2 10'' JL Audio Subs, Wet Okle seat covers, Weather Tech Floor Mats.
    Nice build... :popcorn:
     
  17. Feb 11, 2011 at 5:59 PM
    #97
    barlowrs

    barlowrs [OP] Well-Known Member

    Joined:
    Feb 12, 2010
    Member:
    #31230
    Messages:
    612
    Gender:
    Male
    First Name:
    Robert
    So Cal
    Vehicle:
    06 Toyota Tacoma Sport 4x4
    Build Thread: http://www.tacomaworld.com/forum/builds/74926-barlowrs-06-taco-expo-build-thread.html OME Lift, FJ SE Wheels, 255/85 KM2, Allpro Plate Bumper, 8K Winch, Synthetic Line, Yaesu FT-8800R, Custom Sliders Sockmonkey bedside decals, BHLM, base model grille, TRD offroad (black) trim
    Surprisingly, the same as when I rolled it off the lot. When I first got her I complained about horrible mileage (She has never gotten good mileage), but with all the extra weight, it hasn’t changed, which is really weird. About 15mpg now.
     
  18. Feb 11, 2011 at 10:18 PM
    #98
    Drunknsloth

    Drunknsloth Indffrnce will be the fall of manknd but who cares

    Joined:
    Jun 17, 2010
    Member:
    #39105
    Messages:
    3,126
    Gender:
    Male
    First Name:
    Retribution
    South West
    Vehicle:
    08 SR5 Access V6 6-Speed
    Blacked-Out Badges; Retribution Decals (Sockmonkey); Tailgate Mod; Red LED Rear Blinkers; Yellow Foglights; Yellow Front Blinkers; Superwhite Xenon Corner Bulb; Leer Bedcap; Bedrug Bedmat; Black Cupholders; Black Plastic Piece Around Window Controls; Plasti-Dip Front Bumper Valence; Plasti-Dip Grill Surround; Blackout Chrome Back Bumper; Metal Miller Skid-Plate; Aero Turbine 2525 Muffler; TSB Rear Leaf Springs and Shocks; Satoshi Grill Pending; Off-Roading Torn off Mirror (Replaced); Blue-Sea Fuse Box; Tinted Tail Lights; URD Short Shifter; Interior Mood Lighting; Hood Lights; BedLights Pending
    Any plans on locking the rear cubby in the future?
     
  19. Feb 12, 2011 at 11:10 AM
    #99
    barlowrs

    barlowrs [OP] Well-Known Member

    Joined:
    Feb 12, 2010
    Member:
    #31230
    Messages:
    612
    Gender:
    Male
    First Name:
    Robert
    So Cal
    Vehicle:
    06 Toyota Tacoma Sport 4x4
    Build Thread: http://www.tacomaworld.com/forum/builds/74926-barlowrs-06-taco-expo-build-thread.html OME Lift, FJ SE Wheels, 255/85 KM2, Allpro Plate Bumper, 8K Winch, Synthetic Line, Yaesu FT-8800R, Custom Sliders Sockmonkey bedside decals, BHLM, base model grille, TRD offroad (black) trim
    Na, dont think so, the compressor is bolted down and would be very hard to take, adn the other side cubby (next to power outlet) just holds some tie downs and a canyon dancer for hauling my bike around. Nothing worth locking up. Besides, with my shell up, they are pretty protected.
     
  20. Feb 17, 2011 at 4:18 PM
    #100
    Krasus22

    Krasus22 Well-Known Member

    Joined:
    Feb 6, 2011
    Member:
    #50652
    Messages:
    175
    Gender:
    Male
    First Name:
    Matt
    Rancho Cucamonga, CA
    Vehicle:
    05 PreRunner SR5 Murdered Out
    Blacked Out Badges, Blacked Out Front Grill, BLacked Out Rear Bumper, WeatherTech Floor Mats, Kenwood DDX616, BLHM, Flowmaster Exhaust.
    Amazing build! Very inspiring! Thank you for taking the time to share all of this with us
     

Products Discussed in

To Top