

-
Welcome to Tacoma World!
You are currently viewing as a guest! To get full-access, you need to register for a FREE account.
As a registered member, you’ll be able to:- Participate in all Tacoma discussion topics
- Communicate privately with other Tacoma owners from around the world
- Post your own photos in our Members Gallery
- Access all special features of the site
 LED headlight brightness
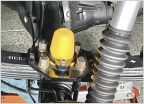 Bumpstops pricing
 Dumb question-- Tail gate camera hole plug options?
 Which Bed Lights?
 Dog Transportation with Topper
 Filling bolt holes in bed
Battery Negative/Ground Cable Upgrade
Discussion in '3rd Gen. Tacomas (2016-2023)' started by YSL, Nov 20, 2019.
Page 3 of 3
Page 3 of 3


