

-
Welcome to Tacoma World!
You are currently viewing as a guest! To get full-access, you need to register for a FREE account.
As a registered member, you’ll be able to:- Participate in all Tacoma discussion topics
- Communicate privately with other Tacoma owners from around the world
- Post your own photos in our Members Gallery
- Access all special features of the site
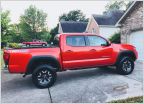 Step Bars or Rock Sliders?
 2017 Tailgate Security
 Blind-spot Cameras
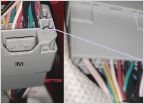 Dashcam wired to overhead console?
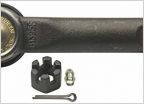 Tie rod suggestions
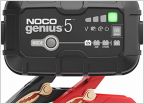 Battery charger question
Bed cubby power panel progress
Discussion in '3rd Gen. Tacomas (2016-2023)' started by Stocklocker, May 2, 2019.
Page 1 of 3
Page 1 of 3


