

-
Welcome to Tacoma World!
You are currently viewing as a guest! To get full-access, you need to register for a FREE account.
As a registered member, you’ll be able to:- Participate in all Tacoma discussion topics
- Communicate privately with other Tacoma owners from around the world
- Post your own photos in our Members Gallery
- Access all special features of the site
 Ceramic coat,after wash quick detail up keep
 Battle the water spots?
 New car, best steps for care of paint preventative etc?
 Tire shine or no?
 Honest wash or chemicals guys
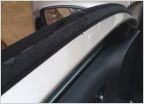 Anti-fog treatment
Beginners First Time Vinyl Wrap Process
Discussion in 'Detailing' started by PaintFadeParade, Sep 7, 2025 at 7:32 AM.


