

-
Welcome to Tacoma World!
You are currently viewing as a guest! To get full-access, you need to register for a FREE account.
As a registered member, you’ll be able to:- Participate in all Tacoma discussion topics
- Communicate privately with other Tacoma owners from around the world
- Post your own photos in our Members Gallery
- Access all special features of the site
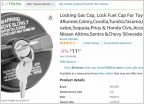 Where can I find a 3rd Gen locking fuel filler door?
 Another Around the World Tacoma
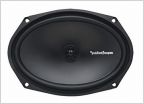 Anyone used these Rockford Fosgate speakers?
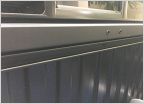 Bed tie down??
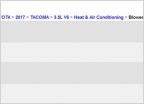 Another AC Blower motor gone bad?
Big Ole' Brake Upgrade Thread for Third Gens
Discussion in '3rd Gen. Tacomas (2016-2023)' started by stevotivo12, Dec 25, 2017.
Page 4 of 14
Page 4 of 14
Products Discussed in


