1. Welcome to Tacoma World!

    You are currently viewing as a guest! To get full-access, you need to register for a FREE account.

    As a registered member, you’ll be able to:
    • Participate in all Tacoma discussion topics
    • Communicate privately with other Tacoma owners from around the world
    • Post your own photos in our Members Gallery
    • Access all special features of the site

Billstein 5100 easy install method

Discussion in 'Suspension' started by Holyfather, Mar 24, 2012.

  1. Nov 3, 2018 at 5:27 AM
    #281
    Vjtrey1

    Vjtrey1 Well-Known Member

    Joined:
    May 31, 2018
    Member:
    #255076
    Messages:
    155
    Gender:
    Male
    Richmond, Tx
    Vehicle:
    2018 Super White Tacoma TRD OR DCSB
    Simple mods
    Should I get 4x4 block to do it? Or floor jack and jack stands will give me enough lift to do this.
     
  2. Nov 4, 2018 at 2:39 PM
    #282
    outxider

    outxider Never stop exploring. Rest in Paradise Big Bro.

    Joined:
    May 9, 2010
    Member:
    #36858
    Messages:
    2,082
    Gender:
    Male
    First Name:
    Sang
    East Bay, CA
    Vehicle:
    06 DCSB 4x4
    A few mods here and there and counting....
    Depends on your jack. I have one of those heavy duty jack so it was all i needed with some jack stands. Easy work.

     
  3. Nov 4, 2018 at 2:48 PM
    #283
    Speachey

    Speachey Member

    Joined:
    Feb 7, 2017
    Member:
    #209932
    Messages:
    20
    Gender:
    Male
    First Name:
    Stephen
    Georgia
    Vehicle:
    2017 Silver TRD Sport DCSB
    Blackhawk Air intake for now
    I wish I would have seen this video about a year ago That would have saved me a lot of time and headache.
     
  4. Nov 4, 2018 at 3:42 PM
    #284
    NMTrailRider

    NMTrailRider Well-Known Member

    Joined:
    Sep 28, 2009
    Member:
    #23469
    Messages:
    5,293
    New Mexico
    What exactly is the "dangerous" part of doing it this way?
     
  5. Nov 4, 2018 at 3:52 PM
    #285
    Speachey

    Speachey Member

    Joined:
    Feb 7, 2017
    Member:
    #209932
    Messages:
    20
    Gender:
    Male
    First Name:
    Stephen
    Georgia
    Vehicle:
    2017 Silver TRD Sport DCSB
    Blackhawk Air intake for now
    there is a chance that the shock could rapidly decompress and injury you.
     
  6. Mar 3, 2019 at 11:28 AM
    #286
    Vjtrey1

    Vjtrey1 Well-Known Member

    Joined:
    May 31, 2018
    Member:
    #255076
    Messages:
    155
    Gender:
    Male
    Richmond, Tx
    Vehicle:
    2018 Super White Tacoma TRD OR DCSB
    Simple mods
    Does it work for OME coil 887? Thanks
     
  7. Mar 24, 2019 at 3:28 PM
    #287
    CrustyTaco

    CrustyTaco Well-Known Member

    Joined:
    Jan 20, 2019
    Member:
    #279940
    Messages:
    1,038
    Gender:
    Male
    First Name:
    Todd
    Louisville, KY
    Vehicle:
    04 Ext Cab V6 5MT 4X4 180k
    881/5100/Dakars 4R wheels / TBU / New frame
    Just used this method on a 1st gen with Bilstein 5100s and OME 881 coils. Wanted to give @DDD a shout out for posting up that Youtube video, it helped me a lot. I'm just a shadetree mechanic, but in my opinion this feels safer than handling a preloaded quick strut assembly. With the floor jack I'm able to keep a good distance from the spring while I'm jacking up the LCA to compress the assembly. A few things worth mentioning for those installing on a 1st gen.

    - I had to remove my skid plate to access the front LCA alignment bolts
    - There are four 14mm bolts on the lower knuckle instead of two
    - I had to remove my sway bar end links to get the LCA to drop. The allen key inset was rusted, and I couldn't get the nuts on the old one off without destroying the boots, so I ended up cutting it off with a grinder and buying two new Moog links.
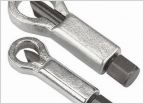
    - My tie rod ends were rusted to the steering knuckle, and no amount of hammering would free them. I bought a Pitman puller from Advance Auto for $16 and it did the trick.
    - My driver's side shock top nut was rusted to the point of not being able to remove, I had to cut it off with a grinder. Also one of the top hat nuts was rusted enough that a 14mm didn't fit, so it was cut off with a sawzall.

    All in all the process took me about 16 hours from start to finish. I could probably do it again in half that time, but if you've got a rusty rig make sure you have some cutting tools.
     
  8. Sep 2, 2019 at 4:13 PM
    #288
    ricknobinson

    ricknobinson Well-Known Member

    Joined:
    Jul 27, 2019
    Member:
    #300465
    Messages:
    113
    Gender:
    Male
    First Name:
    Nick
    Vehicle:
    06 TRD Off Road Tacoma Access Cab
    I feel I should chime in on this thread, I just put 5100s on my 06 all the way around this weekend. I sat on this for a while before deciding to try the easy install method vs taking them to a shop and I can honestly say it was easier than I expected. I didn’t remove the sway bar links, brake line brackets or anything extra besides the shock itself honestly.

    After the truck was jacked up and secured on stands I first place the jack under the LCA and put a bit of pressure on it. Then remove the two bolts attaching the ball joint to the the control arm. Loosen the bottom shock mount bolt but leave it in, you could probably do this last but I thought it might help the LCA to swing down freely. Next remove the top nut on the shock (a 19mm ratcheting wrench and vise grips to hold the shaft still seemed to do the trick). Now the scary part, slowly release the tension on the spring by lowering the jack under the LCA slowly. It was nice to have a second person for this so I could watch the spring and make sure nothing was binding as it was decompressing. As crusty taco mentioned you will have to remove the skid plate to access the front CAM bolt. I used an impact and a wrench to loosen them just enough to give the LCA a little more play. At this point almost all the tension will be off the spring so you’ll just need to use a large pry bar to wiggle the LCA a bit and the shock will nearly fall right out once you completely remove the bottom shock mounting bolt. Pay special attention to the orientation of the coil spring in the top and bottom seats before removing it, you’ll want to reinstall in the same position with your 5100s. Once the strut is inside the coil spring place the bottom bolt through the strut mount to keep it in place and then play with the coil until you reach the desired position so it will seat properly. If you skip this you may hit a big dip and hear a loud CLANG like I did lol.

    Now step back, take a deep breath, and realize that you were anxious for nothing. It’s a piece of cake! I’m sure some steps can be done in a different order but I just felt the need to share my experience as it went much smoother than expected and probably only took me about 30 mins to do the driver after wrapping up the passenger side.
     
    eherlihy and jamesfishn09 like this.
  9. Nov 17, 2019 at 7:00 PM
    #289
    CrustyComa

    CrustyComa Well-Known Member

    Joined:
    Aug 6, 2019
    Member:
    #301449
    Messages:
    392
    Gender:
    Male
    Michigan
    Vehicle:
    2020 SR SX TRD Sport love child
    Any issues using this method on a 3rd gen?
     
  10. Dec 1, 2019 at 8:58 PM
    #290
    Markcal

    Markcal Well-Known Member

    Joined:
    Aug 14, 2014
    Member:
    #136147
    Messages:
    3,115

    May I ask where your Tacoma lived most of its life and was this the first time the shocks were replaced?
     
  11. Dec 2, 2019 at 9:30 AM
    #291
    ricknobinson

    ricknobinson Well-Known Member

    Joined:
    Jul 27, 2019
    Member:
    #300465
    Messages:
    113
    Gender:
    Male
    First Name:
    Nick
    Vehicle:
    06 TRD Off Road Tacoma Access Cab

    So I’m the third owner and to my knowledge this truck spent most of its life where it was first purchased in Boone, NC. Couldn’t tell you the last time the shocks were replaced. Perhaps when the frame was replaced in ‘16?
     
  12. Dec 2, 2019 at 9:42 AM
    #292
    Markcal

    Markcal Well-Known Member

    Joined:
    Aug 14, 2014
    Member:
    #136147
    Messages:
    3,115

    OK thanks, I ask because I own a 2006 too, but living its whole life in Saltachusetts and still having the factory shocks makes me question if it's worth trying to replace them myself.
     
  13. Dec 2, 2019 at 9:55 AM
    #293
    CrustyTaco

    CrustyTaco Well-Known Member

    Joined:
    Jan 20, 2019
    Member:
    #279940
    Messages:
    1,038
    Gender:
    Male
    First Name:
    Todd
    Louisville, KY
    Vehicle:
    04 Ext Cab V6 5MT 4X4 180k
    881/5100/Dakars 4R wheels / TBU / New frame
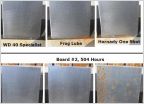
    My truck is originally from Pennsylvania, so I had plenty of rust to deal with when I replaced my front shocks and springs. Here's what it looked like before the work started:


    Depending on how much rust you're dealing with, you should just be prepared to have to cut some of the hardware. It's a manageable job if you take your time and have the right tools. I used an angle grinder and dremel on some of the front hardware. A propane torch is also useful to have.
     
  14. Dec 2, 2019 at 10:01 AM
    #294
    Markcal

    Markcal Well-Known Member

    Joined:
    Aug 14, 2014
    Member:
    #136147
    Messages:
    3,115
    Did you replace the coils on shock as a unit or only the shocks? I planned to reuse my coils and just remove the old shocks with new Bilstein 5100 that have been sitting in my basement for 2 years waiting to be installed.
     
  15. Dec 2, 2019 at 10:05 AM
    #295
    CrustyTaco

    CrustyTaco Well-Known Member

    Joined:
    Jan 20, 2019
    Member:
    #279940
    Messages:
    1,038
    Gender:
    Male
    First Name:
    Todd
    Louisville, KY
    Vehicle:
    04 Ext Cab V6 5MT 4X4 180k
    881/5100/Dakars 4R wheels / TBU / New frame
    I swapped in OME 2881 springs and Bilstein 5100 shocks. My springs cleaned up pretty good though, I could have reused them.
     
    Markcal[QUOTED] likes this.
  16. Dec 2, 2019 at 1:36 PM
    #296
    ricknobinson

    ricknobinson Well-Known Member

    Joined:
    Jul 27, 2019
    Member:
    #300465
    Messages:
    113
    Gender:
    Male
    First Name:
    Nick
    Vehicle:
    06 TRD Off Road Tacoma Access Cab

    Mine has some surface rust in spots but it nothing on the shocks themselves. The hardest thing you’ll encounter will probably be holding the shaft and freeing the top nut. Mine was a bitch.
     
  17. Dec 2, 2019 at 2:13 PM
    #297
    MAG GRY TACO15

    MAG GRY TACO15 Well-Known Member

    Joined:
    Sep 5, 2018
    Member:
    #265273
    Messages:
    5,053
    Gender:
    Male
    First Name:
    Alan
    GA
    Vehicle:
    '15 TRD Off-Road
    Same crap everyone else got
    If you are worried about stuck bolts, go spray them all with penetrating liquid each night for a week before you know you're going to do the work on your truck.
     
  18. Jan 3, 2024 at 5:29 PM
    #298
    poopshute

    poopshute Well-Known Member

    Joined:
    Jul 7, 2009
    Member:
    #19385
    Messages:
    813
    Gender:
    Male
    Colorado
    Vehicle:
    2017 Tacoma TRD Pro Storm Trooper
    Wow, it's been a LONG while since posting here. Typically I'm on FB. However, this is a great idea and I've been reading through all of the comments as I get ready to install an Eibach TRD Pro (3rd gen) spring kit.

    Two questions...

    3rd gen owners, can you speak up if you've used this method? Any gotchas?

    2nd question, any issues getting a torque wrench in the wheel well to torque the top nut to proper spec (I believe it's around 20 ft/lbs)?
     

Products Discussed in

To Top