1. Welcome to Tacoma World!

    You are currently viewing as a guest! To get full-access, you need to register for a FREE account.

    As a registered member, you’ll be able to:
    • Participate in all Tacoma discussion topics
    • Communicate privately with other Tacoma owners from around the world
    • Post your own photos in our Members Gallery
    • Access all special features of the site

Billstein 5100 easy install method

Discussion in 'Suspension' started by Holyfather, Mar 24, 2012.

  1. Jul 12, 2012 at 2:38 PM
    #81
    greenrustic

    greenrustic Well-Known Member

    Joined:
    Jan 16, 2012
    Member:
    #70776
    Messages:
    676
    Gender:
    Male
    NY
    Vehicle:
    2012 DCLB 4x4 TRD SPORT
    Access LTD Tonneau Cover, Weather Tech Digital Fit Mats, Weather Tech Rain Guards, 35% Tint up Front, AFE Dry Power Intake Filter, Debadged, GrilleCraft, OME 884x, OME 9000 NitroChargers, Icon 3 Leaf Progressive AAL
    db-thanks!
     
  2. Jul 12, 2012 at 4:55 PM
    #82
    white toy taco

    white toy taco 505 Member

    Joined:
    Dec 23, 2011
    Member:
    #69296
    Messages:
    1,925
    Gender:
    Male
    Albuquerque, NM
    Vehicle:
    '06 OR and '02 OR (sold)
    you will find that . its the 01-04 complete repair manual. thats one of the sites i visit often when wanting to know random stuff like torque specs
     
  3. Jul 12, 2012 at 4:58 PM
    #83
    buzzard1992

    buzzard1992 Yep

    Joined:
    Sep 16, 2010
    Member:
    #43343
    Messages:
    2,417
    Gender:
    Male
    First Name:
    Alex
    Summerville, SC
    Vehicle:
    01 4wd trd, 255/85/16 km2s
    5100's with eibachs. And 255/85/16 km2s
    Awesome! Thanks man
     
  4. Jul 13, 2012 at 2:43 PM
    #84
    jeremy1ns

    jeremy1ns Gamecock Tacos

    Joined:
    Mar 14, 2011
    Member:
    #53034
    Messages:
    764
    Gender:
    Male
    First Name:
    Jeremy
    Greenwood, SC
    Vehicle:
    2010 TRD Sport BR
    None yet, but its about to get rolling.
    Thanks for the video, will be doing this when i purchase 5100s
     
  5. Jul 26, 2012 at 7:51 PM
    #85
    greenrustic

    greenrustic Well-Known Member

    Joined:
    Jan 16, 2012
    Member:
    #70776
    Messages:
    676
    Gender:
    Male
    NY
    Vehicle:
    2012 DCLB 4x4 TRD SPORT
    Access LTD Tonneau Cover, Weather Tech Digital Fit Mats, Weather Tech Rain Guards, 35% Tint up Front, AFE Dry Power Intake Filter, Debadged, GrilleCraft, OME 884x, OME 9000 NitroChargers, Icon 3 Leaf Progressive AAL
    This method is easy and I felt in control and safe through the entire process. I even had a wall mounted spring compressor I could have used but I am glad I went this route.
     
  6. Sep 7, 2012 at 8:27 AM
    #86
    SconnieHailer

    SconnieHailer PutterClutch

    Joined:
    Aug 26, 2012
    Member:
    #85590
    Messages:
    9,737
    Gender:
    Male
    First Name:
    Marc
    West Central Wisconsin
    Vehicle:
    2012 TRD Off Road Double Cab V6 6Speed
    I picked up a pair of Billy 5100 for the front of my new 2012 Taco. I'll document as I do my install with pictures and post back sometime next week if anyone is interested. I feel this has sort of been beaten to death that it works well, but I thought id add some more pictures for newbs trying this. Should be easy and fun since the truck is still so clean!

    ~M
     
  7. Sep 7, 2012 at 8:38 AM
    #87
    tmreyes1

    tmreyes1 Well-Known Member

    Joined:
    Dec 8, 2011
    Member:
    #68412
    Messages:
    1,726
    Gender:
    Male
    First Name:
    T-Rey
    TX
    Vehicle:
    2017 TRD
    I had the same issue with the Eibach springs
     
  8. Sep 7, 2012 at 10:29 AM
    #88
    Bama_TACO

    Bama_TACO ROLL TIDE!!!!!!!

    Joined:
    Aug 3, 2010
    Member:
    #41157
    Messages:
    1,011
    Gender:
    Male
    Winfield, AL
    Vehicle:
    2006 PreRunner Double Cab TRD SPORT
    I'm surprised. I didn't have that issue installing my OME 885x springs.
     
  9. Sep 7, 2012 at 12:10 PM
    #89
    tmreyes1

    tmreyes1 Well-Known Member

    Joined:
    Dec 8, 2011
    Member:
    #68412
    Messages:
    1,726
    Gender:
    Male
    First Name:
    T-Rey
    TX
    Vehicle:
    2017 TRD
    The springs were pretty stiff.
     
  10. Sep 8, 2012 at 10:41 PM
    #90
    Drunknsloth

    Drunknsloth Indffrnce will be the fall of manknd but who cares

    Joined:
    Jun 17, 2010
    Member:
    #39105
    Messages:
    3,126
    Gender:
    Male
    First Name:
    Retribution
    South West
    Vehicle:
    08 SR5 Access V6 6-Speed
    Blacked-Out Badges; Retribution Decals (Sockmonkey); Tailgate Mod; Red LED Rear Blinkers; Yellow Foglights; Yellow Front Blinkers; Superwhite Xenon Corner Bulb; Leer Bedcap; Bedrug Bedmat; Black Cupholders; Black Plastic Piece Around Window Controls; Plasti-Dip Front Bumper Valence; Plasti-Dip Grill Surround; Blackout Chrome Back Bumper; Metal Miller Skid-Plate; Aero Turbine 2525 Muffler; TSB Rear Leaf Springs and Shocks; Satoshi Grill Pending; Off-Roading Torn off Mirror (Replaced); Blue-Sea Fuse Box; Tinted Tail Lights; URD Short Shifter; Interior Mood Lighting; Hood Lights; BedLights Pending
    I just muscled the gap together with the 885 OME springs
     
  11. Sep 12, 2012 at 7:01 PM
    #91
    SconnieHailer

    SconnieHailer PutterClutch

    Joined:
    Aug 26, 2012
    Member:
    #85590
    Messages:
    9,737
    Gender:
    Male
    First Name:
    Marc
    West Central Wisconsin
    Vehicle:
    2012 TRD Off Road Double Cab V6 6Speed
    Installed the 5100's up front yesterday at 1.75 setting. I don't have the TSB rear since it's a 2012 and an Off Road TRD version which come with the 3 leaf pack. After settle with the 1.75 setting the front was 1/4 inch higher than the rear. It drove a bit stiff as well and felt like the coils were pre loaded a bit too much. Sooo today I dropped the 5100's back out and set them to the .85 setting. It looked much better after settle and felt excellent on the road. There is a big whoop in the road a mile from my place that makes it really easy to tell how well the shock is setup. The whoop never felt so good :)

    Overall with the stock progressive rate coils that come on the TRD Off Road and not the sport feel the best (performance wise) at the 5100 .85 setting.

    The first time I did this it took me roughly 3 hours. Today it took me 1.5 hours. This method is extremely easy and safe if done with quality jacks or lifts and solid contact points between them and the truck frame.

    If you loosen the lower control arm cam bolts enough to get the LCA to swing straight out of the way you can get the shock out followed by the coil without removing any of the sway bar connections.

    Pictures will be uploaded after I can get them off my camera, which will most likely be tomorrow afternoon.

    I had a hard time finding any pictures or people who had done the 5100 on a truck without the TSB which is why I am posting.

    I hope this wasn't too long winded...
    ~M
     
  12. Sep 12, 2012 at 8:24 PM
    #92
    SconnieHailer

    SconnieHailer PutterClutch

    Joined:
    Aug 26, 2012
    Member:
    #85590
    Messages:
    9,737
    Gender:
    Male
    First Name:
    Marc
    West Central Wisconsin
    Vehicle:
    2012 TRD Off Road Double Cab V6 6Speed
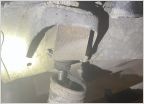
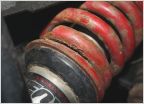
    [​IMG]

    [​IMG]

    [​IMG]

    Got them off the camera tonight.

    Sorry they aren't the best pictures.

    ~M
     
  13. Sep 13, 2012 at 6:28 PM
    #93
    burnout03

    burnout03 Member

    Joined:
    Aug 24, 2012
    Member:
    #85454
    Messages:
    19
    Gender:
    Male
    First Name:
    Russ
    Conway, SC
    used this method to install my 5100's with stock springs @ 1.75 on my 2013. very easy only took 45 min. thanks for the write up.
     
  14. Sep 15, 2012 at 5:21 PM
    #94
    Motogash

    Motogash Member

    Joined:
    Sep 15, 2012
    Member:
    #87005
    Messages:
    10
    Gender:
    Male
    Las Vegas
    Vehicle:
    03 PreRunner
    I know someone has already asked but I didn't see a reply. Anyone have experience on this install method in the video with a 1st gen... 2003? It looks like the suspension arm needs to be disconnected at the ball joint instead of the steering knuckle. Looks like stabilizer bar needs to be disconnected too. Do you need a special tool to separate the ball joint? Anyone ever tried? Any help is appreciated.
     
  15. Jan 14, 2013 at 2:51 PM
    #95
    TwzteD

    TwzteD Well-Known Member

    Joined:
    Mar 28, 2011
    Member:
    #53902
    Messages:
    707
    Gender:
    Male
    First Name:
    Kyle
    St Lucie Fl
    Vehicle:
    2013 4x4 reg cab Auto
    2013 4x4 reg cab, 2011 4runner sr5 rims, 265 general grabber at2's, 5100's All 4 corners with fronts at .85, De badged, Egr Rainguards, Led tail lights, Int wipers, fog lights, Trailer Hitch, POwer locks+ keyless entry, Extang Solidfold Bed Cover, WeatherTech Mats, Stubbie Antenna, Trd Skid Plate, Tint, Scanguage, Cargo net in bed, Sound Ordnance B-8PT, FULID FILM Under Coat.
    Can anyone tell me the best place and time to dissconnect the swaybar? do i disconnect it when the truck is on the ground or up in the air witch is easier? and wheres the best place to disconnected it? I plan on doing this over the weekend, got my 5100's today and i put the rears in in less than 45 mins so fronts will prob go in this weekend.
     
  16. Jan 14, 2013 at 2:54 PM
    #96
    TwzteD

    TwzteD Well-Known Member

    Joined:
    Mar 28, 2011
    Member:
    #53902
    Messages:
    707
    Gender:
    Male
    First Name:
    Kyle
    St Lucie Fl
    Vehicle:
    2013 4x4 reg cab Auto
    2013 4x4 reg cab, 2011 4runner sr5 rims, 265 general grabber at2's, 5100's All 4 corners with fronts at .85, De badged, Egr Rainguards, Led tail lights, Int wipers, fog lights, Trailer Hitch, POwer locks+ keyless entry, Extang Solidfold Bed Cover, WeatherTech Mats, Stubbie Antenna, Trd Skid Plate, Tint, Scanguage, Cargo net in bed, Sound Ordnance B-8PT, FULID FILM Under Coat.

    hmm just re red this, maby i dont have to dissconnect it.
     
  17. Jan 14, 2013 at 4:04 PM
    #97
    white toy taco

    white toy taco 505 Member

    Joined:
    Dec 23, 2011
    Member:
    #69296
    Messages:
    1,925
    Gender:
    Male
    Albuquerque, NM
    Vehicle:
    '06 OR and '02 OR (sold)
    well the rears are A LOOOOOOOT easier to put in that the fronts because the rears only have 2 bolts so i would plan for a few hours to complete the front.

    i cant remember if i diconnected it in the air or on the ground but i think its easier in the air because the tire is in the way. super simple to undo. and i would leave it off for a better ride. but if you still want it on, i would diconnect it where its bolted to the LCA and i think you can just move it up out of the way after that

    EDIT: just saw your a 2nd gen so it might be a little different. ill let a 2nd gen chime in
     
  18. Jan 14, 2013 at 4:21 PM
    #98
    TwzteD

    TwzteD Well-Known Member

    Joined:
    Mar 28, 2011
    Member:
    #53902
    Messages:
    707
    Gender:
    Male
    First Name:
    Kyle
    St Lucie Fl
    Vehicle:
    2013 4x4 reg cab Auto
    2013 4x4 reg cab, 2011 4runner sr5 rims, 265 general grabber at2's, 5100's All 4 corners with fronts at .85, De badged, Egr Rainguards, Led tail lights, Int wipers, fog lights, Trailer Hitch, POwer locks+ keyless entry, Extang Solidfold Bed Cover, WeatherTech Mats, Stubbie Antenna, Trd Skid Plate, Tint, Scanguage, Cargo net in bed, Sound Ordnance B-8PT, FULID FILM Under Coat.
    Yea I did the fronts before on my 2010 but I put it on a lift gonna try this method this time around.
     
  19. Jan 15, 2013 at 1:46 AM
    #99
    DDD

    DDD Shine bright like a hymen

    Joined:
    Mar 6, 2009
    Member:
    #14416
    Messages:
    2,303
    Gender:
    Male
    First Name:
    Derek
    Santa Clarita, CA
    You can disconnect the sway bar either up on jack stands or on the ground. It is under no tension unless one side of the front suspension is higher than the other. I would support the truck on jack stands, take off the wheels, then disconnect the sway bar links from the spindles. Once the links on both sides of the truck are disconnected the sway bar can be rotated up or down by hand. This should provide you with enough room to install the 5100s.

    If you want to completely remove the sway bar you will need to remove the skid plate and 2 bumper support brackets first.
     
  20. Jan 15, 2013 at 2:40 AM
    #100
    TwzteD

    TwzteD Well-Known Member

    Joined:
    Mar 28, 2011
    Member:
    #53902
    Messages:
    707
    Gender:
    Male
    First Name:
    Kyle
    St Lucie Fl
    Vehicle:
    2013 4x4 reg cab Auto
    2013 4x4 reg cab, 2011 4runner sr5 rims, 265 general grabber at2's, 5100's All 4 corners with fronts at .85, De badged, Egr Rainguards, Led tail lights, Int wipers, fog lights, Trailer Hitch, POwer locks+ keyless entry, Extang Solidfold Bed Cover, WeatherTech Mats, Stubbie Antenna, Trd Skid Plate, Tint, Scanguage, Cargo net in bed, Sound Ordnance B-8PT, FULID FILM Under Coat.
    Gotcha that was the answer I was looking for, thank you.
     

Products Discussed in

To Top