1. Welcome to Tacoma World!

    You are currently viewing as a guest! To get full-access, you need to register for a FREE account.

    As a registered member, you’ll be able to:
    • Participate in all Tacoma discussion topics
    • Communicate privately with other Tacoma owners from around the world
    • Post your own photos in our Members Gallery
    • Access all special features of the site

BlaisBrosTacos '08 Reg Cab 4x4 Build and Adventures

Discussion in '2nd Gen. Builds (2005-2015)' started by Blais03, Sep 1, 2016.

  1. Dec 28, 2019 at 8:54 PM
    #1261
    Breakfast Taco

    Breakfast Taco Well-Known Member

    Joined:
    Jul 4, 2017
    Member:
    #223169
    Messages:
    3,111
    SW CT
    Vehicle:
    2002 4x4 5spd 2.7L
    I honestly did not know these came in colors other than red or black.

    So how do you use one. Seriously, what do you lift under & say there's unlevel ground - how do you prevent the truck from just sliding off those divots on the lift plate? I don't see how they're mechanically attached to the vehicle.
     
    Mech1txs likes this.
  2. Dec 28, 2019 at 8:58 PM
    #1262
    Blais03

    Blais03 [OP] Guess I'll bring a spare wheel bearing...

    Joined:
    Nov 13, 2015
    Member:
    #169518
    Messages:
    4,476
    Gender:
    Male
    First Name:
    Nick
    Easthampton MA
    Vehicle:
    '08 Reg. Cab 4WD + '06 Reg. Cab 2WD
    They have different attachments you can use for sliders, wheels, bumpers, shackles, etc. they have base plates, and other accessories too. Check them out on YouTube. They do a ton of things, not just lifting and lowering, they also can be used as a winch, a spreader, clamp, etc.
     
  3. Dec 30, 2019 at 7:46 AM
    #1263
    Blais03

    Blais03 [OP] Guess I'll bring a spare wheel bearing...

    Joined:
    Nov 13, 2015
    Member:
    #169518
    Messages:
    4,476
    Gender:
    Male
    First Name:
    Nick
    Easthampton MA
    Vehicle:
    '08 Reg. Cab 4WD + '06 Reg. Cab 2WD
    My 08 2.7l with 225K miles recently started becoming low on coolant. After surfing around the forum here, I found a few threads on this and saw this pipe being a relatively common problem. Looked around the engine bay and found this... I obviously can't see the other side of the pipe but knowing how much coolant I am loosing I am guessing there's something broken on that end too. I am glad I caught this before it ran out and or overheated. I am going to try to make this post as detailed as I can as it was hard for me to find the information needed to do this job. I will be replacing the pipe and gasket tomorrow so stay tuned. This post will get updated with more pictures etc.
    [​IMG]

    As you can see, 16268 and 16268G in the picture below is what needs to be replaced.
    [​IMG]

    I just got this from my local Toyota dealer this morning! I included part numbers for anyone looking for them. I wanted to make sure I replaced this pipe with the stainless steel version and not the plastic version! Here are the most recent part numbers (part numbers often change with updates). My total was $54.92 + tax

    Stainless steel water by-pass pipe part # 16268-75131
    Metal gasket part # 16258-75021

    I prefer to use OEM parts when I can but I would also like to add that Dorman makes a fix for this as well. Dorman # 626-554 which comes with a gasket and is listed on Rock Auto for $41.79. Here a link if you'd rather go that route https://www.rockauto.com/en/moreinfo.php?pk=9769344&jsn=255

    [​IMG][​IMG][​IMG]
     
    Breakfast Taco and DrFunker like this.
  4. Dec 30, 2019 at 9:14 AM
    #1264
    DrFunker

    DrFunker Well-Known Member

    Joined:
    Feb 3, 2014
    Member:
    #122158
    Messages:
    42,919
  5. Dec 30, 2019 at 9:22 AM
    #1265
    Blais03

    Blais03 [OP] Guess I'll bring a spare wheel bearing...

    Joined:
    Nov 13, 2015
    Member:
    #169518
    Messages:
    4,476
    Gender:
    Male
    First Name:
    Nick
    Easthampton MA
    Vehicle:
    '08 Reg. Cab 4WD + '06 Reg. Cab 2WD
    Just loaded her into the operating room. Surgery starts tonight.
    image.jpg
     
  6. Dec 30, 2019 at 9:23 AM
    #1266
    DrFunker

    DrFunker Well-Known Member

    Joined:
    Feb 3, 2014
    Member:
    #122158
    Messages:
    42,919
    Going to livestream this one? :D
     
  7. Dec 30, 2019 at 9:25 AM
    #1267
    Blais03

    Blais03 [OP] Guess I'll bring a spare wheel bearing...

    Joined:
    Nov 13, 2015
    Member:
    #169518
    Messages:
    4,476
    Gender:
    Male
    First Name:
    Nick
    Easthampton MA
    Vehicle:
    '08 Reg. Cab 4WD + '06 Reg. Cab 2WD
    Only if your virgin ears are ready for a colorful poem spontaneously written by yours truly :crapstorm:
     
  8. Dec 30, 2019 at 9:35 AM
    #1268
    DrFunker

    DrFunker Well-Known Member

    Joined:
    Feb 3, 2014
    Member:
    #122158
    Messages:
    42,919
    Coffeehouse Garage.....:rolleyes:

    I like it! :thumbsup:
     
  9. Dec 30, 2019 at 7:48 PM
    #1269
    Blais03

    Blais03 [OP] Guess I'll bring a spare wheel bearing...

    Joined:
    Nov 13, 2015
    Member:
    #169518
    Messages:
    4,476
    Gender:
    Male
    First Name:
    Nick
    Easthampton MA
    Vehicle:
    '08 Reg. Cab 4WD + '06 Reg. Cab 2WD
    After work I got the truck in the garage and got to work. I will say, this job isn't nearly as difficult as I expected and I am no professional mechanic. A few basic hand tools and some common sense and anyone can do this.

    I drained my coolant first just because I wanted drain and refill it while I was at it. I don't think this is necessary but I'd recommend it as you'll be loosing coolant later anyway.

    Second, I removed the air intake. I have a cold air intake so it was super simple with the only tool needed was a 10mm wrench.
    [​IMG] [​IMG]
    Next I disconnected and removed the throttle body, use a 10mm socket and remove the 2 nuts and 2 bolts that hold it on. I left the throttle body's hoses connected and just pushed it up out of the way.
    [​IMG]

    Next step would be to remove the 5 bolts and 2 nuts that hold on the intake manifold. I used a 12mm socket with a few different extensions. I think I used nearly 2.5 feet worth of extensions to get to the 2 lower intake manifold bolts through the wheel well. I did not need to remove the wheel for this on my truck. Also remove the electrical connections on the manifold. Once the manifold is completely disconnected pull it away from the block.
    [​IMG]

    Now you can finally see the pipe you're trying to replace.
    [​IMG]

    Undo the 2 fuel line connectors and push the hoses up and out of the way. Now carefully remove the intake manifold from the engine compartment. its a tight fit and requires a little persuasion but it will squeeze out. Put the intake manifold in a clean safe place.
    [​IMG]

    Hooray! The hard part is done. Now we can get to the stupid plastic pipe Toyota was generous enough to supply! Simply remove the 2 rubber hoses on the end of it, be careful as the small nipple could easily break off inside the hose. if it does like mine did, just screw in a dry wall screw and pull on the head of it. Pulls right out. anyway, remove the hoses, coolant will spill everywhere which I expected but wasn't prepared for (had to buy some kitty litter). Remove the bolt and 2 nuts holding on the shitty plastic pipe. (all 12mm). Once removed, throw the pipe right in the trash where it belongs! [​IMG]
    Clean everything the best you can, insert the gasket, and put the pipe on. replace the 2 nuts and the bolt. Tighten them down evenly so the gasket seats properly. Connect the 2 hoses as well.
    [​IMG][​IMG] [​IMG]

    This is where I have stopped for the night. Had to buy some shop towels, kitty litter, coolant, a funnel, and I decided while the intake manifold was off it was worth replacing the intake manifold gasket. $28 at the local auto parts store. I will finish the job in the morning. and update this post when its done. I hope someone finds this useful.
     
  10. Dec 31, 2019 at 4:05 AM
    #1270
    DrFunker

    DrFunker Well-Known Member

    Joined:
    Feb 3, 2014
    Member:
    #122158
    Messages:
    42,919
    Great write up Nick. :bowdown:
    This will help quite a few people. :thumbsup:
     
    Blais03[QUOTED][OP] likes this.
  11. Jan 3, 2020 at 8:23 PM
    #1271
    Blais03

    Blais03 [OP] Guess I'll bring a spare wheel bearing...

    Joined:
    Nov 13, 2015
    Member:
    #169518
    Messages:
    4,476
    Gender:
    Male
    First Name:
    Nick
    Easthampton MA
    Vehicle:
    '08 Reg. Cab 4WD + '06 Reg. Cab 2WD
    Painted the trail jack. Gotta match the truck right? 37213CB8-5585-4D61-90A3-122A60D5F4F6.jpg
     
  12. Jan 6, 2020 at 11:29 AM
    #1272
    Blais03

    Blais03 [OP] Guess I'll bring a spare wheel bearing...

    Joined:
    Nov 13, 2015
    Member:
    #169518
    Messages:
    4,476
    Gender:
    Male
    First Name:
    Nick
    Easthampton MA
    Vehicle:
    '08 Reg. Cab 4WD + '06 Reg. Cab 2WD
    38950B5B-729F-4E2D-9776-A8841F347164.jpg
    Been working on my tool box recently. Doing my best to make it very clean.

    As you've seen my entire on board water system is inside the box, I am adding dual battery setup with the aux battery in the tool box as well as a new Smittybilt 5.65 CFM air compressor, solar controller, battery isolator, and blue seat fuse block. Stay tuned.
     
    Last edited: Jan 6, 2020
  13. Jan 6, 2020 at 9:11 PM
    #1273
    Blais03

    Blais03 [OP] Guess I'll bring a spare wheel bearing...

    Joined:
    Nov 13, 2015
    Member:
    #169518
    Messages:
    4,476
    Gender:
    Male
    First Name:
    Nick
    Easthampton MA
    Vehicle:
    '08 Reg. Cab 4WD + '06 Reg. Cab 2WD
    When they don’t make side terminal battery boxes, you make your own with a hole saw!4015D9D5-545B-4BCA-872B-33C9C201247B.jpg 67376E01-EF76-401D-BD0D-556E5D1C43C5.jpg
     
    Grand dude, 5 Lug Fury and DrFunker like this.
  14. Jan 7, 2020 at 12:28 PM
    #1274
    Grand dude

    Grand dude Well-Known Member

    Joined:
    Jul 16, 2016
    Member:
    #192126
    Messages:
    6,253
    Gender:
    Male
    First Name:
    Dave
    lehigh valley, PA.
    Vehicle:
    2016 trd or dcsb & 2002 trdor exclb
    cool stickers and a baseball card With clothes pin, sounds awesome ! wicked
    :thumbsup::spy:
     
    Blais03[QUOTED][OP] likes this.
  15. Jan 7, 2020 at 12:34 PM
    #1275
    Blais03

    Blais03 [OP] Guess I'll bring a spare wheel bearing...

    Joined:
    Nov 13, 2015
    Member:
    #169518
    Messages:
    4,476
    Gender:
    Male
    First Name:
    Nick
    Easthampton MA
    Vehicle:
    '08 Reg. Cab 4WD + '06 Reg. Cab 2WD
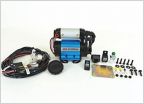
    Smittybilt 5.65 CFM air compressor came in today! This this is fricken huge!! But it does fit where I need it to. 7C5F05C8-8DEA-486B-812F-CF3C86F3EB89.jpg 185B26AD-14B2-495D-88FA-087C7F5E5964.jpg
     
  16. Jan 7, 2020 at 1:38 PM
    #1276
    Grand dude

    Grand dude Well-Known Member

    Joined:
    Jul 16, 2016
    Member:
    #192126
    Messages:
    6,253
    Gender:
    Male
    First Name:
    Dave
    lehigh valley, PA.
    Vehicle:
    2016 trd or dcsb & 2002 trdor exclb
    cool stickers and a baseball card With clothes pin, sounds awesome ! wicked
    Nick man I got a question for you ………..
    at what point is it necessary to use relays for switching ? The reason I'm asking I want to put in a 4 gang switch panel in the truck bed
    for some low wattage lighting...2x3amp, dometic cfx40 7.5amp & usb charger 3amp,maybe 18 amp total ?

    https://www.amazon.com/dp/B06XPJ38W...olid=3LGPYOKZXGXYW&psc=1&ref_=lv_ov_lig_dp_it
     
    Last edited: Jan 7, 2020
  17. Jan 7, 2020 at 2:00 PM
    #1277
    Blais03

    Blais03 [OP] Guess I'll bring a spare wheel bearing...

    Joined:
    Nov 13, 2015
    Member:
    #169518
    Messages:
    4,476
    Gender:
    Male
    First Name:
    Nick
    Easthampton MA
    Vehicle:
    '08 Reg. Cab 4WD + '06 Reg. Cab 2WD
    What are the switches rated for? a good rule of thumb: Your load should be no more than 75% of the amperage the switch is rated for. If its more the 75% you need to wire a relay. Usually those toggle switches are 20A switches but I don't see any of that information on the listing. If you're only running a total of 18 amps throughout 4 switches (so only 4.5 amps each switch) you'll probably be fine.

    Have you considered something like a switch controller with relays and fuses built in? Check out Painless Wiring.
     
    Last edited: Jan 7, 2020
    Grand dude[QUOTED] likes this.
  18. Jan 7, 2020 at 9:01 PM
    #1278
    Grand dude

    Grand dude Well-Known Member

    Joined:
    Jul 16, 2016
    Member:
    #192126
    Messages:
    6,253
    Gender:
    Male
    First Name:
    Dave
    lehigh valley, PA.
    Vehicle:
    2016 trd or dcsb & 2002 trdor exclb
    cool stickers and a baseball card With clothes pin, sounds awesome ! wicked
    Thanks Nick that sounds good, I have a switch controller with relays and fuses in engine compartment running the HP stuff
    Im now looking at the MICTUNING 6 Gang rocker switch panel has Switch rated: DC 12V/20A, DC 24V/10A that should cover my needs.
    down side..the rocker covers only come one way...…….I think.

    https://mictuning.com/6-gang-rocker...oltmeter-for-car-truck-marine-boat_p0402.html
     
    Blais03[QUOTED][OP] likes this.
  19. Jan 8, 2020 at 4:30 AM
    #1279
    Blais03

    Blais03 [OP] Guess I'll bring a spare wheel bearing...

    Joined:
    Nov 13, 2015
    Member:
    #169518
    Messages:
    4,476
    Gender:
    Male
    First Name:
    Nick
    Easthampton MA
    Vehicle:
    '08 Reg. Cab 4WD + '06 Reg. Cab 2WD
    Should be fine. Again, 20a switch, so try to make sure you’re not running more than 15a through each switch.
     
  20. Jan 8, 2020 at 7:28 PM
    #1280
    Blais03

    Blais03 [OP] Guess I'll bring a spare wheel bearing...

    Joined:
    Nov 13, 2015
    Member:
    #169518
    Messages:
    4,476
    Gender:
    Male
    First Name:
    Nick
    Easthampton MA
    Vehicle:
    '08 Reg. Cab 4WD + '06 Reg. Cab 2WD
    Got my 2 gallon air tank freshly bedlined. Can’t wait to get this baby mounted up! I repurposed it from an old Campbell Hausfeld air compressor that a buddy of mine had and when it shit the bed, I took it apart and kept the tank. Should work perfectly!
    B5912579-DFAF-4137-8056-7AD50F09F8D0.jpg 66FB1D63-39EF-43EA-A23E-958BC032AB34.jpg
     
    Last edited: Jan 9, 2020
    DrFunker likes this.
To Top