1. Welcome to Tacoma World!

    You are currently viewing as a guest! To get full-access, you need to register for a FREE account.

    As a registered member, you’ll be able to:
    • Participate in all Tacoma discussion topics
    • Communicate privately with other Tacoma owners from around the world
    • Post your own photos in our Members Gallery
    • Access all special features of the site

BLP's 2021 TRD OR 6MT

Discussion in '3rd Gen. Builds (2016-2023)' started by BLtheP, May 12, 2022.

  1. May 12, 2022 at 1:36 PM
    #1
    BLtheP

    BLtheP [OP] Not a Member

    Joined:
    Apr 5, 2022
    Member:
    #394355
    Messages:
    3,759
    Gender:
    Male
    Plano, TX
    Vehicle:
    2021 MGM TRD On-Road DCSB MT
    5.29 Gears, FJ Metal Pedal, OEM Condenser Fan
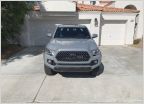
    After picking some brains here a month or so ago and asking what folks thought of their 6MT Third Gens, I decided to pull the trigger on one I found nearby. I've been driving a 2019 Nissan Frontier and decided to trade it in. I don't have the truck yet because part of my deal with the dealer was to take off all my mods and then bring it back. I have thousands of dollars of Frontier stuff I can sell that will help.

    The specs:

    Year: 2021
    Trim: TRD Off-Road
    Engine: 3.5L V6
    Transmission: 6-Speed Manual
    Color: Magnetic Gray Metallic

    I found the truck at a Toyota dealer and decided to swing by. It was an August 2021 build in perfect condition with not quite 4,000 miles. The only "mods" I could find are a hose clamp on the tailgate, some terribly dim sequential mirror indicators, Lasfit LED bulbs in the headlights, fogs, side markers, tail lamp and backup lamps, pre-2020 all-red tail lights, TRD Graphite 17" wheels, and they debadged the "V6" emblem off the tailgate. And luckily for me, the dealer rebadged it for me with their lovely "Family Toyota" sticker, lol. I'm not much of a debadger but anything dealer related has got to go, so I will be pulling all the plate frames and that badge soon enough.

    Overall excited to get this truck. I have a pretty good list of things going and dammit, keep adding more to the list. We will see.

    Audio/Video:
    Exterior:
    Interior:
    Lighting:

    Performance:
    Suspension & Tires:
    Maintenance/Preventative Stuff:
    Upcoming (the list will grow):
    • Rigid SAE 30" driving light bar
    • Clazzio or Katzkin seat treatment with heaters
    • AMP power steps

    Here's the Tacoma (I only got one quick pic but will get more on Saturday after the swap):

    IMG_4724.jpg

    So long old friend:

    IMG_4713.jpg
     
    Last edited: Jun 7, 2023
    This site contains affiliate links for which the site may be compensated.
    #1
    tacoLvR10, specter208, Twize and 2 others like this.
  2. May 25, 2022 at 9:27 PM
    #2
    BLtheP

    BLtheP [OP] Not a Member

    Joined:
    Apr 5, 2022
    Member:
    #394355
    Messages:
    3,759
    Gender:
    Male
    Plano, TX
    Vehicle:
    2021 MGM TRD On-Road DCSB MT
    5.29 Gears, FJ Metal Pedal, OEM Condenser Fan
    Floor Mats

    The first thing I decided to do was floor liners. Being a manual transmission, the mats are a relatively limited selection. There are OEM, WeatherTech, Husky, and I'm sure a few no-name Chinese options from eBay or Amazon. WeatherTechs don't cover the dead pedal very well, Toyota leaves out some coverage around the gas pedal, and I don't know anything about the no-names. I read a few good things here about the Husky WeatherBeater series (13981) being decent for manual transmission owners, so I decided to try them out. For $75 from Amazon, they're pretty great! Perfect fit, nice thick material, etc. They are honestly probably the best fitting liner style mat I have seen on a vehicle. The only downside is that they maybe don't go up the transmission tunnel sides as far as some other options do, but I don't rub my dirty boots against that area so it's really not a concern for me.

    I also do like that they are pretty smooth which makes it much easier for my left heel to slide across the mat for clutch use, as opposed to my shoes/boots getting caught on the carpet and sliding jerkily. The mats also have nice spikes on the bottom so they catch the carpet and don't move too much. Not every floor liner option has those.

    I only bought the fronts to experiment with but after these results I'm going to buy the rear soon.

    Few pictures on and off the truck:

    Left:

    IMG_5218.jpg

    Right:

    IMG_5219.jpg

    Left:

    IMG_5220.jpg

    Right:

    IMG_5221.jpg

    Rear Liners:

    I received my rear mat after liking the fronts enough and deciding to order the rear. I opted for the X-Act Contour series (53981) which I read for a rear liner is a better choice than the harder Weatherbeaters like what I put up front. It fit great and looks good. I'm happy with it and would recommend.

    IMG_5414.jpg
     
    Last edited: May 31, 2022
    This site contains affiliate links for which the site may be compensated.
    #2
    tacoLvR10 likes this.
  3. May 25, 2022 at 9:47 PM
    #3
    BLtheP

    BLtheP [OP] Not a Member

    Joined:
    Apr 5, 2022
    Member:
    #394355
    Messages:
    3,759
    Gender:
    Male
    Plano, TX
    Vehicle:
    2021 MGM TRD On-Road DCSB MT
    5.29 Gears, FJ Metal Pedal, OEM Condenser Fan
    Gentex Homelink 4 Mirror

    I did not like having a tacky garage door opener clipped to my windshield visor, so I opted for a clean solution on the rearview mirror. Enter the Homelink 4 direct plug and play mirror for Tacomas from Bob's Automotive Mirrors & More. In my previous Frontier I did a similar mod by taking a Homelink mirror out of a 2013-2019 Frontier SL, which I had to do wiring work to make happen.

    The Tacoma was very simple, it's all plug and play. I opted to buy the $20 adapter harness. Bob's made it seem as if I will need it since I have a 2021 and apparently the 2020+ need it. A typical Homelink mirror will have 3 wires: ignition power, constant power, and ground. The ignition power is for the compass and auto dimming, the battery power is for the garage opener. Bob's website states for the harness that "This is for 2020 & 2021 trucks that do not have constant power to the mirror connector. Required for pretty much all 2020 & 2021 trucks."....For whatever reason, my 2021 worked perfectly fine without the adapter harness. However, this means that the mirror would work on battery power. I do NOT like that, as anyone can break into my truck on the driveway and let themselves into the garage. Not a fan of that. The harness basically ends up converting the wiring to feed ignition power to the Homelink module, so that the garage opener can only be operated with the truck's key in the ON position. That suits my needs much better. The only downside occurs if you forget to open the garage before you turn the truck off, but that is not a problem for me. Worst case just stick the key back in for a second to open the garage.

    Other than that, it's a pretty simple swap and it works great. This is the actual brand new OEM mirror that comes on higher optioned Tacomas. It is completely plug and play and very simple to install. There is a bit of compass calibration needed which the instructions easily cover. Overall 10/10 recommend this swap for anyone who needs to open a garage and doesn't already have the mirror.

    Pic of the mirror, on. Buttons illuminate in a nice blue that matches the dash and is very dim so as to be easy on the eyes:

    IMG_5212.jpg

    Here you can see the wiring adapter below. I basically removed the roof console, pulled the factory mirror plug up into the headliner, wrapped it with some paper towels to keep it quiet and then plugged in the adapter and routed it through the factory mirror wiring channel. Nobody would ever know this isn't stock.

    IMG_5215.jpg
     
    Last edited: May 25, 2022
  4. May 25, 2022 at 10:03 PM
    #4
    BLtheP

    BLtheP [OP] Not a Member

    Joined:
    Apr 5, 2022
    Member:
    #394355
    Messages:
    3,759
    Gender:
    Male
    Plano, TX
    Vehicle:
    2021 MGM TRD On-Road DCSB MT
    5.29 Gears, FJ Metal Pedal, OEM Condenser Fan
    OEM Mirror Turn Signals (to Replace the PO's eBay Specials)

    The first thing I didn't like about this truck was the cheesy smoked sequential mirror turn signals the previous owner decided to put on my truck. They were so dim that you couldn't see them hardly at all during the day. No way they were actually useful as a signal. The smoked portion itself didn't look bad, it actually looked pretty sleek, but the poor output and the sequential aspect bothered me, it's just not for me.

    I had been talking to @daveeasa who happened to have some lying around that he didn't want anymore. That worked out nicely, thanks Dave! I installed them this past weekend and they work great. The OEMs are not super bright either, but definitely better than what I removed. The important part is their brightness is aimed more towards rear and sides...not to the front. So accordingly, don't judge them by their front performance, but more the performance when you're standing to the side of the mirror or further back. I know people love to hate on the chrome, and I am not a fan of typical over-the-top chrome, but these are minimal and look just fine to me. Actually I think they provide a nice little accent of it. Overall these are great for my needs/wants.

    Install was easy, I did each side in about 5 minutes in the dark. I didn't take any pictures as there are tons of guides for this on YouTube. No need for me to redundantly post more.

    Quick video of them in action:


    Last edited: May 25, 2022
    This site contains affiliate links for which the site may be compensated.
    #4
  5. May 25, 2022 at 10:25 PM
    #5
    BLtheP

    BLtheP [OP] Not a Member

    Joined:
    Apr 5, 2022
    Member:
    #394355
    Messages:
    3,759
    Gender:
    Male
    Plano, TX
    Vehicle:
    2021 MGM TRD On-Road DCSB MT
    5.29 Gears, FJ Metal Pedal, OEM Condenser Fan
    Meso Customs Total Tail Stage 1 Conversion

    Over the weekend I received my Meso Customs Total Tail conversion kit. This is "sold out" everywhere, however I found it in stock at Tacoma Lifestyle so I ordered it up. Nice little kit, it works well. The whole purpose as many people know is that the factory tail lamps are a C shape, broken into two halves, vertically. Both halves are illuminated as a C at night, and the lower half is the brake light, and upper half is turn signal/hazards. Pay attention to the next Tacoma you drive behind...this design is incredibly hard to actually look at and notice what the driver is doing. The turn signal is very easily missed, and the brake lights aren't that great either.

    The Total Tail kit converts the entire C to remain a full tail lamp like stock, but converts the braking portion to be the entire C. It relocates the turn signal down to the backup light housing, which is clear when off. The bulb used is a custom switchback which is amber for turn signaling, and white in reverse. The amber takes priority, so when you are backing into a parallel parking spot, the turn signal will blink in priority over the backup lamp on the side you put the blinker on for (traditionally right side in the US).

    Overall the results are pretty good, though I am not a fan of the brake light bulbs supplied. They are "ok", but not great. They are quite bright on running lamp mode, and not much brighter on brake light mode. I installed the stock incandescent bulbs on one side to do a comparison, and the stocks were dimmer on running lamp mode, and brighter on brake mode. That is more what you want in a dual function bulb. You want the brightnesses to contrast significantly so that it's actually noticeable when the brakes kick in. I have always been a fan of VLEDS, and stumbled upon this kit. These are advertised to be brighter than the Meso supplied switchbacks, so I decided to order them. Worst case if I don't like the light dispersion as much, or the brightness, I will just return them. I figured I may as well try them out so I can figure out the best results. I still have the needed wiring from Meso so no regrets buying that kit.

    For the red bulbs that I am not so thrilled with, I also bought some VLEDS 50-LED red 7443 bulbs to test under the same conditions: I can return if needed. In my experience, the 50-LED bulbs from VLEDS are excellent, providing great reliability and similar to stock levels of brightness but with better intensity, i.e. lighting up signs and such behind you more brightly, even if the overall brightness of the bulbs is not blinding or brighter than stock. Of course you also get a more cherry red color vs the more orange color from whitish amber incandescents behind the red lens. Either way, I know they will be brighter than the Mesos and I have no doubt I'll end up running them. Worst case, I overspent but ended up with some spare bulbs I can keep and use if anything ever dies prematurely. Obviously the goal is for that to not happen, but you never know.

    Pictures and videos in several conditions to show the results:


    Here is the picture comparison of the stock incandescents on the left vs the Meso red bulbs on the right, when using the brakes. The incandescents are clearly brighter, which puts the Meso bulbs to shame. The Meso bulbs are almost the same brightness on the running lamp portion, which is not good either. Not sure how these made it through quality control but I wouldn't run them any longer than I had to. I considered even running the incandescents for a few days, but I was worried about drawing too much power through the brake wire and switch. Not sure how the brake circuit is wired on these trucks but if all 4 bulbs are pulling from one wire, that could be a problem at nearly 8 amps for the length of the truck. So I'll stick with LEDs. I get my VLEDS stuff tomorrow, so I won't be using these for long.

    IMG_5198 (1).jpg

    Update:

    I received the VLEDS stuff which was x4 50-LED 7443 bulbs, as well as x2 V6 Meso switchback "upgrades". The red bulbs are great, nicely bright, good color, etc. I decided to keep them. The V6 replacements intended to take the place of the Meso switchbacks, were really poor IMO. I don't know how VLEDS markets them as an upgrade, they definitely weren't. I'm sending those back. So the final setup is 4 VLEDS reds, 2 Meso switchbacks, the Meso reds will be kept as spares, and the VLEDS switchbacks sent back.

    I also ordered this recommended 15-ohm resistor kit from VLEDS, because without it, the turn signals will hyperflash if you use the blinker while in reverse (such as when parallel parking). It's not a big deal, but slightly annoying. The resistor kit uses some strong tape to stick to any metal you want to stick it on, which I hid behind the tail light. The wiring that comes with it will hook right up to the Meso switchback. So unless $20 is just too much money, there is no real reason to not go this route.

    Here's a decent video of the final total tail setup in action:


    Overall I'm happy with the conversion and would recommend it.
     
    Last edited: May 31, 2022
    Robe30, tacoLvR10 and MGMDesertTaco like this.
  6. May 31, 2022 at 8:17 PM
    #6
    BLtheP

    BLtheP [OP] Not a Member

    Joined:
    Apr 5, 2022
    Member:
    #394355
    Messages:
    3,759
    Gender:
    Male
    Plano, TX
    Vehicle:
    2021 MGM TRD On-Road DCSB MT
    5.29 Gears, FJ Metal Pedal, OEM Condenser Fan
    VLEDS Full Interior LED Bulb Kit

    This was a simple one. I ordered from VLEDS their interior bulb kit which is a grouping of 7 bulbs designed to change out the 4 vanity, 1 dome, and 2 map/courtesy lights to LED. You can choose from 5000K white, 5500K white, 6000K white, or red or blue. I opted for 5000K as it's the most white, least amount of blue, and overall pretty easy on the eyes and useful light to use at night.

    VLEDS Full Interior LED Kit

    Not a lot to say about this kit, it works and works well. The bulbs are not blindingly bright, no one wants that no matter how much they may think they do. These provide a perfect amount of light at a very good color tone.

    I'm only going to post an illuminated pic, not one looking at the lamps themselves as the camera can't capture them right anyways.

    IMG_5332.jpg

     
    tacoLvR10 likes this.
  7. May 31, 2022 at 8:23 PM
    #7
    MGMDesertTaco

    MGMDesertTaco Come on, live a little...

    Joined:
    Jan 30, 2021
    Member:
    #354573
    Messages:
    8,254
    Gender:
    Male
    I'm a bit confused on the tail lights here. You've got 4 red VLED bulbs and which meso switchbacks are you referring to? Are the VLED bulbs being used in the meso total tail kit? I'd like to do the same to my 2017.
     
    tacoLvR10 likes this.
  8. May 31, 2022 at 8:24 PM
    #8
    MGMDesertTaco

    MGMDesertTaco Come on, live a little...

    Joined:
    Jan 30, 2021
    Member:
    #354573
    Messages:
    8,254
    Gender:
    Male
    tacoLvR10 likes this.
  9. May 31, 2022 at 8:30 PM
    #9
    BLtheP

    BLtheP [OP] Not a Member

    Joined:
    Apr 5, 2022
    Member:
    #394355
    Messages:
    3,759
    Gender:
    Male
    Plano, TX
    Vehicle:
    2021 MGM TRD On-Road DCSB MT
    5.29 Gears, FJ Metal Pedal, OEM Condenser Fan
    So the Meso kit you buy comes with the wiring, 4 red bulbs, and 2 switchbacks. I did not like the red bulbs Meso supplied, so I ordered the 4 red ones from VLEDS to try instead. Your link was correct on those.

    While I was buying those, I stumbled upon the VLEDS switchbacks in your second link, so I decided to try them since they were advertised as an upgrade for the switchbacks that Meso supplies. I did not like them at all. The Meso switchbacks are much better. So I will be sending the VLEDS switchbacks back.

    As for the reds, you may be just fine with the Meso supplied ones. I just thought their tail lamp mode was too bright and the brake was not much brighter. Not a whole lot of distinguishing between low and high, so I took them out and threw them into the drawer since I can't return them by themselves. The VLEDS switchbacks are a separate purchase so I'm getting my $110 back on them since I did not like them at all.
     
  10. May 31, 2022 at 8:33 PM
    #10
    BLtheP

    BLtheP [OP] Not a Member

    Joined:
    Apr 5, 2022
    Member:
    #394355
    Messages:
    3,759
    Gender:
    Male
    Plano, TX
    Vehicle:
    2021 MGM TRD On-Road DCSB MT
    5.29 Gears, FJ Metal Pedal, OEM Condenser Fan
    Also after looking at my post above, if you are going ahead and buying from VLEDS, go ahead and throw one of these kits in the cart: https://www.vleds.com/vlr-15-wp-t-adapter-2.html

    The Meso kit works really well but if you are in reverse and start signaling (think parallel parking), you will hyperflash. These resistors will branch right into the Meso switchback connection. Just stick them on some metal in the tail light area (preferably metal that isn't exterior and painted - I stuck mine on the panel straight behind the back of the tail light (towards front of vehicle)) and screw them into the harness and they will fix any hyperflashing. I am even running LEDs up front with no problems at all, even in reverse.
     
  11. May 31, 2022 at 8:44 PM
    #11
    BLtheP

    BLtheP [OP] Not a Member

    Joined:
    Apr 5, 2022
    Member:
    #394355
    Messages:
    3,759
    Gender:
    Male
    Plano, TX
    Vehicle:
    2021 MGM TRD On-Road DCSB MT
    5.29 Gears, FJ Metal Pedal, OEM Condenser Fan
    VLEDS License Plate LED Bulbs

    Another simple post. Since I'm changing everything to LED, I figured I may as well do the license plate lights as well. I bought 2 of these little LEDs below:

    End-Fire LED Bulbs

    Not much to say about them, they are quite bright, but not obnoxiously so. I'm not begging to make my license plate easier to read, I just wanted a light that looked white and not yellowish and dim. I think these fit the bill really well without being flashy or over the top.

    IMG_5309 (1).jpg

    VLEDS Front Turn Signal Bulbs

    After putting in the resistors on my Total Tail Conversion, I figured I would try throwing some LEDs in the front turn signals that I had left over from my Frontier. I used to run them up front on the Frontier as well and they were always bright. Lo and behold, I had no hyper-flashing at all, even in reverse, so I kept them. It's been 4 or 5 days by now and they work great. The only thing I will change my current setup for are the OEM reverse sequential LEDs.

     
    tacoLvR10 likes this.
  12. May 31, 2022 at 9:00 PM
    #12
    BLtheP

    BLtheP [OP] Not a Member

    Joined:
    Apr 5, 2022
    Member:
    #394355
    Messages:
    3,759
    Gender:
    Male
    Plano, TX
    Vehicle:
    2021 MGM TRD On-Road DCSB MT
    5.29 Gears, FJ Metal Pedal, OEM Condenser Fan
    VLEDS Front Footwell Lighting Kit

    I stumbled upon this thread the other day and thought the product was so cool I just had to buy and try for myself. It's a footwell lighting kit from VLEDS, designed by TacomaWorld members that plug and plays directly a factory harness and provides you two conditions: bright floor lighting when opening a door, unlocking the truck, etc, sort of entry lighting and also, has a very dim accent light mode for driving at night, which is tied to the parking lamp circuit. That's luxury car level. A bonus to this kit is that you can also buy this splitter harness for $5 which will allow you to tie in the Meso puddle pods as well, all plug and play. I had already ordered the Meso puddle pods so doing the VLEDS kit was a no brainer. I decided to purchase the and received it in like 2 days. They offer a few white options and some other colors, I chose 5000K white to match the other interior bulbs and license plate lights. They are all a perfect match.

    I installed it this past weekend which wasn't too bad, it took me maybe an hour and a half going slow. I tore apart the center console for a better, more concealed wire routing than I could accomplish otherwise. Without going through the console I ended up with wiring dangling down and being visible in spots that just was not acceptable to me.

    The results are damn awesome. They are bright but not too bright, and super convenient and unique. The pulse width modulator slowly dimming them is pretty classic too. I'm really happy with these. The funny thing is passengers won't even know these were added, because they are so OEM-seeming for 2022. The design team and VLEDS did a really nice job.

    Full brightness:

    IMG_5330.jpg IMG_5329.jpg

    Night time accent:

    IMG_5331.jpg

    Highly recommend!

    VLEDS Rear Footwell Lighting Kit

    I bought the rear kit with my front kit but I have not installed it yet. I'm not really sure how I want to do it. The problem is you are supposed to stick the lights to the seat with velcro, but then it's really low and doesn't illuminate much...if you move it outward and up the seat back, you can get better light but then the light itself is visible and susceptible to shoes....so I have not decided how I'm going to install the rears yet. I figured I may as well buy them to install eventually, but doing it later vs now is no big deal.
     
    tacoLvR10 and MGMDesertTaco like this.
  13. May 31, 2022 at 9:06 PM
    #13
    BLtheP

    BLtheP [OP] Not a Member

    Joined:
    Apr 5, 2022
    Member:
    #394355
    Messages:
    3,759
    Gender:
    Male
    Plano, TX
    Vehicle:
    2021 MGM TRD On-Road DCSB MT
    5.29 Gears, FJ Metal Pedal, OEM Condenser Fan
    OEM Bed Light Kit

    I learned that I could easily buy the 2020+ bed lighting kit by Toyota from Amazon, so I decided to order a kit. It was $62, which I thought was very fair.

    Bed Light Kit


    the install was super easy. Just pop out the little plastic covers, pop the lights into place, and plug them into a capped off pigtail behind each tail light. They will be operated by the cab light switch and will come on anytime the overhead cab light comes on. Note, the plug and play stuff only works on 2020+ because all of them are pre-wired. Older trucks like 2019 are not pre-wired as far as I know and need extensively more work to add the lights. What can I say, they're nice and bright and will do the job. For $62 and 5 minutes of install time, I can't say no.

    IMG_5360.jpg
     
    doublethebass likes this.
  14. May 31, 2022 at 10:23 PM
    #14
    MGMDesertTaco

    MGMDesertTaco Come on, live a little...

    Joined:
    Jan 30, 2021
    Member:
    #354573
    Messages:
    8,254
    Gender:
    Male
    Thank you for clarifying!:hattip:

    As long as you're upgrading everything to LED, I highly recommend the oem LED headlights and the conversion harness from Dave Easa on the forums here. I upgraded to the pro led headlights on my 2017 and it made a huge difference. Also went with yellow SS3 Max fogs from Hotshotoffroad. The headlight upgrade alone was like going from horse and buggy carriage lanterns to super bright and clear.

    https://www.tacomaworld.com/threads/oem-led-conversion-harness-diy-info.700623/
    https://fbchs.square.site
    https://hotshotoffroad.com/collecti...light-kit-16-22-tacoma?variant=42087354073307
     
  15. May 31, 2022 at 10:30 PM
    #15
    BLtheP

    BLtheP [OP] Not a Member

    Joined:
    Apr 5, 2022
    Member:
    #394355
    Messages:
    3,759
    Gender:
    Male
    Plano, TX
    Vehicle:
    2021 MGM TRD On-Road DCSB MT
    5.29 Gears, FJ Metal Pedal, OEM Condenser Fan
    Oh trust me, the OEMs are definitely in the plans! I’ve talked to Dave a bit about it, the plan is when I get my summer bonus in mid June I’ll go ahead and grab them up and some tires and probably the Rigid 360 fogs (yellow) that I want.

    I did have the SS3 Max (yellow) on my Frontier for a while and they were nice and bright but I ended up having a bunch of interference issues with them and the radio and key fob, so I ended up sending them back and continuing on with my Rigid D fogs which I liked and served me well. The 360s are a newer round Rigid light so I’m wanting to try them this time around although they are expensive, I think they’ll be worth it. I think the truck is going to look excellent with quality yellow LEDs and the OEM headlights!
     
    MGMDesertTaco[QUOTED] likes this.
  16. Jun 15, 2022 at 4:59 PM
    #16
    TacoJay808

    TacoJay808 Well-Known Member

    Joined:
    Oct 7, 2020
    Member:
    #343095
    Messages:
    55
    Gender:
    Male
    First Name:
    James
    Washington State
    Vehicle:
    2022 Tacoma TRD Off Road DCSB
    Sweet build. Great write ups and recommendations. I like the practicality of your mods as well.
     
    BLtheP[OP] likes this.
  17. Jun 15, 2022 at 5:01 PM
    #17
    BLtheP

    BLtheP [OP] Not a Member

    Joined:
    Apr 5, 2022
    Member:
    #394355
    Messages:
    3,759
    Gender:
    Male
    Plano, TX
    Vehicle:
    2021 MGM TRD On-Road DCSB MT
    5.29 Gears, FJ Metal Pedal, OEM Condenser Fan
    Thanks! I need to update it again, quite a bit going on in the last few weeks. Been too busy with the truck to be posting here lol.

    Glad to hear you like my choices. I try to be mostly practical, I like to be unique as well but in the Tacoma that’s hard to do because everybody else has already done everything before I got here.
     
    TacoJay808[QUOTED] likes this.
  18. Jun 15, 2022 at 5:10 PM
    #18
    Tw85

    Tw85 Active Member

    Joined:
    Mar 18, 2017
    Member:
    #213609
    Messages:
    43
    Gender:
    Male
    Vehicle:
    2017 MGM DCSB TRD OR 4x4 6spd w/P&T
    Great job OP, your truck is coming along nicely. I made a similar transition coming from a Nissan Xterra to my 2017 Off Road 6MT in MGM several years ago. And kudos to you for getting the manual.
     
    BLtheP[OP] likes this.
  19. Jun 15, 2022 at 5:12 PM
    #19
    BLtheP

    BLtheP [OP] Not a Member

    Joined:
    Apr 5, 2022
    Member:
    #394355
    Messages:
    3,759
    Gender:
    Male
    Plano, TX
    Vehicle:
    2021 MGM TRD On-Road DCSB MT
    5.29 Gears, FJ Metal Pedal, OEM Condenser Fan
    Manual is the only way to go :cool:

    Thanks, people love to hate the Frontier/Xterra and they certainly have their flaws but I enjoyed my time with them. You can mod them decently but certainly takes more creativity since the market just isn’t there. I love the Xterras, I wish I could have one of those and the Tacoma. Nismo has come out with a ton of stuff for the Xterra lately and I like it all. They gave the frontier a few things but not as much or as cool. I even considered trading the frontier for one but they’re way too expensive and all at least 7+ years old by now, so I couldn’t do it.
     
  20. Jun 15, 2022 at 6:16 PM
    #20
    BLtheP

    BLtheP [OP] Not a Member

    Joined:
    Apr 5, 2022
    Member:
    #394355
    Messages:
    3,759
    Gender:
    Male
    Plano, TX
    Vehicle:
    2021 MGM TRD On-Road DCSB MT
    5.29 Gears, FJ Metal Pedal, OEM Condenser Fan
    Kenwood DMX957XR & iDataLink/ADS Maestro RR

    After about a week and a half of the truck, I was damn tired of the factory head unit. When I bought the truck I was pumped because I thought to myself, "cool, factory CarPlay! Now I won't need to upgrade it and I can sell my Kenwood and Maestro.".....WRONG! I was frustrated in no time. The thing was clunky, the volume for CarPlay maps never worked right, and half the time it would glitch out and not recognize my phone (1.5 year old iPhone 12 Pro). So naturally, I started shifting into research mode to see if the 2021 was able to be swapped or if it was too new. Good news is, it was able to be swapped and pretty easily with a few purchases and some troubleshooting smarts with a multimeter and ability to read wiring diagrams.

    I detailed out a decent amount of the experience in this thread.

    Parts List:
    • Kenwood DMX957XR Radio - wired/wireless CarPlay/Android Auto, highest resolution 6.8" screen they offer, it's the top of the line media player (NON-NAV, NON CD/DVD) model they sell.
    • iDataLink ADS-MRR (Maestro RR) - for adapting vehicle settings, OBD scanning/clearing codes to radio, gauge clusters on radio, steering wheel controls and custom programming, etc.
    • TOYK9714 Dash Kit - for adapting the radio to our large dash opening
    • iDataLink HRN-RR-TO3 - wiring harness to adapt the Maestro and radio to to the 2020+ Tacoma wiring
    • iDataLink ACC-SAT-TO2 - adapts the stock GPS antenna and XM antenna to the Kenwood
    • iDataLink UTO3 - adapts the factory USB port to the Kenwood USB input
    • Metra 40-LX11 - adapts the factory radio antenna to the Kenwood - needs to be wired to ignition power for HD radio capability (I wired it to the P ANT wire from the radio harness)
    • SiriusXM SXV300V1 - takes the truck's Sirius antenna signal and converts it to a usable signal and sends that to the Kenwood for Sirius functionality (optional)

    The install was not terrible, though it took me some time to figure out. The first step is take your radio harness and splice it to all of the loose wires on the Maestro HRN-RR-TO3 harness. This will tie your radio to your Maestro power wise. The second step is to plug the maestro into the PC or Mac, get the iDataLink WebLink software, and flash it. This basically tells the Maestro what radio it will be talking to (radio serial no. is needed), it tells the Maestro what vehicle it's going into, you custom program all the steering wheel controls how you want them (you can customize it any way you want), and then it's ready to go into the truck.

    Troubleshooting:

    As an initial test run, I took my spliced harness out to the truck and tried to run the radio temporarily after I flashed the Maestro. I plugged the harness into the truck harness, plugged the Kenwood into the harness, and nothing. Okay, finish plugging everything in. Plugged the flashed Maestro into the new harness, and the radio immediately kicked on. Sweet! This was unusual for me, because the Maestro actually controls the radio power. This is actually awesome, because there's a sweet setting in there called "accessory power retained while cranking" which basically keeps the radio on if it's on in accessory mode and then you go to start the truck. In other vehicles like the Frontier, the radio just gets powered by the truck and the Maestro is on the sidelines running the steering wheel controls and such. This is a much cooler setup, I hate when I'm in accessory mode listening to music or whatever and the radio restarts if I go to crank the starter.

    Anyways, back to install. The Maestro harness comes with 3 main plugs....two whites (28 and 30 pin) and a black (10 pin). The truck has 4 plugs, two blacks (30 and 10 pin), a white (28 pin), and a gray (30 pin). So, which plug goes to which? The white 30 pin on the Maestro harness could plug into either the black or the gray 30 pin on the truck. I eventually realized I got nothing at all if the white 30 pin was plugged into the black 30 pin. The gray 30 pin everything worked.

    IMG_5342.jpg

    So:

    Maestro Harness Truck Harness
    white 30 pin - gray 30 pin
    white 28 pin - white 28 pin
    black 10 pin - black 10 pin
    unused - black 30 pin

    The first issue I had once everything was hooked up, was that the backup camera did not work. Nothing happened on the radio when I put the truck in reverse. The screen did not change to camera view, and the camera view button did not give me a signal at all even when I manually tried to open the camera.

    The first part of the problem is that the Maestro harness does not have a reverse wire for whatever reason. I guess they don't care about the manual trucks. The automatic trucks send their reverse position indicator to the Maestro over CANBUS, and the Maestro then tells the radio to switch to reverse. The manual trucks have a dumb box of gears as their transmission which just sends a 12V signal to the radio when the truck is in reverse. I bought an ALLDATA subscription which pointed me to the reverse wire. I don't remember what color the wire on the truck was but it was in the gray 30 pin plug. Naturally, nothing was there on the corresponding pin on the Maestro harness.

    IMG_5383.jpg

    I looked over the maestro harness and found wires in it that lined up with empty spots on the truck harness. I de-pinned those unused Maestro wires and moved one of them to the reverse wire spot. I spliced that to the random pink wire that I used as my makeshift reverse wire (ran that to the radio pigtail). Voila, problem #1 was solved by this wire. The radio now went into the backup camera view when I put the transmission in reverse. However, I still had no picture.

    IMG_5382.jpg

    I spent the next few days on this issue because I could not figure out what was wrong. I verified the Maestro was outputting the proper voltage for the camera, and all the wires were in the right spots, but still nothing. I took apart the tailgate and verified the camera was getting 6V power like it was supposed to. Yup, was perfect.

    After racking my brain I finally learned that radios have different camera view settings, as in what camera it expects to be connecting to and display for. My radio was set to HD view, because in my Frontier I had a Kenwood HD camera and the setting was set to that by the audio shop that installed it. Well, I went into the settings and found the other camera options, sure enough changing the camera view to one of the others fixed it. Boom! everything was fixed.

    IMG_5410.jpg

    Settings and Tips:

    So I have a few recommendations for optimizing the experience. For one, really feel out the steering wheel controls to see what you like. First thing I did was flip the volume and seek controls. I like my song skipping to be left to right, and volume up and down to be vertical. It's only natural that way. So I flipped those. I set it to where holding volume down mutes the audio (but does not pause it). I also like to be able to toggle the radio screen off at night, so I made my hold function on the Siri button toggle the screen on or off. Clicking the button still triggers Siri as designed. On the mode button from the factory, there are already two functions...click for mode, hold for "mute" (play/pause toggle). I retained these as designed. I LOVE having a play/pause toggle on the wheel. Lastly, the phone controls work as designed when clicked, and I assigned hold functions to each of them. Holding on the answer (upper) button brings up the vehicle settings where I can see right on the radio if doors or hood are open, tire pressure and temp, battery voltage, etc. Literally what's going on with the vehicle. Holding on the lower reject call button brings up my Maestro gauge clusters, which is a set of 5 gauge clusters from the OBD to monitor coolant temp, battery voltage, rpm, speed, gas mileage, etc, whatever 5 gauges you want. There are actually 2 gauge screens, so you can monitor 10 gauges amongst 2 cluster views.

    Definitely turn on the retained accessory power. This will allow the radio to stay on during cranking as well as stay off when you flip the key back to ACC. When the key goes to off the radio goes off as it should.

    Dig through the other settings and find what you like. There were a lot of things I changed, and I love how it's setup now.

    View of the "vehicle settings", where you can see all the data like doors and tires and stuff. Pretty sweet.

    IMG_5413.jpg

    Final thoughts:

    I absolutely love this setup. It is so much better than the old stock radio was. No more clunky radio, no more maps being spoken over by music, no more ridiculous antics. So much added functionality. The only thing I would change would be to go with one of the larger Kenwood head units, which I honestly probably will do at some point for cool factor and better camera view and maps. I just don't have the $1500-1800 to spend on that yet, but eventually. For now, I'm super happy. The next steps will be all new speakers (in the works) and eventually a 5 channel amp and a 10" sub to tie it all together.

    The last thing I will bring up is that this swap ends up with adding a ton of wiring clutter to the dash. You can fit it all in there, but it's a pain. My plan overall is to eventually extend the maestro wiring down to the transmission shifter console area and hide the maestro in there, with the extended wiring going down there to run it. This would clean up the dash significantly and reduce the amount of wire smashing I had to do to get the radio into the dash. This will be a pretty tedious project so I need some time before I can dig into it. I don't want to end up with a bunch of radio downtime. It's also hot outside so I have little motivation to go do a 3 hour wiring job out in the sun with the engine not running. But, eventually I will get to it, as I really want to pull the clutter out of the dash as much as possible.

    IMG_5304.jpg
     

Products Discussed in

To Top