1. Welcome to Tacoma World!

    You are currently viewing as a guest! To get full-access, you need to register for a FREE account.

    As a registered member, you’ll be able to:
    • Participate in all Tacoma discussion topics
    • Communicate privately with other Tacoma owners from around the world
    • Post your own photos in our Members Gallery
    • Access all special features of the site

Body Mount Bushing Install - now with pictures! And a video too!!!

Discussion in '2nd Gen. Tacomas (2005-2015)' started by Pigpen, May 18, 2016.

  1. Jan 1, 2017 at 10:21 AM
    #221
    XPOTRPR

    XPOTRPR CNC Programmer/Machinist

    Joined:
    May 29, 2011
    Member:
    #57449
    Messages:
    30,602
    Gender:
    Male
    First Name:
    Josh
    Chandler, AZ
    Vehicle:
    [2009 Supercharged Adventuretruck] & [1986 22r Minitruck]
    > BUILD LINKS >
    Starting this project today.. Grabbing 4x4 number now.

    Gonna check the washers and sleeves beforehand now as well.
     
  2. Jan 1, 2017 at 12:10 PM
    #222
    XPOTRPR

    XPOTRPR CNC Programmer/Machinist

    Joined:
    May 29, 2011
    Member:
    #57449
    Messages:
    30,602
    Gender:
    Male
    First Name:
    Josh
    Chandler, AZ
    Vehicle:
    [2009 Supercharged Adventuretruck] & [1986 22r Minitruck]
    > BUILD LINKS >
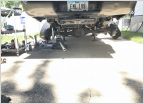
    Well shit... Might be stuck here..

    Not enough room to get the wood block on the pinch weld well enough. Sliders are in the way. Tried it, but the block kicked out (safely believe it or not)..

    20170101_130845.jpg
     
  3. Jan 1, 2017 at 12:14 PM
    #223
    Torspd

    Torspd Tor-nication

    Joined:
    Sep 18, 2009
    Member:
    #22958
    Messages:
    25,682
    Gender:
    Male
    First Name:
    Tor
    The Great America!
    Vehicle:
    MMVI 4.4L 4x4 Access Cab
    Torspd Custom Turbo kit [] Borg Warner 9180EFR Turbo [] Haltech Elite 2500 [] TiAL Q BOV [] TiAL V44 Wastegate @ 15psi [] CP Pistons [] CP Carrillo Rods [] ARP Head studs [] ARP Main Studs [] ARP Header - Head Studs [] Ported Heads w/ 1mm oversized valves intake/exhaust [] Brian Crower Forged Stroker Crank [] Darton M.I.D. Sleeved Block [] Kelford Camshafts [] Torspd 160* T-stat mod [] APR Large Fuel Rail [] Walbro 460 LPH E85 Fuel Pump [] FueLab FPR [] APR T56 Conversion Kit [] KP RACING Built T56 [] McLeod Racing Custom Twin Disk Clutch [] One Piece Aluminum Driveshaft [] MGW Shifter [] Custom lowering kit [] Ohlins Front Coilovers [] QA1rear shocks [] Custom Ron Davis Radiator [] Dual SPAL Electric Fans []
    Going to have to find another method to pry and hold them up.

    Unless someone with sliders has done these with a proven method already?
     
  4. Jan 1, 2017 at 12:20 PM
    #224
    XPOTRPR

    XPOTRPR CNC Programmer/Machinist

    Joined:
    May 29, 2011
    Member:
    #57449
    Messages:
    30,602
    Gender:
    Male
    First Name:
    Josh
    Chandler, AZ
    Vehicle:
    [2009 Supercharged Adventuretruck] & [1986 22r Minitruck]
    > BUILD LINKS >
    I know the pinch weld is the best place, but what about up behind it?

    1483301979171-548722722.jpg
     
  5. Jan 1, 2017 at 12:22 PM
    #225
    Ted Yoder

    Ted Yoder Well that didn't work

    Joined:
    Jul 29, 2016
    Member:
    #193220
    Messages:
    459
    Gender:
    Male
    Vehicle:
    06 DCLB
    In Progress
    Idea time.

    Cut your block of wood at a slant in order to angle it so it touches the pinch weld on the back of the cab. I used a piece of firewood cut the same way. I can't see what you're working with but I was seated evenly across the back and side pinch welds
     
  6. Jan 1, 2017 at 12:24 PM
    #226
    XPOTRPR

    XPOTRPR CNC Programmer/Machinist

    Joined:
    May 29, 2011
    Member:
    #57449
    Messages:
    30,602
    Gender:
    Male
    First Name:
    Josh
    Chandler, AZ
    Vehicle:
    [2009 Supercharged Adventuretruck] & [1986 22r Minitruck]
    > BUILD LINKS >
    Got it

    20170101_132431.jpg
     
  7. Jan 1, 2017 at 12:25 PM
    #227
    Ted Yoder

    Ted Yoder Well that didn't work

    Joined:
    Jul 29, 2016
    Member:
    #193220
    Messages:
    459
    Gender:
    Male
    Vehicle:
    06 DCLB
    In Progress
    Now seeing this pic my idea might work. Or take a short cut of 2x4 and make a "T" so you slide in beyond the sliders and contact both pinch welds
     
  8. Jan 1, 2017 at 12:47 PM
    #228
    XPOTRPR

    XPOTRPR CNC Programmer/Machinist

    Joined:
    May 29, 2011
    Member:
    #57449
    Messages:
    30,602
    Gender:
    Male
    First Name:
    Josh
    Chandler, AZ
    Vehicle:
    [2009 Supercharged Adventuretruck] & [1986 22r Minitruck]
    > BUILD LINKS >
    Got the rear out.

    Just to clarify.. The left is how it came out.. The right is how the new ones go in?

    20170101_134602.jpg
     
  9. Jan 1, 2017 at 12:49 PM
    #229
    XPOTRPR

    XPOTRPR CNC Programmer/Machinist

    Joined:
    May 29, 2011
    Member:
    #57449
    Messages:
    30,602
    Gender:
    Male
    First Name:
    Josh
    Chandler, AZ
    Vehicle:
    [2009 Supercharged Adventuretruck] & [1986 22r Minitruck]
    > BUILD LINKS >
    Or, if I understand correctly, flip the new ones to yield a little more height?

    1483303717615153976652.jpg
     
    Pigpen[OP] likes this.
  10. Jan 1, 2017 at 12:55 PM
    #230
    Ted Yoder

    Ted Yoder Well that didn't work

    Joined:
    Jul 29, 2016
    Member:
    #193220
    Messages:
    459
    Gender:
    Male
    Vehicle:
    06 DCLB
    In Progress
    Thats how I installed them. Body lines wont line up the other way
     
  11. Jan 1, 2017 at 12:57 PM
    #231
    XPOTRPR

    XPOTRPR CNC Programmer/Machinist

    Joined:
    May 29, 2011
    Member:
    #57449
    Messages:
    30,602
    Gender:
    Male
    First Name:
    Josh
    Chandler, AZ
    Vehicle:
    [2009 Supercharged Adventuretruck] & [1986 22r Minitruck]
    > BUILD LINKS >
    just between the bed and cab tho. good call though. didnt even think abut that.
     
  12. Jan 1, 2017 at 1:49 PM
    #232
    XPOTRPR

    XPOTRPR CNC Programmer/Machinist

    Joined:
    May 29, 2011
    Member:
    #57449
    Messages:
    30,602
    Gender:
    Male
    First Name:
    Josh
    Chandler, AZ
    Vehicle:
    [2009 Supercharged Adventuretruck] & [1986 22r Minitruck]
    > BUILD LINKS >
    Passenger side done. Raised it an 1/8". Finishing it up and moving to the radiator mounts

    20170101_144618.jpg
     
    Ted Yoder and Torspd like this.
  13. Jan 1, 2017 at 3:30 PM
    #233
    XPOTRPR

    XPOTRPR CNC Programmer/Machinist

    Joined:
    May 29, 2011
    Member:
    #57449
    Messages:
    30,602
    Gender:
    Male
    First Name:
    Josh
    Chandler, AZ
    Vehicle:
    [2009 Supercharged Adventuretruck] & [1986 22r Minitruck]
    > BUILD LINKS >
    So I've got the radiator bushings in now.. They are the separate ones. Not the ones that come in the body kit. I put the smaller bushing on top.. Wondering if I should swap them around, or is that just for aftermarket bumpers to gain some clearance between bumper and fender. I have the smaller bushing on top for the body mounts as well (regular install method), so I should probably keep them all consistent yeah?

    20170101_160600.jpg
     
  14. Jan 1, 2017 at 3:34 PM
    #234
    Torspd

    Torspd Tor-nication

    Joined:
    Sep 18, 2009
    Member:
    #22958
    Messages:
    25,682
    Gender:
    Male
    First Name:
    Tor
    The Great America!
    Vehicle:
    MMVI 4.4L 4x4 Access Cab
    Torspd Custom Turbo kit [] Borg Warner 9180EFR Turbo [] Haltech Elite 2500 [] TiAL Q BOV [] TiAL V44 Wastegate @ 15psi [] CP Pistons [] CP Carrillo Rods [] ARP Head studs [] ARP Main Studs [] ARP Header - Head Studs [] Ported Heads w/ 1mm oversized valves intake/exhaust [] Brian Crower Forged Stroker Crank [] Darton M.I.D. Sleeved Block [] Kelford Camshafts [] Torspd 160* T-stat mod [] APR Large Fuel Rail [] Walbro 460 LPH E85 Fuel Pump [] FueLab FPR [] APR T56 Conversion Kit [] KP RACING Built T56 [] McLeod Racing Custom Twin Disk Clutch [] One Piece Aluminum Driveshaft [] MGW Shifter [] Custom lowering kit [] Ohlins Front Coilovers [] QA1rear shocks [] Custom Ron Davis Radiator [] Dual SPAL Electric Fans []
    Just looks slightly used. :cool:
     
    Kolter45 and XPOTRPR like this.
  15. Jan 1, 2017 at 3:37 PM
    #235
    VolcomTacoma

    VolcomTacoma Well-Known Member

    Joined:
    May 25, 2011
    Member:
    #57205
    Messages:
    20,617
    Gender:
    Male
    First Name:
    Jeff
    NorCal
    Vehicle:
    2015 TRD Sport 4x4 6 Speed Supercharged
    Front- Camburg 4x4 Long Travel 2.5" King Coilovers 2.5" King Triple Bypasses Wheelers Superbumps Rear- DMZ SUA 16" 3.0 King Triple Bypasses 3" 2.0 Fox bumps Wheels and Tires- 295/75/16 Toyo ATII XTREME SCS SR8 Dark Matte Bronze 16" Lighting- (2) 30" Combo light bars (4) Iggycorp diffused pods Tepui Ayer TRD Supercharger URD Mark III 3" Exhaust URD 4x4 Y Pipe URD CAI URD 2.85 Stealth Pulley Hurst Core Shifter with Hurst T URD Stage 3 clutch URD Lightweight flywheel URD Throw out bearing upgrade AEM Wideband AFR Gauge Speedhut Boost Gauge Craven Speed Flex Pod mount Weathertech Floor Liners BAMF Sliders Ultragauge sPod SE ARB CKMTA12 Hella Supertone horns Relentless Tailgate Reinforcement
    Nope, they look like that pretty much from the factory.
     
    XPOTRPR likes this.
  16. Jan 1, 2017 at 3:38 PM
    #236
    Ted Yoder

    Ted Yoder Well that didn't work

    Joined:
    Jul 29, 2016
    Member:
    #193220
    Messages:
    459
    Gender:
    Male
    Vehicle:
    06 DCLB
    In Progress
    I put the larger up top. Im considering putting the smaller up top since I had to adjust my hood, snapped a headlight bracket and my hood sits uneven with my fenders still.

    EDIT: I also have a Brute Force Fab front bumper and had to chop the center support bracket to the headlights.
     
    XPOTRPR[QUOTED] likes this.
  17. Jan 1, 2017 at 3:47 PM
    #237
    XPOTRPR

    XPOTRPR CNC Programmer/Machinist

    Joined:
    May 29, 2011
    Member:
    #57449
    Messages:
    30,602
    Gender:
    Male
    First Name:
    Josh
    Chandler, AZ
    Vehicle:
    [2009 Supercharged Adventuretruck] & [1986 22r Minitruck]
    > BUILD LINKS >
    See, wondering if I should just leave the smaller one on top since I have factory bumpers. Hmmm..
     
    AR15xAR10 likes this.
  18. Jan 1, 2017 at 3:52 PM
    #238
    VolcomTacoma

    VolcomTacoma Well-Known Member

    Joined:
    May 25, 2011
    Member:
    #57205
    Messages:
    20,617
    Gender:
    Male
    First Name:
    Jeff
    NorCal
    Vehicle:
    2015 TRD Sport 4x4 6 Speed Supercharged
    Front- Camburg 4x4 Long Travel 2.5" King Coilovers 2.5" King Triple Bypasses Wheelers Superbumps Rear- DMZ SUA 16" 3.0 King Triple Bypasses 3" 2.0 Fox bumps Wheels and Tires- 295/75/16 Toyo ATII XTREME SCS SR8 Dark Matte Bronze 16" Lighting- (2) 30" Combo light bars (4) Iggycorp diffused pods Tepui Ayer TRD Supercharger URD Mark III 3" Exhaust URD 4x4 Y Pipe URD CAI URD 2.85 Stealth Pulley Hurst Core Shifter with Hurst T URD Stage 3 clutch URD Lightweight flywheel URD Throw out bearing upgrade AEM Wideband AFR Gauge Speedhut Boost Gauge Craven Speed Flex Pod mount Weathertech Floor Liners BAMF Sliders Ultragauge sPod SE ARB CKMTA12 Hella Supertone horns Relentless Tailgate Reinforcement
    Despite what some people have done, I would leave the bushings in the stock arrangement. Rubber compresses alot more than polyurethane so putting the larger on top means added stress all around.
     
    AR15xAR10, NaZRaQ and Ted Yoder like this.
  19. Jan 1, 2017 at 3:54 PM
    #239
    Pigpen

    Pigpen [OP] My truck is never clean

    Joined:
    Mar 6, 2012
    Member:
    #74319
    Messages:
    8,955
    Gender:
    Male
    Northwest Montana
    Vehicle:
    2012 AC Manual 4.0 4x4 Base Model
    Access cab toolbox/ dog bed with seats and headrests deleted, waterproof TRD seat covers, yellow wire mod, diff breather relocated to tail light, engine block heater, Leer topper with Yakima tracks and rack, Yakima rack on cab, Ride Rite with Daystar cradles, CBI hidden front hitch, wired for winch front and rear Warn quick connect, Warn x8000i on external carrier, sway bar delete, trailer plug relocated to bumper, Pelfreybilt IFS and Mid skids, ECGS front diff bushing, ARB CKMA12 compressor, 255/85/16 Backcountrry MT 3 load E tires on stock steel rims, Up2NoGood heated mirror kit, Husky X-act Contour front floor liners, Northstar AGM 24F battery, Pelfreybilt bolt on sliders with kickout and top plates, TRD Pro headlights, Depo smoked tail lights, Energy suspension body mount bushing kit, OME Dakar leaf packs with AAL, Billstein B110 rear shocks, OME 90021 front shocks with 885 coils, SPC LR UCAs, Up2NoGood 2wd low range mod, 4 Wheel Campers Grandby slide in camper
    You'd never notice the body lines. Mine look normal.
     
    AR15xAR10 likes this.
  20. Jan 1, 2017 at 3:59 PM
    #240
    XPOTRPR

    XPOTRPR CNC Programmer/Machinist

    Joined:
    May 29, 2011
    Member:
    #57449
    Messages:
    30,602
    Gender:
    Male
    First Name:
    Josh
    Chandler, AZ
    Vehicle:
    [2009 Supercharged Adventuretruck] & [1986 22r Minitruck]
    > BUILD LINKS >
    I'm just gonna leave them all (radiator and body bushings) with the smaller one on top. Still better and more supportive than the OEM destroyed ones.

    Thanks guys. :cheers:
     
    AR15xAR10, Pigpen[OP] and Ted Yoder like this.

Products Discussed in

To Top