

-
Welcome to Tacoma World!
You are currently viewing as a guest! To get full-access, you need to register for a FREE account.
As a registered member, you’ll be able to:- Participate in all Tacoma discussion topics
- Communicate privately with other Tacoma owners from around the world
- Post your own photos in our Members Gallery
- Access all special features of the site
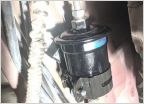 Fuel Filter Replacement
 02' Truck Bed Rack
 BF Goodrich all terrains for my tacoma?
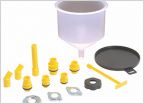 Flush before or after radiator swap?
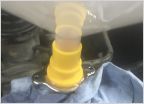 Coolant flush**RESOLVED**
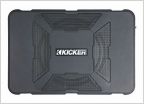 Hideaway subwoofer
Boot Slide mod. No more blowing cv boots.
Discussion in '1st Gen. Tacomas (1995-2004)' started by 802YOTA, Mar 16, 2011.
Page 8 of 12
Page 8 of 12

