1. Welcome to Tacoma World!

    You are currently viewing as a guest! To get full-access, you need to register for a FREE account.

    As a registered member, you’ll be able to:
    • Participate in all Tacoma discussion topics
    • Communicate privately with other Tacoma owners from around the world
    • Post your own photos in our Members Gallery
    • Access all special features of the site

Bored Clerk's Rear Bumper Build

Discussion in 'Armor' started by 1 Bored Clerk, Mar 12, 2016.

  1. Jun 24, 2016 at 5:23 AM
    #241
    EatSleepTacos

    EatSleepTacos Well-Known Member

    Joined:
    Mar 24, 2015
    Member:
    #151688
    Messages:
    59,834
    Gender:
    Male
    First Name:
    Randy
    West Valley, AZ
    Vehicle:
    2017 4Runner
    Looks great so far! At least I think so...I can't see much on the pics.
     
  2. Jun 24, 2016 at 9:33 PM
    #242
    1 Bored Clerk

    1 Bored Clerk [OP] Well-Known Member

    Joined:
    Sep 18, 2013
    Member:
    #112786
    Messages:
    1,999
    Gender:
    Male
    Vancouver, WA
    Vehicle:
    '13 4x4 AC TRD OR
    More crappy pics!

    image.jpg
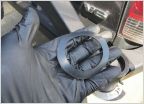
    Bearings, spacers, seals. All greased up and ready to roll.

    image.jpg
    I just happen to like all of this contrast in one place.

    image.jpg
    image.jpg
    All put together!

    image.jpg
    image.jpg
    With tire.

    Now, I don't have a photo with the jerry cans. The powdercoater forgot the top plate for the Jerry can holder in the sandblast booth so it didn't get coated. Oops. Haha. I'll get that next week.

    Drove it around a bit and nothing fell off so that's nice. It's going to look really good when I get the wrap around wings done and the drawers and camper. It's a little out of place right now but I don't care...I gots dat vision, yo!

    I still need to wire up the license plate light and the backup camera. I think I'm going to try mounting the backup camera on the inside edge of the Jerry can holder (toward the center of the truck). I think that might be the best place for it.

    Anyway, that's the end of phase 1! Stay tuned, I'll be working on the wings soon.
     
    medic2230, omaguz, Acerwin and 5 others like this.
  3. Jun 24, 2016 at 9:41 PM
    #243
    1 Bored Clerk

    1 Bored Clerk [OP] Well-Known Member

    Joined:
    Sep 18, 2013
    Member:
    #112786
    Messages:
    1,999
    Gender:
    Male
    Vancouver, WA
    Vehicle:
    '13 4x4 AC TRD OR
    Lord, I need to get better photos. There's so much detail that you can't see in these photos because all of the black just runs together.
     
    EatSleepTacos likes this.
  4. Jun 25, 2016 at 7:39 AM
    #244
    beertimecontinuum

    beertimecontinuum What's outside the simulation?

    Joined:
    Dec 29, 2013
    Member:
    #119461
    Messages:
    9,993
    Gender:
    Male
    First Name:
    Everett
    Ky,Earth,SolarSystem,MilkyWay,VirgoSupercluster
    Vehicle:
    10 Pyrite DCSB VEEEEEE 1.618
    FoxShox, Dirt King Heims, Chevy63s, 2UZ-FE V8 Flowmaster 40, Demello Front/DYF Rear w/Swigouts, BAMF sliders, DYFAF
    Looks great!!!
     
  5. Jul 30, 2016 at 9:03 AM
    #245
    1 Bored Clerk

    1 Bored Clerk [OP] Well-Known Member

    Joined:
    Sep 18, 2013
    Member:
    #112786
    Messages:
    1,999
    Gender:
    Male
    Vancouver, WA
    Vehicle:
    '13 4x4 AC TRD OR
    After a nice break and a sweet vacation to Iceland, I'm back on it!

    This is happening:
    image.jpg
    image.jpg

    Measured twice, eyeballed a few times, worried a lot...and that's just to get tape on the truck! I'm nervous about this. Don't want to screw it up!
     
    SonnyBones likes this.
  6. Jul 30, 2016 at 10:55 AM
    #246
    1 Bored Clerk

    1 Bored Clerk [OP] Well-Known Member

    Joined:
    Sep 18, 2013
    Member:
    #112786
    Messages:
    1,999
    Gender:
    Male
    Vancouver, WA
    Vehicle:
    '13 4x4 AC TRD OR
    image.jpg
    image.jpg
    Yep. That just happened.

    Not terrible. I still have some cleaning up to do. Radius corners and trim the area below the taillight so it looks good and is the same from side to side. Once everything is cleaned up the way I want it, I'll get some paint on the exposed metal, mount the fender flares and cut those.
     
  7. Aug 17, 2016 at 10:40 AM
    #247
    1 Bored Clerk

    1 Bored Clerk [OP] Well-Known Member

    Joined:
    Sep 18, 2013
    Member:
    #112786
    Messages:
    1,999
    Gender:
    Male
    Vancouver, WA
    Vehicle:
    '13 4x4 AC TRD OR
    Between travel and picking the low hanging fruit (finishing the much easier refrigerator mount for the truck), I haven't done anything on the bumper. Well, a little thing here or there but nothing major. I'm starting to get annoyed at myself over this. I'm 75% done! Just finish it!! Ugh. I'm a little stuck in the 'overthinking it' stage. I just need to start and it'll become, sometimes painfully, clear how to proceed. I'm mostly posting this so those of you with fabrication aspirations can see what it can actually be like on a project like this! Haha.
     
    EatSleepTacos likes this.
  8. Aug 17, 2016 at 6:15 PM
    #248
    EatSleepTacos

    EatSleepTacos Well-Known Member

    Joined:
    Mar 24, 2015
    Member:
    #151688
    Messages:
    59,834
    Gender:
    Male
    First Name:
    Randy
    West Valley, AZ
    Vehicle:
    2017 4Runner
    You can do it! You're almost there!
     
    1 Bored Clerk[OP] and Nickel like this.
  9. Aug 18, 2016 at 3:23 AM
    #249
    Acerwin

    Acerwin The unNORM NORM

    Joined:
    Nov 20, 2014
    Member:
    #142732
    Messages:
    32,623
    Gender:
    Male
    First Name:
    Andrew
    South Carolina
    Vehicle:
    Toyota Tundra
    Looks great buddy. Haven't been on here in a while and damn I've missed a lot.
     
  10. Aug 18, 2016 at 7:16 AM
    #250
    1 Bored Clerk

    1 Bored Clerk [OP] Well-Known Member

    Joined:
    Sep 18, 2013
    Member:
    #112786
    Messages:
    1,999
    Gender:
    Male
    Vancouver, WA
    Vehicle:
    '13 4x4 AC TRD OR
    Thanks! Being away for a long time is the only way to see actual progress on most of my projects! Ha!
     
    Acerwin likes this.
  11. Aug 28, 2016 at 5:18 PM
    #251
    malburg114

    malburg114 Well-Known Member

    Joined:
    Dec 26, 2012
    Member:
    #93766
    Messages:
    3,788
    Gender:
    Male
    Las Vegas, NV
    Vehicle:
    2001 Toyota Tacoma TRD

    Where did you get the spring loaded pin and can you get some measurments of it? Last thing I need to do and cant seem to find a pin small enough.
     
  12. Aug 28, 2016 at 7:12 PM
    #252
    1 Bored Clerk

    1 Bored Clerk [OP] Well-Known Member

    Joined:
    Sep 18, 2013
    Member:
    #112786
    Messages:
    1,999
    Gender:
    Male
    Vancouver, WA
    Vehicle:
    '13 4x4 AC TRD OR
    I got mine from 4xinnovations. They sell the spring pin with a weldable sleeve. It's great...ready to go! I have also seen pins like this on McMaster Carr but can't be sure how easy they'd be to integrate.
     
    malburg114[QUOTED] likes this.
  13. Aug 29, 2016 at 6:49 AM
    #253
    Synergy001

    Synergy001 IG: @pnwx.taco

    Joined:
    Dec 10, 2015
    Member:
    #171908
    Messages:
    1,950
    Gender:
    Male
    PDX
    Vehicle:
    00 ACLB -Daily, 16 DCSB -Adventure Rig
    Looking good so far. Who did your powdercoating BTW?
     
  14. Aug 29, 2016 at 7:54 AM
    #254
    1 Bored Clerk

    1 Bored Clerk [OP] Well-Known Member

    Joined:
    Sep 18, 2013
    Member:
    #112786
    Messages:
    1,999
    Gender:
    Male
    Vancouver, WA
    Vehicle:
    '13 4x4 AC TRD OR
    I get all my powdercoating at M&M powdercoating. They are in Vancouver and very close to both my work and home. Super convenient. Their prices seem good and they turn everything in a week to a week and a half.
     
    Last edited: Sep 26, 2016
  15. Aug 29, 2016 at 8:23 AM
    #255
    Synergy001

    Synergy001 IG: @pnwx.taco

    Joined:
    Dec 10, 2015
    Member:
    #171908
    Messages:
    1,950
    Gender:
    Male
    PDX
    Vehicle:
    00 ACLB -Daily, 16 DCSB -Adventure Rig
    Sweet thanks! Been looking for a powdercoater in the area that someone has used...
     
  16. Aug 29, 2016 at 9:21 AM
    #256
    1 Bored Clerk

    1 Bored Clerk [OP] Well-Known Member

    Joined:
    Sep 18, 2013
    Member:
    #112786
    Messages:
    1,999
    Gender:
    Male
    Vancouver, WA
    Vehicle:
    '13 4x4 AC TRD OR
    Yeah, I like these guys a lot. Totally recommend.
     
    Synergy001[QUOTED] likes this.
  17. Aug 31, 2016 at 9:17 AM
    #257
    1 Bored Clerk

    1 Bored Clerk [OP] Well-Known Member

    Joined:
    Sep 18, 2013
    Member:
    #112786
    Messages:
    1,999
    Gender:
    Male
    Vancouver, WA
    Vehicle:
    '13 4x4 AC TRD OR
    No photo update but I did, finally, spend some time on the bumper. It was all pondering time but I worked through my plan of attack and general layout for the side wings on the bumper. I doubt any real work will happen until I get back from Peru (leaving end of next week - gone for a week and a half), but you never know. It's hard for me to get all the equipment out and set up for, realistically, an evening or two of work. We do have a long weekend though...
     
  18. Sep 24, 2016 at 5:08 PM
    #258
    1 Bored Clerk

    1 Bored Clerk [OP] Well-Known Member

    Joined:
    Sep 18, 2013
    Member:
    #112786
    Messages:
    1,999
    Gender:
    Male
    Vancouver, WA
    Vehicle:
    '13 4x4 AC TRD OR
    Finished our last big trip for the year. Spent four days hiking the Inka Trail to Machu Picchu...crazy cool trip! Anyway, got to work on the bumper today.

    image.jpg
    Started by setting the angle for the back corners. Tacked together.

    image.jpg

    image.jpg

    Then I'd did some measuring and trimming of the corner plate and side wings. Tacked in place.

    image.jpg Then I made a template for the top filler piece out of mat board.

    image.jpg
    Here's the template in place. I'll cut this from steel tomorrow.

    That's it for today but I'm happy with the progress. My focus is truck projects now that traveling is done. So, I should be able to make good progress on this. Stay tuned!
     
    malburg114, EatSleepTacos and Nickel like this.
  19. Sep 25, 2016 at 10:03 AM
    #259
    1 Bored Clerk

    1 Bored Clerk [OP] Well-Known Member

    Joined:
    Sep 18, 2013
    Member:
    #112786
    Messages:
    1,999
    Gender:
    Male
    Vancouver, WA
    Vehicle:
    '13 4x4 AC TRD OR
    A bit more work this morning...

    image.jpg
    image.jpg
    I cut the top corner plates and tacked them in place. That may be all of the fabrication I can do today. I have a bunch of measuring to do so I know how much more material I need as well as what shapes I need to cut. It's coming along well, though.
     
    SonnyBones likes this.
  20. Sep 26, 2016 at 8:49 PM
    #260
    1 Bored Clerk

    1 Bored Clerk [OP] Well-Known Member

    Joined:
    Sep 18, 2013
    Member:
    #112786
    Messages:
    1,999
    Gender:
    Male
    Vancouver, WA
    Vehicle:
    '13 4x4 AC TRD OR
    Made some great progress after work today! I guess having months to think about how I was going to do this is actually paying off. Haha.

    image.jpg
    image.jpg
    image.jpg
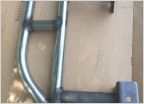
    Got a lot of the bracing in the corners done which starts to really show the shape.

    There is probably room in each rear corner for some small reverse lights...not sure if I'll take advantage of that. I'm not really a lighting guy. Might look good though.

    I'm pretty happy so far. Back at it tomorrow after work!
     
    Acerwin, EatSleepTacos and malburg114 like this.

Products Discussed in

To Top