

-
Welcome to Tacoma World!
You are currently viewing as a guest! To get full-access, you need to register for a FREE account.
As a registered member, you’ll be able to:- Participate in all Tacoma discussion topics
- Communicate privately with other Tacoma owners from around the world
- Post your own photos in our Members Gallery
- Access all special features of the site
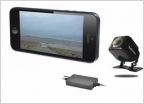 Backup Camera Question
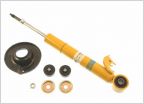 2WD / RWD specific Bilsteins - front won't fit - spring pad too wide?
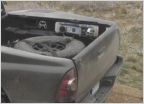 Bedside mounted floor Jack
 Recovery Points
 Adding an auxillary fuel tank, how to advice needed.
 Rail Mounting Clamps
Brand new & building a ladder rack. Advice?
Discussion in '2nd Gen. Tacomas (2005-2015)' started by Tac243, Dec 12, 2009.
Page 2 of 5
Page 2 of 5


