1. Welcome to Tacoma World!

    You are currently viewing as a guest! To get full-access, you need to register for a FREE account.

    As a registered member, you’ll be able to:
    • Participate in all Tacoma discussion topics
    • Communicate privately with other Tacoma owners from around the world
    • Post your own photos in our Members Gallery
    • Access all special features of the site

brettf's Third Gen Taco Build, Adventure, and BS Log

Discussion in '3rd Gen. Builds (2016-2023)' started by brettf, Oct 26, 2018.

  1. Oct 26, 2018 at 7:25 PM
    #1
    brettf

    brettf [OP] Well-Known Member

    Joined:
    Feb 20, 2018
    Member:
    #245064
    Messages:
    46
    Finally getting around to putting together a build thread!

    Among each of the Taco generation sub build forums on TW there are some rad trucks.
    I've taken inspiration from a bunch of them. Hopefully some info I share inspires
    someone to build some cool things into their truck!

    Third gen Tacoma time!
    2016 4x4 v6, Double Cab, 6-speed TRD OR model.

    I'll update some of the details as I go on, but here are some of the highlights:

    • Suspension: Bilstein 6112 Coilover and the rear Bilstein 5165s. OME Dakar leafs.
    • Gears: Nitro 4.88 F&R. Excellent upgrade over the (already lowish 4.30:1 for manual trans) OEM gears.
    • Locker: OEM rear e-locker, front ARB air
    • Toys: ARB dual compressor, Prinsu rack, Bedslide brand slide all hacked and frankensteined up...
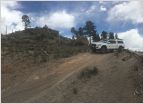
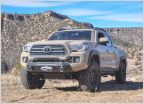
    A couple years back at first sight:
    [​IMG]

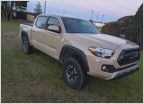
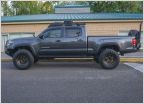
    Today:
    [​IMG]
     
    Last edited: Oct 26, 2018
    BloodyTaco likes this.
  2. Oct 26, 2018 at 7:25 PM
    #2
    brettf

    brettf [OP] Well-Known Member

    Joined:
    Feb 20, 2018
    Member:
    #245064
    Messages:
    46
    The first thing I did was get this thing home and test fit some 2013 4Runner SR5 wheels with some 265 70 17 KM2s.
    I always loved the wheels so it was good chance to do a test:
    [​IMG]


    (Interesting to note that this is a couple years back now (trying to catch up the thread). I HATED the third gen stock wheels at the time
    and couldn't wait to replace them. I don't mind them as much now, still not a fan, but funny how time changes those things. Still
    stoked on my SR5 wheels though!)

    Aaaaand sold on fitment. Found a CL deal on some SR5s, picked those up and a quick purchase of rubber:
    [​IMG]


    Didn't have to wait long for the first snow test here in Colorado:
    [​IMG]


    I've been a fan of the AT KO for years. I believe the new K02 tires are better in all conditions. Snow, slickrock, dirt, on road even.
    Really digging everything about the new BFGs.... except I think they wear faster, which is to be expected I think given how sticky
    they feel compared to the previous version. Good tradeoff? I think so, but time will tell!
     
  3. Oct 26, 2018 at 7:26 PM
    #3
    brettf

    brettf [OP] Well-Known Member

    Joined:
    Feb 20, 2018
    Member:
    #245064
    Messages:
    46
    One of the next things I did was to get rid of the black film between the front and rear windows on the B pillar. Drove me crazy and I couldn't
    wait to tear it off. Looking back now, I don't mind it as much! Still glad I did that. Took a couple hours with Goof Off and a heat gun:

    BEFORE:
    [​IMG]


    AFTER:
    [​IMG]
     
  4. Oct 26, 2018 at 7:26 PM
    #4
    brettf

    brettf [OP] Well-Known Member

    Joined:
    Feb 20, 2018
    Member:
    #245064
    Messages:
    46
    First puncture, plug, and repair didn't take long... like DAYS after getting the new tires. Sigh.
    [​IMG]
     
  5. Oct 26, 2018 at 7:26 PM
    #5
    brettf

    brettf [OP] Well-Known Member

    Joined:
    Feb 20, 2018
    Member:
    #245064
    Messages:
    46
    Started putting "things" on and in the truck. Car seat, infant, topper, rack, bike rack... started thinking about upgrading the suspension pretty quick.

    Settled on the TRD Baja Pro kit, which is really a TRD branded Bilstein 6112 Coilover with Bilstein 5165 rear shocks.

    Getting the front coilovers in, rear shocks in. Both sides done:
    [​IMG]

    [​IMG]


    Resulted in a 2"? lift(ish) up front. Second gen trucks would be a little higher. Note the rear is not lifted; I'd look at that later.
    Happy with the damping and spring rate from the coilovers and really happy with the rear dampers over stock.
     
  6. Oct 26, 2018 at 7:27 PM
    #6
    brettf

    brettf [OP] Well-Known Member

    Joined:
    Feb 20, 2018
    Member:
    #245064
    Messages:
    46
    And then some adventures with the truck out of state:
    [​IMG]


    Returned to more snow, some trees crushed, and a bunch of cleanup:
    [​IMG]


    And more snow:
    [​IMG]


    But we made the best of it:
    [​IMG]
     
  7. Oct 26, 2018 at 7:27 PM
    #7
    brettf

    brettf [OP] Well-Known Member

    Joined:
    Feb 20, 2018
    Member:
    #245064
    Messages:
    46
    Sometime as winter was moving into spring I picked up a RTT. Blair Witch Project style picture:
    [​IMG]


    And eventually got my butt in gear and installed some OME Dakar leafs:
    [​IMG]

    [​IMG]

    [​IMG]

    [​IMG]


    I also seemed to be on a mission to attach as many things as possible to the Tacoma!
     
  8. Oct 26, 2018 at 7:27 PM
    #8
    brettf

    brettf [OP] Well-Known Member

    Joined:
    Feb 20, 2018
    Member:
    #245064
    Messages:
    46
    Adventure time!

    Some northern New Mexico travels:
    [​IMG]


    American Basin, Odom Point on a San Juan trip:
    [​IMG]

    [​IMG]


    Summer camping with all the things on the Taco:
    [​IMG]

    [​IMG]


    Late Sept adventures. Near Moon Pass accessed from La Garita:
    [​IMG]


    San Juans near Blowout Pass. Drove in from Cumbres Pass through Platoro, had some great camping then over through some passes eventually landing in Del Norte.
    [​IMG]

    [​IMG]
     
    ponts likes this.
  9. Oct 28, 2018 at 10:08 AM
    #9
    brettf

    brettf [OP] Well-Known Member

    Joined:
    Feb 20, 2018
    Member:
    #245064
    Messages:
    46
    Somewhere along the line I put a plywood cutoff in the back of the bed and trimmed it to fit
    tight with the bed closed. I put some ripped 1" by 1/2"(or maybe 3/4"?) strips on the bottom as
    runners and fit those between the composite bed ribs to keep things straight. Super budget
    bed-slide setup. That did exactly as advertised. It was in the "bed" and it would "slide". Not
    well, but remarkably usable for el-cheapo setup. I mounted some randoms scraps to keep
    things I used often in place, to mount bike for mounts, and some other items like that.

    I used it it for at least a year; it just kept working and a price of exactly free wasn't bad. I just
    dragged it out onto the tailgate and it worked for me. Little rough pushing it back in when on an
    incline though! Here's the old setup:
    [​IMG]

    Eventually I wanted something a little better and found a used Bedslide brand slide that had
    been installed on a wrecked truck - like days before it was totalled out. A good score. I
    mounted a slotted profile to the front (err, back) of it, which I added the fork mount to. This
    was just a temporary setup. Well, it's all temporary until it's perfect (it's never perfect!)...

    Here you can see the slide when I was installing it and test-fitting how I'd have to angle my bike
    to fit. Shorter bikes can be straight. The slide itself fits between the wheel wells decently, but
    eats up a lot of space. I was worried it would use too much, but I ended up really liking it from
    day one. The added height of the "mid-rise" Leer topper helped keep some utility lost due to the
    height of the slide.

    [​IMG]
    (Looks like the slide install was exactly TWO Ska Mexican Lagger units in duration!)

    Used that for a bit, but hacked it up and replaced some parts with some extruded Aluminum
    t-slotted rails to fit my needs a little better. Below is a shot that shows current rail in the back
    with where the cooler more or less lives when it's in the Taco. I use some ammo cans to hold
    often-accessed items. Two are mounted to the slide, so they come out when I slide it out.

    Still figuring out where I want to mount a stove for transport and also for cooking. Might install
    slide out "drawer" thing for the cook stove (or a newer/better stove) that slides out from under
    the cooler, but still not sure how I want that to be. For now it scraps to the cooler tie downs for
    transport and on a box on the ground for cooking.

    upload_2018-10-28_11-2-25.gif

    [​IMG]

    [​IMG]

    Here's how it looks today. It's quick and convenient to remove things and still use it like a
    truck. This is what it looks like most of the time. The orange anodized fork mounts come out
    easily if I need a little extra room, but those are there basically 100% of the time.

    [​IMG]

    This shows how the left-most can slides in with the bed slide and the right can stays where I can
    reach it quickly through the side window OR through the back of the truck. That can has air
    accessories and tools. Can grab that quick and air up/down tires, set a bead on tubeless mtb tires, use air tools for impact etc.

    [​IMG]

    Here shows the amount of height I lost installing the slide itself. Almost 4 3/8" total
    height, which is a lot... That's one of the major downsides to using a slide. However,
    I think the tradeoff has been worth it for me. In the future I may pull apart the
    frame and see if I can reduce the height of the frame or of the sliding deck, but this
    is not a priority for me given how useful this thing has been and how less often I've
    had to crawl into the back of the truck!

    [​IMG]


    In case anyone is curious how I mounted the rail, there deck frame structure is based on angle
    steel. I mounted a 1.5" extrusion to this using the little 90* corner brackets shown.
    This turned out to be really rigid and I'm happy with how strong it has been.

    [​IMG]
     
  10. Oct 30, 2018 at 9:26 AM
    #10
    brettf

    brettf [OP] Well-Known Member

    Joined:
    Feb 20, 2018
    Member:
    #245064
    Messages:
    46
    Someone asked me elsewhere about my compressor and how it fits in the third gen, so I'll share that here as well.


    The ARB dual compressor isn't large for what it is, but space under the hood comes at a premium. I picked up the Slee
    bracket to fit the dual compressor horizontally near the firewall on the passenger side. Here is a shot showing where it
    currently lives:

    [​IMG]


    Here's the bracket from Slee:

    [​IMG]


    It fits, but it's tighter to the hood than I would prefer. The steel hose doesn't rub the hood, ever. The fitting for the hose
    fits fine when running it with the hood open. I was thinking I'd want to create some more space and reconfigure that
    for some reason, but I can't think of a reason I would have THAT kind of hose connected with the hood closed. I would
    use a different configuration if I were running a tank... which I haven't found the need for while running small tools or
    airing up truck tires (or mounting beads on tubeless mtb tires). Here's an angle showing how high the braided line runs:

    [​IMG]


    I swapped out the shallow cubby above the knee to the left of the steering wheel with a 3D printed switch panel that I
    found on Shapeways. It's made by a third-gen owner who created one for his own truck and sent the design to the
    Shapeways site. If you order, Shapeways prints it, ships it, and (I think, hope?) gives a kick back to the designer...

    Here's the direct link: 3rdGen Cubby Switch Panel I don't remember it being quite that expensive, maybe the prices
    have jumped. IIRC there are some options for different configurations if you snoop around. Here is an exceptionally
    terrible photo that shows where I put the switch and the two blank spots. I filled those with blanks:

    [​IMG]


    Here is the switch I used from CruiserHeads store:

    Direct CH4x4 link

    [​IMG]
     
  11. Oct 30, 2018 at 9:27 AM
    #11
    brettf

    brettf [OP] Well-Known Member

    Joined:
    Feb 20, 2018
    Member:
    #245064
    Messages:
    46
    As much as these threads are about the gear and the truck. I am going to try to make an effort to show pictures from adventures as
    much as include info about the truck. Here are some shots from here and there along the way. Trying to catch up to current.

    Loads of Ouray/Silverton/Tellurude-centric shots get posted to Expo from the summer, but fewer from the winter:

    [​IMG]


    Near Aspen Ridge between Salida and BV from February:

    [​IMG]

    [​IMG]


    Some more San Juan mountain exploring from the summertime:

    [​IMG]

    [​IMG]

    [​IMG]


    That one spot!

    [​IMG]


    From a drive over Breakneck and Browns passes before driving over Weston Pass into
    Leadville. Start driving young!

    [​IMG]


    Above Buena Vista:

    [​IMG]
     
    BloodyTaco likes this.
  12. Oct 30, 2018 at 9:04 PM
    #12
    brettf

    brettf [OP] Well-Known Member

    Joined:
    Feb 20, 2018
    Member:
    #245064
    Messages:
    46
    Had some questions from fellow mtb riders on how bikes fit in the bed so I took some pictures
    to show how one bike lives when it's in the back of the truck inside the topper. I figured I'd share
    those here:

    Some photos showing how the bike is mounted, the slide out, the slide in, and overall height of opening:
    [​IMG]

    [​IMG]

    [​IMG]

    This shows the overall opening is ~32 5/8" from the top of the deck to the top of the topper door opening.
    [​IMG]
     

    Attached Files:

    dspec and BloodyTaco like this.
  13. Oct 31, 2018 at 8:32 AM
    #13
    Rocky.Mtn

    Rocky.Mtn Well-Known Member

    Joined:
    Aug 6, 2017
    Member:
    #226091
    Messages:
    477
    Canada
    Vehicle:
    2024 Tacoma TRD OR (Hybrid)
    Rad build. I have the same suspension, works well.
     
  14. Oct 31, 2018 at 12:17 PM
    #14
    BloodyTaco

    BloodyTaco Well-Known Member

    Joined:
    Oct 10, 2010
    Member:
    #44470
    Messages:
    105
    Gender:
    Male
    First Name:
    Luke
    Colorado
    Vehicle:
    17 TRDOR DCSB
    Love that topper and bedslide setup, sub'd!
     
  15. Nov 5, 2018 at 12:40 PM
    #15
    dspec

    dspec Well-Known Member

    Joined:
    Sep 11, 2018
    Member:
    #265928
    Messages:
    222
    Gender:
    Male
    Sweet build, I dig the Santa Cruz too.
     

Products Discussed in

To Top