1. Welcome to Tacoma World!

    You are currently viewing as a guest! To get full-access, you need to register for a FREE account.

    As a registered member, you’ll be able to:
    • Participate in all Tacoma discussion topics
    • Communicate privately with other Tacoma owners from around the world
    • Post your own photos in our Members Gallery
    • Access all special features of the site

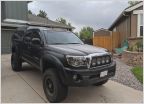
Built by a 14 year old (with some help from my dad)

Discussion in '2nd Gen. Builds (2005-2015)' started by jwarr, Aug 17, 2021.

  1. Dec 1, 2021 at 12:53 PM
    #121
    iwashmycar

    iwashmycar a lot

    Joined:
    May 16, 2014
    Member:
    #129960
    Messages:
    1,988
    Gender:
    Male
    First Name:
    Adam
    Lewis Center, Ohio
    Vehicle:
    07 FJ 4x4 AT
    33's | 3" | skids | rails | dent | CB | lights | dingus
    While dust shields are not fun, they can really help prolong the life of the tie rod ends, and ball joints that are otherwise pretty darned close to the hot brake rotors. YMMV

    Those spindles look great!
     
    deanosaurus and Drainbung like this.
  2. Dec 1, 2021 at 3:39 PM
    #122
    crashngiggles

    crashngiggles Tacomaworld's Resident Psych Dr.

    Joined:
    May 17, 2015
    Member:
    #155446
    Messages:
    6,633
    Gender:
    Male
    First Name:
    Jared
    Wilbraham, Massachusetts
    Vehicle:
    2013 MGM TRD 4x4 DCLB Trail Limo
    You should take this thing to SEMA when you are done with a big sign that says "yes I built this" and stand right next to it.....keep up the good work sir
     
    Sasquatch3153 likes this.
  3. Dec 1, 2021 at 3:43 PM
    #123
    Drainbung

    Drainbung Somedays you are the show....

    Joined:
    Sep 2, 2010
    Member:
    #42629
    Messages:
    9,114
    Gender:
    Male
    First Name:
    Bob
    Fallabama, NV
    Vehicle:
    10 DCLB
    TRD Fleshlight
    If you need a pair let me know, I've got them on the shelf in pretty decent shape off my 2010. I did the big brake upgrade.
     
    Sasquatch3153 and skeletron like this.
  4. Dec 2, 2021 at 10:49 AM
    #124
    jwarr

    jwarr [OP] Well-Known Member

    Joined:
    Jun 10, 2016
    Member:
    #189219
    Messages:
    406
    Gender:
    Male
    Thanks, we are going with 4runner rotors so need bigger, skipping the expense for now
     
  5. Dec 7, 2021 at 5:53 AM
    #125
    jwarr

    jwarr [OP] Well-Known Member

    Joined:
    Jun 10, 2016
    Member:
    #189219
    Messages:
    406
    Gender:
    Male
    We got our rack out to clean it up, it is pretty crusty. we hoped to get the rust off and POR-15 it and replace the boots. But when we pulled the boots off and one had oil in it. so an unexpected expense...

    upload_2021-12-7_8-53-37.jpg
     
  6. Dec 15, 2021 at 5:10 AM
    #126
    jwarr

    jwarr [OP] Well-Known Member

    Joined:
    Jun 10, 2016
    Member:
    #189219
    Messages:
    406
    Gender:
    Male
    remanufactured Cardone rack came and we got it painted in POR-15:
    upload_2021-12-15_8-10-20.jpg
     
  7. Dec 15, 2021 at 5:16 AM
    #127
    AllTacosFloat

    AllTacosFloat I need to be moderated

    Joined:
    Nov 26, 2019
    Member:
    #311742
    Messages:
    4,743
    First Name:
    John
    Boston ish
    Vehicle:
    Has lockers and a skewp
  8. Dec 16, 2021 at 5:30 AM
    #128
    jwarr

    jwarr [OP] Well-Known Member

    Joined:
    Jun 10, 2016
    Member:
    #189219
    Messages:
    406
    Gender:
    Male
    Rack is mounted, bolts put back in upside down for easier removal next time:
    upload_2021-12-16_8-30-28.jpg
     
  9. Dec 16, 2021 at 6:33 AM
    #129
    [KD]

    [KD] Used Import

    Joined:
    Feb 10, 2019
    Member:
    #282461
    Messages:
    459
    Gender:
    Male
    First Name:
    Dan
    Halifax, NS
    Vehicle:
    06 DCSB 6MT
    Hope you used threadlocker lol.. I put my passenger side one right way up just in case since it's only the driver's side that's a hassle to get out.
     
    skeletron likes this.
  10. Dec 29, 2021 at 11:45 AM
    #130
    jwarr

    jwarr [OP] Well-Known Member

    Joined:
    Jun 10, 2016
    Member:
    #189219
    Messages:
    406
    Gender:
    Male
    We got the rear brakes done with all new hardware, wheel cylinders, coated drums, and since both ebrake fittings were broken at the backing plate, we replaced those also:
    upload_2021-12-29_14-43-30.jpg

    upload_2021-12-29_14-44-12.jpg
     
  11. Dec 29, 2021 at 11:55 AM
    #131
    jwarr

    jwarr [OP] Well-Known Member

    Joined:
    Jun 10, 2016
    Member:
    #189219
    Messages:
    406
    Gender:
    Male
    Then went onto prepping the transmission to go back onto the engine. We replaced the pivot with the one from the clutch chirp service bulletin:
    upload_2021-12-29_14-47-45.jpg

    Then cleaned up the part where the bearing rides and put a little high temp Moly grease on it. It has a little wear, but is not too bad:
    upload_2021-12-29_14-49-24.jpg

    Then cleaned the fork and put grease onto the pivot points and put on the new bearing from our Aisin clutch kit:
    upload_2021-12-29_14-51-51.jpg

    upload_2021-12-29_14-53-13.jpg

    The put on the new slave cylinder with the accumulator removed (we plan to delete the accumulator):
    upload_2021-12-29_14-54-33.jpg
    upload_2021-12-29_14-56-20.jpg
     
  12. Jan 1, 2022 at 11:47 AM
    #132
    jwarr

    jwarr [OP] Well-Known Member

    Joined:
    Jun 10, 2016
    Member:
    #189219
    Messages:
    406
    Gender:
    Male
    Next we decided to tackle extending the CV axles following both the total chaos and service manual instructions:
    upload_2022-1-1_14-35-4.jpg

    We cut the bands and separated the inner joint:
    upload_2022-1-1_14-36-47.jpg

    Then remove the snap ring that holds the inner joint to the shaft and tap it off the shaft. Then remove the outer boot:
    upload_2022-1-1_14-39-13.jpg

    Then tape up the end and cut the shaft off as close as you can get it:
    upload_2022-1-1_14-40-34.jpg
    upload_2022-1-1_14-40-59.jpg

    Then rotate the joint around and pop the balls out one at a time, then you can remove the cage and inner part with the shaft stub still in it:
    upload_2022-1-1_14-42-27.jpg

    Then press the stub out of the other part. It took around 20 tons to shear the c-clip inside on our DAKE 25 ton press:
    upload_2022-1-1_14-45-0.jpg

    we doubled up on the tubing to press it out and it still dug into it:
    upload_2022-1-1_14-45-54.jpg

    Then tap the seal off the outer:
    upload_2022-1-1_14-46-47.jpg
     
  13. Jan 1, 2022 at 3:50 PM
    #133
    EatSleepTacos

    EatSleepTacos Well-Known Member

    Joined:
    Mar 24, 2015
    Member:
    #151688
    Messages:
    59,638
    Gender:
    Male
    First Name:
    Randy
    West Valley, AZ
    Vehicle:
    2017 4Runner
    I’m surprised it only took 20 tons. I’ve heard of people having to go to semi truck places with 100 ton presses and it using like 80 tons and sounds like a gun going off. Good work because disassembly is the hardest part. Reassembly is easy as hell.
     
    Drainbung likes this.
  14. Jan 1, 2022 at 4:29 PM
    #134
    jwarr

    jwarr [OP] Well-Known Member

    Joined:
    Jun 10, 2016
    Member:
    #189219
    Messages:
    406
    Gender:
    Male
    Both were around 20 tons, and can confirm the gunshot when they go!
     
  15. Jan 2, 2022 at 11:03 AM
    #135
    jwarr

    jwarr [OP] Well-Known Member

    Joined:
    Jun 10, 2016
    Member:
    #189219
    Messages:
    406
    Gender:
    Male
    We decided on Toyota OEM Boots and used 2 of these kits:
    upload_2022-1-2_13-44-31.jpg

    Each kit has 2 packs of brown grease (inner), 2 packs of black grease (outer), new boots, all c clips, and boot clamps:
    upload_2022-1-2_13-47-18.jpg

    we blasted and painted the axle stubs then put on a new outer seal (toyota PN 90304-A0001) using a piece of PCV pipe:
    upload_2022-1-2_13-49-44.jpg
    upload_2022-1-2_13-50-29.jpg

    Then put the cage, spider and balls back into the outer shell with new grease. then put the new clip onto the new shaft and tapped it into the spider:
    upload_2022-1-2_13-53-18.jpg

    We put the rest of the grease into the boot, then crimped the outer boot on with our Lisle Oetiker clamp pliers:
    upload_2022-1-2_13-55-50.jpg

    Then put the inner boot onto the shaft and put the inner roller thing back on with its c clip:
    upload_2022-1-2_13-57-38.jpg

    Brown grease into the inner hub:
    upload_2022-1-2_13-58-27.jpg

    Put the boot on and the clamps. There seems to be alot of confusion on the internet about the big inner boot clamp. We found out that this is a low profile Oetiker clamp and is actually made to be re-usable. They can be clamped and unclamped with regular pliers.
    upload_2022-1-2_14-1-35.jpg

    Done!
    upload_2022-1-2_14-2-46.jpg

    The +2" axles are Allpro made by Currie, that we got for around $500 from offroad warehouse after a $50 coupon.
     
    Last edited: Jan 2, 2022
    saf023, DoulosXP, 4xThad and 9 others like this.
  16. Jan 2, 2022 at 11:25 AM
    #136
    EatSleepTacos

    EatSleepTacos Well-Known Member

    Joined:
    Mar 24, 2015
    Member:
    #151688
    Messages:
    59,638
    Gender:
    Male
    First Name:
    Randy
    West Valley, AZ
    Vehicle:
    2017 4Runner
    I’m impressed you were able to get that inner clamp with regular pliers, I had no luck! I had to use these which made it a piece of cake.

    Lisle 30500 CV Boot Clamp Plier https://www.amazon.com/dp/B0002SREB8?ref=ppx_pop_mob_ap_share
     
    Drainbung likes this.
  17. Jan 2, 2022 at 11:29 AM
    #137
    tacopeter

    tacopeter My truck isn't modded. It's well optioned.

    Joined:
    Mar 26, 2021
    Member:
    #360623
    Messages:
    477
    Gender:
    Male
    First Name:
    Peter
    Washington State
    Vehicle:
    21 DCLB TRD OR
    OEM+
    This thread is badass:thumbsup:
     
    Twins09 and Tacos4ever15 like this.
  18. Jan 2, 2022 at 11:36 AM
    #138
    super_white

    super_white Well-Known Member

    Joined:
    Feb 6, 2012
    Member:
    #72230
    Messages:
    6,664
    Gender:
    Male
    First Name:
    Harry
    Connecticut
    Vehicle:
    2012 Tacoma 4X4
    Yes, yes it is.
    If anything, it gives me motivation to get off my butt and work on my truck.
     
    crashngiggles and skeletron like this.
  19. Jan 2, 2022 at 11:37 AM
    #139
    MGMDesertTaco

    MGMDesertTaco Come on, live a little...

    Joined:
    Jan 30, 2021
    Member:
    #354573
    Messages:
    6,768
    Gender:
    Male
    Keep the updates coming please. :popcorn:
     
    super_white and Tacos4ever15 like this.
  20. Jan 2, 2022 at 12:45 PM
    #140
    saltybum

    saltybum Well-Known Member

    Joined:
    Dec 15, 2021
    Member:
    #384683
    Messages:
    352
    Gender:
    Male
    First Name:
    Bob
    Space Coast
    Vehicle:
    2022 Tacoma Access
    What everybody else has said PLUS really excellent photography work as well. Easy to see all the details with perfect lighting etc. and explanation of what steps you are doing.
    Five star thread young man.
     
    TomYotaNH, skeletron and Drainbung like this.

Products Discussed in

To Top