1. Welcome to Tacoma World!

    You are currently viewing as a guest! To get full-access, you need to register for a FREE account.

    As a registered member, you’ll be able to:
    • Participate in all Tacoma discussion topics
    • Communicate privately with other Tacoma owners from around the world
    • Post your own photos in our Members Gallery
    • Access all special features of the site

Capture Colorado 01 TRD Taco - GOAE build

Discussion in '1st Gen. Builds (1995-2004)' started by capturecolorado, Mar 3, 2014.

  1. Aug 16, 2014 at 5:13 PM
    #81
    lotsoftoys

    lotsoftoys pavement is boring....

    Joined:
    Apr 22, 2010
    Member:
    #35790
    Messages:
    7,299
    Gender:
    Male
    First Name:
    Jace
    Denver
    Vehicle:
    98 lifted panda taco
    bunch of crap
    kipling and hampton. work off 6th and sims
     
  2. Aug 16, 2014 at 8:28 PM
    #82
    capturecolorado

    capturecolorado [OP] Well-Known Member

    Joined:
    Feb 11, 2014
    Member:
    #122857
    Messages:
    735
    Gender:
    Male
    First Name:
    Alex
    Grand Junction, CO
    Vehicle:
    01 4Runner SR5 with some things attached
    Weird that we haven't crossed paths yet... We're not at all far from each other.
     
  3. Aug 17, 2014 at 8:29 PM
    #83
    Mainmoe02

    Mainmoe02 Well-Known Member

    Joined:
    Apr 28, 2013
    Member:
    #103047
    Messages:
    2,055
    Gender:
    Male
    First Name:
    Moe
    Austin, Texas
    Vehicle:
    01 Gold tacoma SR5 TRD
    3" lift EIBACH coils w/ 5100's front, OME/ Dakar leaf springs w/ toytec adjustable shackles at 1.5" and 5125's out back. 33x10.5x15 KM2's Relentless DIY steel bumper.
    Alex, are those Coilovers the extended travel? If so, do the light racing UCA's allow for more travel/ droop? Or do the UCA's have to be uniball in order for the extended travel Coilovers to fully extend?

    your setup looks sweet, I like the stance! Seems to be a little taller than most 3" set ups
     
  4. Aug 17, 2014 at 8:43 PM
    #84
    capturecolorado

    capturecolorado [OP] Well-Known Member

    Joined:
    Feb 11, 2014
    Member:
    #122857
    Messages:
    735
    Gender:
    Male
    First Name:
    Alex
    Grand Junction, CO
    Vehicle:
    01 4Runner SR5 with some things attached
    Thanks Moe! They are the extended travel coilovers, but to be honest I have yet to install the uca's.... I just haven't had enough time. I also want to get new bolts lined up in case something happens.

    When I decided on the control arms, I shot an email over to the tech department at low range asking if the LR control arms would allow the droop, they claimed it will... I'm not entirely certain about that, but we'll see. If not, they'll be replaced and sold promptly. I will say, I am planning on fine tuning my front lift a little, the cranked 650# springs are kind of rough, so I'm thinking about doing a burly 2" spacer, cranking slightly, and limiting as needed not kill all the components.

    I know the back is rather tall, expo leafs, plus 1.5" shackles certainly helps that, the front has extra height from the heavy spring rate, no winch, and cranked to have 1.5" of compression.
     
  5. Aug 26, 2014 at 11:04 PM
    #85
    capturecolorado

    capturecolorado [OP] Well-Known Member

    Joined:
    Feb 11, 2014
    Member:
    #122857
    Messages:
    735
    Gender:
    Male
    First Name:
    Alex
    Grand Junction, CO
    Vehicle:
    01 4Runner SR5 with some things attached
    WARNING: lots of pictures... and rambling.

    Went out to Moab last week for 5 days of mountain biking and a little bit of wheeling. I left Golden at 7:30 Wednesday and made it to Moab by 12:30, got about 2 hours of sleep in all before I had to wake up and get ready to shuttle the Whole Enchilada trail as a pre-ride for the Moab Big Mountain Enduro race a few days later. Woke up at the crack of way too early in the parking lot of the bike shop and made the shuttle.

    Friday rolled around, and I was exhausted, sore, and didn't want to ride much with the race (theoretically) being the next day. So I sat around and hung out with the Shimano crew all day. Night time rolled around, and I went into town to grab dinner with some tentative plans of a night run on Fins and Things.

    Those tentative plans became reality, and I forgot my real camera.

    10612575_10153108498564689_6414862608500_1a764e81b568ad561c779075ea67c690644a6ae7.jpg

    Having never run that trail in the first place, I wasn't sure what to expect. The ridges, chunky sections, and most of all - the steep descents off of rock faces were exciting and a little....puckering....to say the least. All in all, it was a lot of fun, I had a good friend in the passenger seat that knew more about what my truck is capable of than I do, and was able to spot me through everything I needed spotting on.

    Saturday rolls around. Race day. Well, in theory. I get up early to hit my shuttle time and it's raining. Hard. We stand around for about an hour and the race director calls off the race until Sunday, resulting in a whole lot of disgruntled mountain bikers with not a whole lot to do.

    So what did we do? We went to the Love Muffin and got rowdy and stir-crazy. Then went and watched TV.

    Noon rolled around, the sun came out, the clouds were insane, and I wanted to get out of the hotel room... it's MOAB after all, gotta get out! So my friend and I decided to go into Canyonlands and explore.

    Upheaval Dome
    wm-HQ-3318_330bf59fd925a81eb8bbfa5a06af27515eed2270.jpg

    Meditating cairn
    wm-HQ-3332_f61b66db1aa75c5097aefea3b41c0bc62591c605.jpg

    I'm not good at figuring out how to photograph broad landscapes, I've been so focused lately on having a subject in the foreground, that vast landscapes like this are a struggle for me. So out came the 85mm.
    wm-HQ-3340_65c6c8c7b9e150a8f8442373aa497ea595211626.jpg

    On the way back, I decided to see if I could find Long Canyon (I was only given an obscure description of how to find it...once, ever). It looked as if a river had washed through the narrow part of the canyon up top over the last several days, everything was churned up, loose, and wet. Given the growing dark stormcloud that chased us off the slickrock at upheaval dome was still coming our way, this drive probably wasn't the smartest thing I've ever done...

    Obligatory pose.
    10553681_10152649246383826_7573868986805_08b86886e17ade7d27dec1e271c92be2420aca02.jpg

    Immediately after the rock tunnel, we crossed paths with some locals in a stock T100 warning us of a "ditch" that they couldn't make it through. I decided to keep going and see for myself.

    It wasn't bad, but we were soloing it, so I wanted to make sure I could get out. The entrance was suuuper soft, and the driver side shoulder looked like it could give out if not careful, the exit wasn't bad, the only other consideration was whether or not I'd get traction in the sloppy trickle of water in the riverbed.
    10641093_10152649246868826_9146903518047_7305bf004e50a1cac63a8cbc5a57a7885b14a4e1.jpg

    Stayed really far right to avoid the softness...
    10648361_10152649246283826_2267150189345_38644d449940b0c1d8992292ccc93ef56abb563c.jpg

    Nice fit...
    10544250_10152649246298826_5576434074362_9474c42394327c07396faf6f4ad0638280de5d7a.jpg

    And came out no problem!
    10532076_10152649246258826_1396719819155_47aa34a901b13297ed71d94b2b8bd763219892e8.jpg

    After that we rolled back to the hotel to join in a rain-delay BBQ for the racers, hung out, played some yard games, etc. etc., good times were had by all (who stuck around). My friend and I decided the party wasn't our style (you know, one big social situation) so we bailed and went to enjoy the land of the red dirt some more.

    wm-HQ-3349_ad829b24a28d521f5b11831d17da28954779d6c0.jpg

    If you head back north to I-70, East to Thomson Springs exit, and continue north through town on the main road, you'll eventually find some pretty awesome petroglyph panels. Carrie got a good bit more pictures of these than I did, I was distracted looking at the details and almost forgot to grab my camera. This particular panel is at ground level, and they're f*in lifesize, so if you're not expecting it, they'll scare the hell outta ya! (especially at night, I knew they were coming when we went through after dark, and it still got me).

    Continue up the road, make a right, and pretty soon you're in the ghost town of Sego Canyon. A small town formed around a coal mining operation. I believe the last remnants of the town was abandoned in the early 1940's, but I could be wrong.
    wm-HQ-3352_c43a5c93e2afbb7705c79d17b95df8d03113e527.jpg

    wm-HQ-3369_d9c0f60d90963316e2a0c72ef73accd56d56946b.jpg

    We decided to continue wandering up the main road/old railroad bed to see what we could find. It turns out the road dead-ends into a locked gate and fence, with Ute Territory north of where we were. However, on the drive up we went from whatever desert elevation was (5000ish?), to 8300 feet, surrounded by dense(ish) forest of scrub oak, pine, and aspen. We popped out to an overlook just in time for sunset.
    wm-HQ-3373_8076ce8da1f834adfdd4c8966fd07df8c8995100.jpg

    And that was my weekend. Lots of fun, with a good mix of intense mountain biking and racing, photography, and wheeling.
     
    Last edited: Sep 7, 2014
  6. Aug 27, 2014 at 3:31 PM
    #86
    Mainmoe02

    Mainmoe02 Well-Known Member

    Joined:
    Apr 28, 2013
    Member:
    #103047
    Messages:
    2,055
    Gender:
    Male
    First Name:
    Moe
    Austin, Texas
    Vehicle:
    01 Gold tacoma SR5 TRD
    3" lift EIBACH coils w/ 5100's front, OME/ Dakar leaf springs w/ toytec adjustable shackles at 1.5" and 5125's out back. 33x10.5x15 KM2's Relentless DIY steel bumper.
    Looks like fun. Exploring undeveloped land that people don't see everyday is my favorite reason to hit the trails.
     
  7. Sep 11, 2014 at 8:05 PM
    #87
    capturecolorado

    capturecolorado [OP] Well-Known Member

    Joined:
    Feb 11, 2014
    Member:
    #122857
    Messages:
    735
    Gender:
    Male
    First Name:
    Alex
    Grand Junction, CO
    Vehicle:
    01 4Runner SR5 with some things attached
    Picked up a large bomb-shaped object today. Threw a few coats of paint on it, it should be cured tomorrow sometime. I picked up a 150psi regulator from Wheelers Offroad, grabbed a super quickfist today for securing it in the bed. This'll be a nice addition to everything.

    KIMG0209_d3977d37f928c8db801edcfa5437812cf0f57d28.jpg
     
    adventureclassicsla likes this.
  8. Sep 12, 2014 at 6:29 PM
    #88
    capturecolorado

    capturecolorado [OP] Well-Known Member

    Joined:
    Feb 11, 2014
    Member:
    #122857
    Messages:
    735
    Gender:
    Male
    First Name:
    Alex
    Grand Junction, CO
    Vehicle:
    01 4Runner SR5 with some things attached
    Vinyl Monkey hooked it up on some Expedition decals.

    KIMG0213_145bd7297568d829e618b30923ee0c1460d00d09.jpg

    And finished / mounted the ghetto 15lb Powertank. Tested it, and discovered Wheelers didn't teflon tape the air chuck fitting (or really tighten any of the regulator bits down properly); I'm glad I pressure checked the system. I picked up a Powertank handle and ARB deflator today from Slee - no more valve cap deflators for me!

    KIMG0212_3f9f4c744d4c4e5bb9e9118ec478b0683653ba00.jpg
     
    adventureclassicsla likes this.
  9. Sep 18, 2014 at 9:20 AM
    #89
    BrennMan

    BrennMan Well-Known Member

    Joined:
    Jun 11, 2014
    Member:
    #131785
    Messages:
    81
    Gender:
    Male
    Vehicle:
    01 TRD Access Cab (current) 07 PreRunner TRD (sold)
    5100s, Weather Tech, Wet Okole, 1.25" spidertrax, pop-lock, Bestopper
    By far one of my favorite builds on TW. Really like the style and functionality you have going here. Nice job!
     
  10. Sep 18, 2014 at 5:35 PM
    #90
    capturecolorado

    capturecolorado [OP] Well-Known Member

    Joined:
    Feb 11, 2014
    Member:
    #122857
    Messages:
    735
    Gender:
    Male
    First Name:
    Alex
    Grand Junction, CO
    Vehicle:
    01 4Runner SR5 with some things attached
    Thanks!
     
  11. Sep 18, 2014 at 6:40 PM
    #91
    Dj318

    Dj318 Well-Known Member

    Joined:
    Feb 14, 2013
    Member:
    #97503
    Messages:
    1,649
    Gender:
    Male
    First Name:
    Dylan
    Concord, NC
    Vehicle:
    02 Tacoma
    bilstein 5100, wheelers AAL, Trail gear bumper, SOS sliders, RAT skids, 35" Mtr/k
    Loving the build!! Just wondering on that rear bumper do you have any support between the part that angles in and the square tube on top? Thinking about copying this a little but adding my own things here and there
     
  12. Sep 18, 2014 at 6:48 PM
    #92
    capturecolorado

    capturecolorado [OP] Well-Known Member

    Joined:
    Feb 11, 2014
    Member:
    #122857
    Messages:
    735
    Gender:
    Male
    First Name:
    Alex
    Grand Junction, CO
    Vehicle:
    01 4Runner SR5 with some things attached
    My original plan was to use gussets to strengthen that plate, but when I had all the components welded to the tube, I realized that the plate would be adequately supported at the intervals I had intended to gusset - the frame mounts were in at the distance I would need one, as were the recovery points and finally the hitch. The plate is welded to each, and I'm confident that the end result is plenty burly.

    The next one I build (eventually) will be entirely plate with a tube subframe for the hitch, and off the front of the angled plate on the bottom, I will add a piece of 2" flat on the very bottom, and then extend that up to help prevent the edge from snagging on rocks - which I've yet to have an issue with, but for the aesthetic and functionality it would be nice.
     
  13. Oct 8, 2014 at 8:16 PM
    #93
    capturecolorado

    capturecolorado [OP] Well-Known Member

    Joined:
    Feb 11, 2014
    Member:
    #122857
    Messages:
    735
    Gender:
    Male
    First Name:
    Alex
    Grand Junction, CO
    Vehicle:
    01 4Runner SR5 with some things attached
    I've gotten a good bit done lately, but haven't *finished* a whole lot of projects entirely... I bought and welded on sliders, worked on a new design for a hitch mounted bike rack, built a spare tire mounted shovel and axle carrier, and bought and am preparing to install a new shiny...

    The bike rack still needs some final tweaking before paint, and I'm lazy and want to go play on my bike rather than build shit to carry it with, so I'll finish it eventually.

    The shovel / axe mount is inspired from the EXO Rack from Vector Offroad, it's bolted on through the spare, and has space for quick fists, RotoPax, etc., it's a sweet, versatile system that allows for quick and easy access to tools if you're loaded up with gear in the bed and don't want to fuss with digging through stuff. Vector Offroad EXO Rack

    Now, aside from the pretty, precision-cut bits, and it probably weighs a few pounds less than what I came up with, it's really straight forward. I have a bunch of 3"x3/16" plate sitting around, as well as a ton of sch40 tube that's about 1" or 1.25" OD. So a few cuts, some squaring up of the tube, a weld here and there, and some quality time with a drill... and...

    It's a boy! er... girl? Ah, whatever.
    IMG_20141008_094029%257E2_30b7d08cc9567f66525bacd308d9ad6216f3cceb.jpg

    Since everything was drop, my perceived investment into this product is 2 sets of quick fists, and a can of spray paint (already had primer, too). I think I might look at adding some tabs to carry a hi-lift in between the two quick fists, I'll have to see how it mates up between the shovel and axe when I get them all on there. The center bolt is 1/2" and uses the same size socket as the lug nuts on the spare, which is also the same size that I need for my bike rack bolt. If I do the hi-lift mount, I'll stick with 1/2" hardware for unanimity and limited tool variety for those shitty situations.

    And for the something shiny....
    IMG_20140925_192557_b987c6e2e0d911260ad9c37b9ad08ca9218b1984.jpg
     
  14. Oct 8, 2014 at 8:42 PM
    #94
    Delta00

    Delta00 ᕕ( ᐛ )ᕗ

    Joined:
    Sep 16, 2013
    Member:
    #112633
    Messages:
    4,139
    Gender:
    Male
    First Name:
    Troy
    Chandler AZ
    Vehicle:
    2002 Toyota Tacoma 4WD
    Check Build
    Just saw this build now, looking really good! How have those tires held up? I'm looking at those for my next set.
     
  15. Oct 8, 2014 at 8:48 PM
    #95
    capturecolorado

    capturecolorado [OP] Well-Known Member

    Joined:
    Feb 11, 2014
    Member:
    #122857
    Messages:
    735
    Gender:
    Male
    First Name:
    Alex
    Grand Junction, CO
    Vehicle:
    01 4Runner SR5 with some things attached
    Thanks! Are you talking about the Coopers? Or the TreadWrights? Both are great tires, I really like the Coopers, they are a little louder than the TWs were, but not at all bad. I've had them both offroad a good amount, the TW wore great on road, and handled sharp chunky trails with grace. The Coopers seem to be doing quite the same, if not better. There's no chunking or pitting yet, and I've got a lot of miles on them, a trip to Moab, and a couple of wheeling trips around the area already, they do really really well aired down, too. And not unbearably stiff for a 3-ply tire.
     
  16. Oct 8, 2014 at 9:20 PM
    #96
    Delta00

    Delta00 ᕕ( ᐛ )ᕗ

    Joined:
    Sep 16, 2013
    Member:
    #112633
    Messages:
    4,139
    Gender:
    Male
    First Name:
    Troy
    Chandler AZ
    Vehicle:
    2002 Toyota Tacoma 4WD
    Check Build
    The coopers. Thats what I wanted to hear, they keep on looking more and more like my next set! Thanks for the info.

    Are you planning on making your own sliders?
     
  17. Oct 8, 2014 at 9:25 PM
    #97
    capturecolorado

    capturecolorado [OP] Well-Known Member

    Joined:
    Feb 11, 2014
    Member:
    #122857
    Messages:
    735
    Gender:
    Male
    First Name:
    Alex
    Grand Junction, CO
    Vehicle:
    01 4Runner SR5 with some things attached
    Absolutely.

    I went back and forth about making the sliders myself, but without access to tube notching and bending equipment, it was going to look...not great. I also don't have the welding table that I'd like to be able to build something like that as accurately as I'd like. So I bought some trail-gear sliders. They're made with .120" DOM, the price is right, and free shipping to the 4 wheel parts in town, as much as I wanted to support one of the smaller vendors on TW, it just wasn't going to happen economically on this.

    The trail-gear sliders look great and will offer all the protection I need. They look good, too.
     
  18. Oct 8, 2014 at 9:28 PM
    #98
    Delta00

    Delta00 ᕕ( ᐛ )ᕗ

    Joined:
    Sep 16, 2013
    Member:
    #112633
    Messages:
    4,139
    Gender:
    Male
    First Name:
    Troy
    Chandler AZ
    Vehicle:
    2002 Toyota Tacoma 4WD
    Check Build
    Cool, i'm going back and forth on making my own sliders using square tubing but idk.. Did you get some with kickouts?
     
  19. Oct 8, 2014 at 9:33 PM
    #99
    capturecolorado

    capturecolorado [OP] Well-Known Member

    Joined:
    Feb 11, 2014
    Member:
    #122857
    Messages:
    735
    Gender:
    Male
    First Name:
    Alex
    Grand Junction, CO
    Vehicle:
    01 4Runner SR5 with some things attached
    Just straight tube, I don't like the amount of kickout everyone seems to do, in person I haven't been impressed with the look, I think the standard outer tube will do everything I need it to. I thought about buying the bent portion from relentless or someone, and using square tube as the base, but these were the most cost and time effective method no matter how I looked at it.
     
  20. Oct 18, 2014 at 6:24 PM
    #100
    capturecolorado

    capturecolorado [OP] Well-Known Member

    Joined:
    Feb 11, 2014
    Member:
    #122857
    Messages:
    735
    Gender:
    Male
    First Name:
    Alex
    Grand Junction, CO
    Vehicle:
    01 4Runner SR5 with some things attached
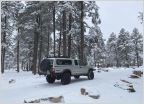
    This is from last Saturday - a coworker and I went wheeling, we hit Twin Cone, and had to turn around on the big hill because it was too slippery, couldn't get any traction, so we went over Guanella Pass over to Fall River Road, and found our way up to Yankee Hill. We saw every variety of weather and trail condition possible, from dry trails with warm sun, to several inches of snow and ice and cold.

    Only managed to get one picture all day, and haven't had time yet to do a shoot of the truck with the latest mods. Was going to today, but ran out of time. I spent my afternoon today getting my CB hardwired, added a voltmeter, and a RAM mount for my phone for trail navigation. I have a handful of new switches from OTRATTW to wire into the switch panel, which will wrap up the panel nicely... got the kind with the lower independent led, which will be wired into the dash lights and dimmable, then then the switch is on, the upper will light up.

    Also while I had the truck apart, I found out that the cruise control wasn't factory installed on the truck, but rather dealer installed (I assume), and kind of poorly done... regardless, one of the 4 random-ass fuses was blown, replaced it and now I have functional cruise control.

    DSC_3543_bb9b434ce5b8f7edafd6f36c68069fc96ec298ff.jpg
     

Products Discussed in

To Top