1. Welcome to Tacoma World!

    You are currently viewing as a guest! To get full-access, you need to register for a FREE account.

    As a registered member, you’ll be able to:
    • Participate in all Tacoma discussion topics
    • Communicate privately with other Tacoma owners from around the world
    • Post your own photos in our Members Gallery
    • Access all special features of the site

CoastieRon's Progression of Idiocy journal & BS

Discussion in '3rd Gen. Builds (2016-2023)' started by CoastieRon, Jan 4, 2018.

  1. Jun 8, 2018 at 12:25 PM
    #121
    CoastieRon

    CoastieRon [OP] Hammocking Fool

    Joined:
    Jan 1, 2018
    Member:
    #239946
    Messages:
    2,432
    Gender:
    Male
    First Name:
    Ron
    Nashua
    Vehicle:
    Lil' Silver
    Too much.
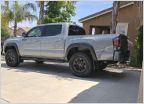
    I couldn't wait!!!


    Wheels: Level 8 MK6 17x8", zero offset, matte gunmetal with Falken Wildpeaks A/T3, 265/70/17 standard load. There is rub right now at full turn, but that's getting taken care of with my lift later this month.


    It's amazing what wheels and going one size up on tires does for the stance/look of these trucks.
     
    pjtx808 likes this.
  2. Jun 9, 2018 at 3:07 PM
    #122
    MrBrooks

    MrBrooks Well-Known Member

    Joined:
    Oct 14, 2017
    Member:
    #232988
    Messages:
    1,224
    Midwest
    Vehicle:
    2018 DCSB - 2021 Rav4
    Subbed just to see what this guys does next...

    BTW it's not copying if we have the same truck & same taste! :spy:
     
    CoastieRon[OP] likes this.
  3. Jun 10, 2018 at 4:34 PM
    #123
    CoastieRon

    CoastieRon [OP] Hammocking Fool

    Joined:
    Jan 1, 2018
    Member:
    #239946
    Messages:
    2,432
    Gender:
    Male
    First Name:
    Ron
    Nashua
    Vehicle:
    Lil' Silver
    Too much.
    Go to town man!

    I'll have a better write up tomorrow about rub, the 8, etc...
     
  4. Jun 11, 2018 at 6:20 AM
    #124
    CoastieRon

    CoastieRon [OP] Hammocking Fool

    Joined:
    Jan 1, 2018
    Member:
    #239946
    Messages:
    2,432
    Gender:
    Male
    First Name:
    Ron
    Nashua
    Vehicle:
    Lil' Silver
    Too much.
    So a couple of quick observations:

    After the wheels and tires were mounted, I had a Boy Scout trip with my troop about 40 miles away. I put in a fresh tank right after the tires were put on. I am definitely taking a hit with fuel mileage, dropping from a 21mpg average to a sub-18mpg average so far, but the tank is not empty yet.

    Also, in regards to the rubbing, it was occurring at half turn, where the inner part of the tire was rubbing against the center of the mud flap. I removed the front mudflaps, and now there is no rub. However, when I removed the mud flap, there is now an outline of the flap etched in the paint. I tried using some cleaner wax as well as Maguire's Scratch remover, and there is still a bit of a line. Because I can't go driving around for too long risking rocks flying up and chipping my paint, I ordered RodBlokz mud flaps, and hopefully they come in before the weekend (going up to the lake to check in on a bit of construction that's supposed to happen this week).

    etching.jpg

    Amazingly enough, there is not as much road noise as I thought there would be. I tend to listen to audible during my commute to and from work when I happen upon a new book, and right now I'm listening to The Outsider by Stephen King. I had no need of raising the volume any higher than normal to drown out any road noise.

    When I got home from camping (which by the way was a good time, I love sleeping in my hammock), I found that there was a box from Georgia Killer Waxx with some soap, liquid wax and detail spray, as well as a couple micro-fibre towels. So I washed and waxed my truck.

    killerwaxxed.jpg

    I'm really happy with the offset of the wheels and tires, the color of the wheels is just right, and the tires handled very good this weekend in the woods. The one thing I don't care for too much is the spray painted in white block 8 in the middle of the wheels. I think this weekend (or hell, maybe even tonight) those 8s will disappear.

    Overall I am very happy with the wheel/tire combination. I don't feel as though they are bogging the truck, but I am sure I am going to take a hit in the gas mileage. I think the next biggy will be the OVT tune up.
     
    1992SR5V6 likes this.
  5. Jun 11, 2018 at 6:37 AM
    #125
    MrBrooks

    MrBrooks Well-Known Member

    Joined:
    Oct 14, 2017
    Member:
    #232988
    Messages:
    1,224
    Midwest
    Vehicle:
    2018 DCSB - 2021 Rav4
    I dig the new wheels! Look good with the silver sky. I have been thinking about getting the silver T4R Pro wheels instead of black. I think you mentioned something about a lift?
     
  6. Jun 11, 2018 at 6:51 AM
    #126
    CoastieRon

    CoastieRon [OP] Hammocking Fool

    Joined:
    Jan 1, 2018
    Member:
    #239946
    Messages:
    2,432
    Gender:
    Male
    First Name:
    Ron
    Nashua
    Vehicle:
    Lil' Silver
    Too much.
    Next Thursday after scouts, me and my cousin are putting in a small-ish lift, or rather, we are swapping out the OEM sport Hitachi suspension for Bilstein 5100s (B8-for 3rd gen), swapping the OEM front springs for OME 884 springs (Headstrong chart states this will achieve a 1.25" front lift) and adding a 1.5" Add a Leaf on the rear leaf packs.

    I am going with a small-ish lift because I don't do serious off-roading (rock crawling, inclines, articulating, etc), but do however hit a few sketchy camping trails/roads throughout the year. I don't feel as though I need a 3" lift, or whole leaf pack switch out, etc. I'm not rolling with a RTT, or 200 pound constant load in the back. Every expensive thing I am doing has a practicality for me (maybe except for the scoop light, but it's just so damn cool, and amazingly enough, I've used it to help set up camp at night already a few times, so there is some practicality I guess). The little asthetic things I do is because fuck it, why not :bananadance:
     
    Last edited: Jun 11, 2018
  7. Jun 11, 2018 at 7:05 AM
    #127
    MrBrooks

    MrBrooks Well-Known Member

    Joined:
    Oct 14, 2017
    Member:
    #232988
    Messages:
    1,224
    Midwest
    Vehicle:
    2018 DCSB - 2021 Rav4
    Yea that scoop light is frickin awesome! I've been thinking about a smaller lift also. Kinda kickin around the idea of just getting a used Offroad suspension off here since there's a bunch for sale & put that extra $ towards other stuff. Gotta do that USB setup in the glovebox also!
     
  8. Jun 11, 2018 at 7:08 AM
    #128
    CoastieRon

    CoastieRon [OP] Hammocking Fool

    Joined:
    Jan 1, 2018
    Member:
    #239946
    Messages:
    2,432
    Gender:
    Male
    First Name:
    Ron
    Nashua
    Vehicle:
    Lil' Silver
    Too much.
    I don't believe that the OEM TRDOR suspension will net you any lift honestly.

    The USB mod was super easy, just don't go as deep into the glovebox as I did, and you will be good to go. I think after the lift I'll probably need to put in the front camera I've been putting off.
     
  9. Jun 11, 2018 at 7:11 AM
    #129
    MrBrooks

    MrBrooks Well-Known Member

    Joined:
    Oct 14, 2017
    Member:
    #232988
    Messages:
    1,224
    Midwest
    Vehicle:
    2018 DCSB - 2021 Rav4
    Hmmm I thought I read that it would be 1" higher that Sport models? Also like the idea of a lil softer ride than the Sport.
     
  10. Jun 11, 2018 at 5:38 PM
    #130
    CoastieRon

    CoastieRon [OP] Hammocking Fool

    Joined:
    Jan 1, 2018
    Member:
    #239946
    Messages:
    2,432
    Gender:
    Male
    First Name:
    Ron
    Nashua
    Vehicle:
    Lil' Silver
    Too much.
    Couple of quick hits hit tonight:

    Removed the "AVS" logos from the vent visors

    IMG_20180611_185825.jpg MVIMG_20180611_191417.jpg

    Removed the "8" logos on all the wheels

    IMG_20180611_190155.jpg IMG_20180611_190507.jpg

    Both were removed using Laquer Thinner. For the vent visors, it took about 3 swipes and the logo was gone. For the 8 logos on the wheels, it probably took about 30 seconds per wheel, with no real pressure on the rag. I applied the Laquer Thinner to a section of a microfiber rag and basically erased the logo using circular motion. Then buffed out with dry section of the rag. This had no effect on the color of the wheel's center cap.

    Lastly, I removed the rear OEM mud flaps. I found a lot of sand and grit between the mud flap and the paint. Cleaned it up but there is some etching. I'll have to fix that later.

    IMG_20180611_200402.jpg

    The Rokblokz come in this week.
     
    racing_reject_001 likes this.
  11. Jun 15, 2018 at 2:56 AM
    #131
    Spider171

    Spider171 Well-Known Member

    Joined:
    Jan 29, 2018
    Member:
    #242793
    Messages:
    123
    Gender:
    Male
    Vehicle:
    18 Trd Off-road Cement LB
    Is there much wind noise with the in channel vent visors? What did you use to black out the chrome around your front grill?
     
  12. Jun 15, 2018 at 3:18 AM
    #132
    CoastieRon

    CoastieRon [OP] Hammocking Fool

    Joined:
    Jan 1, 2018
    Member:
    #239946
    Messages:
    2,432
    Gender:
    Male
    First Name:
    Ron
    Nashua
    Vehicle:
    Lil' Silver
    Too much.
    No wind noise that I hear different. As for the chrome surround, I think page 1 has the part number for the SR black surround bezel I used.
     
  13. Jun 18, 2018 at 6:11 AM
    #133
    CoastieRon

    CoastieRon [OP] Hammocking Fool

    Joined:
    Jan 1, 2018
    Member:
    #239946
    Messages:
    2,432
    Gender:
    Male
    First Name:
    Ron
    Nashua
    Vehicle:
    Lil' Silver
    Too much.
    RokBlokz

    Because the tires I bought were a little oversized, going from 265-65-17 to 265-70-17, i had a little bit of rubbing on the OEM mudflaps only. It occurred just before full turn, and the edge of the tire was rubbing on the very center of the OEM mudflap.

    After a bit of research, I decided to purchase the RokBlokz mudflaps in the "standard size". They are a bit on the spendy side ($149.95 right from the manufacturer) for what they are (stiff plastic with holes), but they were easy to install, look very clean (I purchased the black flaps with black logos) and offer the protection to the paint from dirt, pebbles and debris being flipped up from the tires.

    For the fronts, there is a cut out section for "oversized tire fitment" that I utilized, pulling the flap further away from the tire.

    Front exterior

    IMG_20180618_083408.jpg IMG_20180618_083442.jpg

    Front interior

    MVIMG_20180618_083452.jpg

    Rear exterior

    IMG_20180618_083418.jpg

    Rear interior

    MVIMG_20180618_083431.jpg

    As you can see from the interior pictures, there is a gap that looks as though it may collect mud/dirt/debris in the wheel well.


    IMG_20180618_083504.jpg

    Overall I'm satisfied with my purchase in the "near term". I say this because I'd like to see whether or not the gap does collect debris. The flaps offer a clean look, protection to the paint, while mitigating an rubbing.
     
    Last edited: Jun 26, 2018
  14. Jun 18, 2018 at 7:43 AM
    #134
    MrBrooks

    MrBrooks Well-Known Member

    Joined:
    Oct 14, 2017
    Member:
    #232988
    Messages:
    1,224
    Midwest
    Vehicle:
    2018 DCSB - 2021 Rav4
    Nice choice & I like the logo. When I ordered my bed mat last week I also ordered the OEM flaps but decided not to get them when I went to pick up them up. Might just get a set of these too!
     
    CoastieRon[OP] likes this.
  15. Jun 22, 2018 at 7:53 AM
    #135
    CoastieRon

    CoastieRon [OP] Hammocking Fool

    Joined:
    Jan 1, 2018
    Member:
    #239946
    Messages:
    2,432
    Gender:
    Male
    First Name:
    Ron
    Nashua
    Vehicle:
    Lil' Silver
    Too much.
    "Small Lift" install (1)

    I'm going to try to be as succinct as possible with this post, but I know that I'm going to forget something so bear with me please.

    Last night, me and my cousin installed my "small lift". I call it a small lift because it certainly isn't as tall as 3/4 of the lifted trucks on this site. I got a set up that fits my needs, which were:

    a. better ride than the Hitachi suspention
    b. better ride on some of the sketchy camp roads
    c. light off-roading
    d. a bump up in hauling capacity
    e. aesthetic beauty (LMAO)

    So bearing all this in mind, I went with the following set up:

    3rd Gen Bilstein 5100 PN 24-239370 (on bottom setting)
    Bilstein 5100 Rear shocks
    OME 884 Springs
    Headstrong Offroad 1/4" spacer (for driver side lean)
    1-1/2" AAL (This AAL was from Rogue Off-Road)

    The 5100s (front and rear) and the AAL came as a kit from Rogue Offroad, and is called the Tacoma Stage 1 lift.

    The OME springs and spacer came from Headstrong (I like to spread money around to small businesses).

    Start Time: 8:02 PM
    Fuel: Mountain Dew

    We put the front end on jack stands, and removed the wheels. We followed these two videos for taking off and putting on the front shocks and springs:


    We started off with the passenger side because that was the most simple of the front, because we were not taking off the shock's top hat to add a spacer like on the driver side. Following that video, from the time I pulled in to the garage, to the time we had the new shock on (not including time to torque to specs), was 32 minutes.
    IMG_20180621_203609.jpg
    You read that right.

    Murphy's Law showed up while doing the driver's side, but it was 100% MY FAULT. We got the OEM shock off, took the top hat down, put the spacer in, put the top hat back on it, put the new shock/spring in, and could not fasten it. The lower control arm was waaaaaay down. So after much back and forth, we went to the spring compressor.

    Then I realized that the bottom seat for the spring was on the shock upside down. We flipped it around, fastened the top hat to the shock, and installed easily.

    With that fuck up by me, we had the fronts done in 1 hour and 45 minutes. Keep in mind, we had air tools, the truck just crossed over 11k miles, making everything very easy to take apart.

    On to the rears!

    Items of note. The shocks are self explanatory on this. They come out very easy, and need to be removed before tackling the AAL install. However, before lowering the axle to get the new leaf in there with the much longer setting screw, you MUST disconnect the guide/fasteners for the break lines.

    The rears took a little longer because after we got the first one done, we took a break and had a beer LOL.

    MVIMG_20180621_223354.jpg

    We torqued everything to factory specs using this guide:

    3rd Gen Suspension Guide


    Then we celebrated a job well done that took us 3 hours and 34 minutes, not really rushing, fumble-fucking with tools, a stupid move by me, a quick internet search on adding a leaf, a beer and some friendly family banter.

    beer and shot.jpg

    Results and measurements:

    I measured my height a while back, and I'm pretty sure I did it wrong, but I went from the ground to the top of the wheel well. Some folks do it from the center of the wheel, some folks do it from the top of the tire. I'm pretty sure that it's supposed to be from the center of the wheel, but oh well. These initial measurements were made with the stock Sport wheels, and OEM tires (265-65-17) with the OEM cover on it:

    Driver Front - 35-1/8" Passenger Front - 35-1/4"
    Driver Rear - 35-5/8" Passenger Rear - 36

    Post lift install measurements with new wheels and new tires: (265-70-17)

    Driver Front - 37-9/16" Passenger Front - 37-9/16"
    Driver Rear - 39-1/2" Passenger Rear - 39-1/2"

    Talk about nailing it! However, to get the net lift from the suspension alone, we have to subtract 1" for the tire change. That said, net lift numbers work out like this:

    Driver Front - 1-7/16" net lift Passenger Front - 1-5/16"
    Driver Rear - 2-7/8" net lift Passenger Rear - 2-1/2"


    HeadStrong's handy dandy chart states that Bilstein 3rd Gen 5100s with OME 884s on a DC 4x4 will give 1-1/4" lift. I hope I don't settle that much LOL

    There is rake

    IMG_20180621_235309.jpg IMG_20180622_000648.jpg

    Of course this is all going to change as it "settles".

    All wrapped up, pre-alignment
    MVIMG_20180621_233504.jpg MVIMG_20180622_070402.jpg
     
    Last edited: Jun 22, 2018
  16. Jun 22, 2018 at 8:11 AM
    #136
    CoastieRon

    CoastieRon [OP] Hammocking Fool

    Joined:
    Jan 1, 2018
    Member:
    #239946
    Messages:
    2,432
    Gender:
    Male
    First Name:
    Ron
    Nashua
    Vehicle:
    Lil' Silver
    Too much.
    "Small Lift" install (2 - Alignment and thoughts)

    Knowing that I was going to be installing the lift last night, I scheduled an appointment for the alignment for this morning at 7:30. My cousin suggested a particular tech that we both knew and I booked it. So this morning, my truck went in.

    MVIMG_20180622_074544.jpg MVIMG_20180622_074719.jpg

    Took the tech an hour and a half, but that was due to him showing me the machine, how he was going to go about doing it, and bullshitting about my cousin.

    Lift Alignment.jpg

    Post alignment:

    MVIMG_20180622_093627.jpg

    Thoughts:

    I really thought this was going to be much more difficult than it was. However to be fair, my cousin is a gear head, had the space, the tools and the time to make it way easier than it would have if it was just me.

    Butt Dyno:

    It feels as though the ride is more "plush". The bumps aren't as jarring as they were with the Hitachi shocks and OEM springs. I feel as though I got the rake that (in my humble opinion) the truck should have. There's a bit of work that needs to get done for the rear alignment, and I'm going to need advice on that, as only the fronts got done (the rears are grayed out?) The truck tracks nice and straight (and did last night and this morning pre-alignment honestly), and right now I am extremely happy with my decision to go through with this.
     
    CaptainBart45 and TexasTaco4x4 like this.
  17. Jun 22, 2018 at 8:12 AM
    #137
    CoastieRon

    CoastieRon [OP] Hammocking Fool

    Joined:
    Jan 1, 2018
    Member:
    #239946
    Messages:
    2,432
    Gender:
    Male
    First Name:
    Ron
    Nashua
    Vehicle:
    Lil' Silver
    Too much.
    Oh yeah! I took a close up of the rear spring because I was amazed at how much of a difference the AAL made in the leaf pack. Before I installed it, that pack was dead level, and now it has a nice curve to it.....

    IMG_20180622_081224.jpg
     
  18. Jun 22, 2018 at 8:19 AM
    #138
    CoastieRon

    CoastieRon [OP] Hammocking Fool

    Joined:
    Jan 1, 2018
    Member:
    #239946
    Messages:
    2,432
    Gender:
    Male
    First Name:
    Ron
    Nashua
    Vehicle:
    Lil' Silver
    Too much.
    Before lift:

    before lift.jpg

    After lift:

    MVIMG_20180622_070402.jpg
     
    TexasTaco4x4 likes this.
  19. Jun 22, 2018 at 8:39 PM
    #139
    MrBrooks

    MrBrooks Well-Known Member

    Joined:
    Oct 14, 2017
    Member:
    #232988
    Messages:
    1,224
    Midwest
    Vehicle:
    2018 DCSB - 2021 Rav4
    That ride height & stance looks perfect! :thumbsup:

    Thanks for sharing the alignment sheet so I have something to compare to in the near future!
     
    CoastieRon[OP] likes this.
  20. Jun 24, 2018 at 4:27 PM
    #140
    CoastieRon

    CoastieRon [OP] Hammocking Fool

    Joined:
    Jan 1, 2018
    Member:
    #239946
    Messages:
    2,432
    Gender:
    Male
    First Name:
    Ron
    Nashua
    Vehicle:
    Lil' Silver
    Too much.
    Next up, dash cam.
     
To Top