1. Welcome to Tacoma World!

    You are currently viewing as a guest! To get full-access, you need to register for a FREE account.

    As a registered member, you’ll be able to:
    • Participate in all Tacoma discussion topics
    • Communicate privately with other Tacoma owners from around the world
    • Post your own photos in our Members Gallery
    • Access all special features of the site
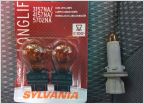
Custom overhead console switch plates

Discussion in '2nd Gen. Tacomas (2005-2015)' started by MESO, Jun 20, 2018.

  1. Jul 28, 2020 at 2:27 PM
    #561
    Jojee117

    Jojee117 Well-Known Member

    Joined:
    Jul 30, 2018
    Member:
    #261068
    Messages:
    960
    Gender:
    Male
    First Name:
    Joe
    MT
    Vehicle:
    06 TRD Sport Prerunner 4WD swapped
    I'd like to have MESO do it, but I can atleast model the stl file. I can copy MESOs base dimensions to play with a scanguage pocket and prototype it with PLA on my printer, but I would much rather have his industrial printer do it as PLA will likely melt or get disfigured. Has he done scanguage mounts? I feel like they would have a ton of demand.
     
  2. Jul 28, 2020 at 2:42 PM
    #562
    Jojee117

    Jojee117 Well-Known Member

    Joined:
    Jul 30, 2018
    Member:
    #261068
    Messages:
    960
    Gender:
    Male
    First Name:
    Joe
    MT
    Vehicle:
    06 TRD Sport Prerunner 4WD swapped
    Taco-Obsessed likes this.
  3. Jul 28, 2020 at 6:12 PM
    #563
    Jojee117

    Jojee117 Well-Known Member

    Joined:
    Jul 30, 2018
    Member:
    #261068
    Messages:
    960
    Gender:
    Male
    First Name:
    Joe
    MT
    Vehicle:
    06 TRD Sport Prerunner 4WD swapped
    Printing out some switch blanks I found on thingiverse. Could be better, but not bad. Only 7 more to go, beats the heck out of spending $100 to fill up blank spots.

    20200728_190029.jpg
    20200728_190135.jpg
     
  4. Jul 28, 2020 at 6:17 PM
    #564
    trdtacojef

    trdtacojef Well-Known Member

    Joined:
    Sep 4, 2019
    Member:
    #304271
    Messages:
    287
    Gender:
    Male
    First Name:
    Jeremy
    Alabama
    Vehicle:
    2007 DCSB TRD Sport
    OME Dakar Medium duty rear leafs Total Choas UCAs Elka 2.5” Extended Travel CO and Rear Shocks w/ RR and DC FN FX Pro 17” Silver Rims Nitto Ridge Grapplers 285/70R17
    Shoot I think those are pretty cool. Especially if you are printing them up yourself.
     
    Jojee117[QUOTED] likes this.
  5. Jul 28, 2020 at 6:24 PM
    #565
    Jojee117

    Jojee117 Well-Known Member

    Joined:
    Jul 30, 2018
    Member:
    #261068
    Messages:
    960
    Gender:
    Male
    First Name:
    Joe
    MT
    Vehicle:
    06 TRD Sport Prerunner 4WD swapped
    I'm just glad I was able to find a file for them so I didnt have to model them myself.
     
  6. Jul 28, 2020 at 7:51 PM
    #566
    trdtacojef

    trdtacojef Well-Known Member

    Joined:
    Sep 4, 2019
    Member:
    #304271
    Messages:
    287
    Gender:
    Male
    First Name:
    Jeremy
    Alabama
    Vehicle:
    2007 DCSB TRD Sport
    OME Dakar Medium duty rear leafs Total Choas UCAs Elka 2.5” Extended Travel CO and Rear Shocks w/ RR and DC FN FX Pro 17” Silver Rims Nitto Ridge Grapplers 285/70R17
    How’s the learning curve with 3D printing? Did you find it difficult to get started when you got one?
     
  7. Jul 28, 2020 at 8:04 PM
    #567
    Jojee117

    Jojee117 Well-Known Member

    Joined:
    Jul 30, 2018
    Member:
    #261068
    Messages:
    960
    Gender:
    Male
    First Name:
    Joe
    MT
    Vehicle:
    06 TRD Sport Prerunner 4WD swapped
    It all depends how you do it. If you buy a printer for several thousand dollars, it's easy peasy for the most part. If you start on a kit that's $150-$300 then you really have to learn the ins & outs, which I'd say is a good thing. You definately have to be a tinkerer as you build the printer yourself and theres about 100 settings in the software that you have to mess with. If it's something you want to try and you're technologically inclined I'd say give it a try. You definately don't have to be a genius to get it going, but it takes a lot of time, patience, and learning to improve your results. I started on an Anet A8 for $150 bucks and it was great for the price. I moved to a FLsun cube with dual extruders(still haven't even tried those) but the rigidity, build volume, and quality are good for the $300 price tag. If you're interested all it takes is time and less than $200. Obviously the more you spend the easier your experience will be, but starting cheap helps you learn a lot. Overall I'd say the learning curve can be a little steep to get started, then it's pretty gradual as you learn, then the more you demand control and perfection the more it skyrockets.
     
  8. Jul 28, 2020 at 8:36 PM
    #568
    trdtacojef

    trdtacojef Well-Known Member

    Joined:
    Sep 4, 2019
    Member:
    #304271
    Messages:
    287
    Gender:
    Male
    First Name:
    Jeremy
    Alabama
    Vehicle:
    2007 DCSB TRD Sport
    OME Dakar Medium duty rear leafs Total Choas UCAs Elka 2.5” Extended Travel CO and Rear Shocks w/ RR and DC FN FX Pro 17” Silver Rims Nitto Ridge Grapplers 285/70R17
    Excellent info. Thank you.
     
    Jojee117[QUOTED] likes this.
  9. Aug 2, 2020 at 8:23 AM
    #569
    seafur

    seafur Well-Known Member

    Joined:
    Jul 11, 2014
    Member:
    #133755
    Messages:
    115
    Gender:
    Male
    Pacific Northwest
    Vehicle:
    2014 DCSB MT TRD OR
    Sprinter bed tiedowns, Aux fuse box, AIO key, 3-way canopy light switch, 12V bed outlet, Dual Battery AGM G35, Viair OBA, Uni-filter mod
    I bought the Meso OHP6, overhead 6 switch panel, for my 2014 Tacoma. Apparently I thought it was designed to hold the OTRATTW V-series switches. I order everything about 6 months ago and finally decided to start the install. The ORATTW I order are too big to fit in the Meso switch panel. What switches is the Meso panel designed to accept?

    31345F22-122C-4A07-872A-9FAB4E1EE28B.jpg
     
  10. Aug 2, 2020 at 8:29 AM
    #570
    hoarder23

    hoarder23 Truck fell over

    Joined:
    Aug 14, 2012
    Member:
    #84787
    Messages:
    12,866
    Gender:
    Male
    First Name:
    Shay
    NJ
    Vehicle:
    15 Pyrite Mica DCSB Sport
    Scratches
    OEM or CH4x4
     
  11. Aug 2, 2020 at 8:59 AM
    #571
    trdtacojef

    trdtacojef Well-Known Member

    Joined:
    Sep 4, 2019
    Member:
    #304271
    Messages:
    287
    Gender:
    Male
    First Name:
    Jeremy
    Alabama
    Vehicle:
    2007 DCSB TRD Sport
    OME Dakar Medium duty rear leafs Total Choas UCAs Elka 2.5” Extended Travel CO and Rear Shocks w/ RR and DC FN FX Pro 17” Silver Rims Nitto Ridge Grapplers 285/70R17
    Air on Board also makes some Toyota push switches that fit.
     
  12. Aug 2, 2020 at 11:33 AM
    #572
    Taco-Obsessed

    Taco-Obsessed Wildlife Peeping Tom

    Joined:
    Dec 23, 2018
    Member:
    #276756
    Messages:
    7,443
    Gender:
    Male
    I just grinded them down to use OTTRAW switches. It is on the backside and doesn't show so I didn't care. You can see my posts on page 28.
     
  13. Aug 3, 2020 at 12:24 PM
    #573
    seafur

    seafur Well-Known Member

    Joined:
    Jul 11, 2014
    Member:
    #133755
    Messages:
    115
    Gender:
    Male
    Pacific Northwest
    Vehicle:
    2014 DCSB MT TRD OR
    Sprinter bed tiedowns, Aux fuse box, AIO key, 3-way canopy light switch, 12V bed outlet, Dual Battery AGM G35, Viair OBA, Uni-filter mod
    thanks for confirming the OTTRAW switches will stay in after grinding. I’ve got one ground out and it’s a snug fit. Now just got 5 more to go :).
     
    Taco-Obsessed[QUOTED] likes this.
  14. Aug 6, 2020 at 4:49 PM
    #574
    seafur

    seafur Well-Known Member

    Joined:
    Jul 11, 2014
    Member:
    #133755
    Messages:
    115
    Gender:
    Male
    Pacific Northwest
    Vehicle:
    2014 DCSB MT TRD OR
    Sprinter bed tiedowns, Aux fuse box, AIO key, 3-way canopy light switch, 12V bed outlet, Dual Battery AGM G35, Viair OBA, Uni-filter mod
    I cut down the "inside" of the switch slots in the Meso panel and got the OTTRAW switches to fit. Unfortunately the 3M blue tape I used to protect the paint had the opposite effect and I lost a little bit of paint off the Meso panel.

    I planned to install the switch panel in the front sunglasses holder slot. I removed the "folding" sunglasses pocket and the switch panel with switches does fit. I left the black recessed pocket in the console since it has the clips that hold the front of the console in the roof.

    I was hoping the Meso panels with switches would stay in the console with just friction fit not requiring screws but that's the case, it just falls down.

    Problem is, I can't get to the mounting holes in the Meso panel from inside to put screws from the inside to outside and finding the alignment to put screws in from the outside to the inside will likely not result in having the Meso panel properly aligned. Not sure if I explained that coherently.

    Any advice on attaching the Meso panel to the console with screws?
     
  15. Aug 6, 2020 at 5:22 PM
    #575
    Taco-Obsessed

    Taco-Obsessed Wildlife Peeping Tom

    Joined:
    Dec 23, 2018
    Member:
    #276756
    Messages:
    7,443
    Gender:
    Male
    I'm not sure I follow but I'm going to attempt to help from my experience.

    1. To make my bigger Ottraw switches fit I grinded down the backside of the switch panel as you did, but I also cut out the back on the top of the sunglass holder. This made it easier to fit the wires but also easier to screw in the side mounting screws because I could do it from the backside with all the switches/wires in place. To do this I had to have the entire "console" removed and installed the switch panel to the console outside of my truck. See two photos below.

    Photo showing backside I cut out to make room for wires and for access. Note due to limited room and my holes not lining up perfectly I heated up an old bit and just melted it through to create an attach point between console and panel.
    20200424_140507.jpg
    Photo showing the entire console removed for install of panel.
    20200425_190202.jpg

    Note that I installed the panel in the second back sunglass holder, not the front one closer to the windshield. I did this for a couple reasons: 1.) Personally I think it looks better and was less likely to be in my line of sight when looking in the rear view mirror; and, 2.) It was easier to reinstall the entire console now that I dont have to reinstall the center screw that attaches the upper half/backside of the front sunglass holder to the console with the meso panel in the way.

    To install the meso panel in the front sunglass holder you'd have to have longer wires, pull out one or more the switches and try to reinstall the screw through the switch openings. I didn't want to deal with that frustration.

    I think it looks good in the back, is out of my line of sight when driving, and was 10x easier to install at that location compared to the front.
    20200426_191203.jpg

    Hope that helps.
     
  16. Aug 6, 2020 at 8:43 PM
    #576
    seafur

    seafur Well-Known Member

    Joined:
    Jul 11, 2014
    Member:
    #133755
    Messages:
    115
    Gender:
    Male
    Pacific Northwest
    Vehicle:
    2014 DCSB MT TRD OR
    Sprinter bed tiedowns, Aux fuse box, AIO key, 3-way canopy light switch, 12V bed outlet, Dual Battery AGM G35, Viair OBA, Uni-filter mod
    @Taco-Obsessed thanks for the pics and description that helped. I stuck with the front slot since I had already removed the gear. Boy we’re you right getting the screws in was a pain. I ended cutting the holes in the back to get the alignment the way I wanted it and drilling holes through the back and into the tabs on the Meso panel. I ran the screws in after wiring up the switches, doing that with everything hanging from the roof was a real pain. It turned out pretty good and it’s solid.

    8A8B73F3-4489-4EDF-A2CA-5189EECE83F8.jpg
     
    Taco-Obsessed and MESO[OP] like this.
  17. Aug 6, 2020 at 8:44 PM
    #577
    MESO

    MESO [OP] Major Modder Vendor

    Joined:
    Feb 16, 2015
    Member:
    #148809
    Messages:
    16,294
    Gender:
    Male
    State of Jefferson
    Vehicle:
    2016 DCLB TRD HELLCAT SWAP
    Looks great guys. Yeah this is kind of a DIY panel so use your own improvisions
     
    Taco-Obsessed likes this.
  18. Aug 6, 2020 at 9:06 PM
    #578
    Taco-Obsessed

    Taco-Obsessed Wildlife Peeping Tom

    Joined:
    Dec 23, 2018
    Member:
    #276756
    Messages:
    7,443
    Gender:
    Male
    Congrats, looks great.
     
  19. Aug 8, 2020 at 8:47 AM
    #579
    Newk

    Newk Member

    Joined:
    Jul 15, 2020
    Member:
    #334523
    Messages:
    11
    Gender:
    Male
    Vehicle:
    2011 tacoma trd offroad
    Welp my sunglasses holder just broke..lol
    @MESO still making these to order?
     
  20. Apr 8, 2021 at 7:18 PM
    #580
    JoshS

    JoshS Well-Known Member

    Joined:
    Aug 31, 2019
    Member:
    #303869
    Messages:
    267
    Gender:
    Male
    First Name:
    Josh
    Vehicle:
    2014 Tacoma TRD Sport DCSB 4x4
    How's your vision of the rear-view mirror? Is it blocked at all?
     

Products Discussed in

To Top