1. Welcome to Tacoma World!

    You are currently viewing as a guest! To get full-access, you need to register for a FREE account.

    As a registered member, you’ll be able to:
    • Participate in all Tacoma discussion topics
    • Communicate privately with other Tacoma owners from around the world
    • Post your own photos in our Members Gallery
    • Access all special features of the site

Cynicalriders "J0hnny5 is ALIVE!" 01 build thread.

Discussion in '1st Gen. Builds (1995-2004)' started by cynicalrider, Aug 8, 2013.

  1. Sep 27, 2021 at 4:27 PM
    #2061
    6 gearT444E

    6 gearT444E Certified Electron Pusher

    Joined:
    Feb 3, 2018
    Member:
    #243372
    Messages:
    7,770
    Deep South
    Herculiner Hootus
    Damn, I think the cabinet I got only had two shelves. Should have robbed additional shelves out of another one lol. Oh well
     
  2. Sep 27, 2021 at 4:53 PM
    #2062
    cynicalrider

    cynicalrider [OP] #NFG

    Joined:
    Jul 25, 2012
    Member:
    #83399
    Messages:
    17,069
    Gender:
    Male
    Jersey
    Vehicle:
    01 SR5 TRD 4x4, '23 Bronco Wildtrak, 2017 HSQV FE350
    Drop bracket lift and booger welds
    hah yeah I made sure to get 4 shelves for each of our cabinets. There was a loose pile of them next to the cabinets too
     
    6 gearT444E[QUOTED] likes this.
  3. Sep 27, 2021 at 5:09 PM
    #2063
    6 gearT444E

    6 gearT444E Certified Electron Pusher

    Joined:
    Feb 3, 2018
    Member:
    #243372
    Messages:
    7,770
    Deep South
    Herculiner Hootus
    two plus the top one is probably good. I really just wanted it for the wardrobe side anyhow to keep clothes from getting dusty from the grinder like you has said.
     
  4. Oct 5, 2021 at 8:25 AM
    #2064
    cynicalrider

    cynicalrider [OP] #NFG

    Joined:
    Jul 25, 2012
    Member:
    #83399
    Messages:
    17,069
    Gender:
    Male
    Jersey
    Vehicle:
    01 SR5 TRD 4x4, '23 Bronco Wildtrak, 2017 HSQV FE350
    Drop bracket lift and booger welds
    Got some wheeling coming up in end of October and November so I am trying to get the truck in order. First up was the locker actuator that failed me at Takeover.

    I started ripping it apart and cleaning it up as best as I can.


    My theory for the failure is this chunk that busted off the back and wedged itself in the gearing. From there I think it all just seized up.

    [​IMG]Untitled by Michael Halat, on Flickr

    I learned a bunch taking it apart this time in my actual shop, unlike the first time I took mine apart in my parents front yard when I was like 25 and just got the truck, and was living in an apartment. I think I lost like half the shit. Needless to say that actuator never started working. :p

    The biggest thing I learned was the trick for the brushes. I think @ToyRyd04 used zip ties for those, and I saw someone else use tooth picks, but for me alligator clips worked great to keep them in. I also learned that the main shaft actually rides on two ball bearings on either end of the shaft, and it was a miracle I didn't lose either of them. Thankfully the magnets are still firmly glued to the housing, even after beating on the damn thing with my impact screw driver to get them to open in the first place. Unfortunately on the motor side, even with how well I cleaned it up, RTV is the only solution that will seal it. I hoped to source an o ring for the main section but I might just fully RTV that too. I also said fuck it to the Toyota grease and am using Bel Ray Waterproof grease for the gears/shaft/spring and dialectric for the face of the wheel. I have used it on all my motorcycles for years and have good faith in the stuff. The only thing I need now to reassemble the motor are new M5 bolts that I am going to use socket cap screws for instead of the stupid phillps shit.

    This was my take on keeping the brushes seated:

    [​IMG]Untitled by Michael Halat, on Flickr

    I will say though, I much much rather rely on this system than an ARB in the rear any day. The beauty of this is that if it does fail, I can still manually engage it, which I did when it failed on the trail.
     
  5. Oct 5, 2021 at 9:13 AM
    #2065
    cynicalrider

    cynicalrider [OP] #NFG

    Joined:
    Jul 25, 2012
    Member:
    #83399
    Messages:
    17,069
    Gender:
    Male
    Jersey
    Vehicle:
    01 SR5 TRD 4x4, '23 Bronco Wildtrak, 2017 HSQV FE350
    Drop bracket lift and booger welds
    ToyRyd04 and MY50cal like this.
  6. Oct 6, 2021 at 9:49 AM
    #2066
    cynicalrider

    cynicalrider [OP] #NFG

    Joined:
    Jul 25, 2012
    Member:
    #83399
    Messages:
    17,069
    Gender:
    Male
    Jersey
    Vehicle:
    01 SR5 TRD 4x4, '23 Bronco Wildtrak, 2017 HSQV FE350
    Drop bracket lift and booger welds
    Chipping away on this before it needs to sit for a quick weekend getaway:

    Tested continuity to confirm the motor SHOULD work:

    [​IMG]Untitled by Michael Halat, on Flickr

    And then dry tested it, success!

    [​IMG]Untitled by Michael Halat, on Flickr

    I also used some JB weld to fix some stuff.

    First was to fill in the piece on the back cover that is meant to prevent deflection:

    [​IMG]Untitled by Michael Halat, on Flickr

    I also saw these nasty gaps on the cover:

    [​IMG]Untitled by Michael Halat, on Flickr

    So pressed the cap into a better shape, and built up that wall with more JB weld.

    [​IMG]Untitled by Michael Halat, on Flickr
    [​IMG]Untitled by Michael Halat, on Flickr

    Even though this cap will no longer use an o ring, I at least want to make it as easy as possible for the RTV to seal it all up, as well as add a little more strength to the motor cap base.

    From there I cleaned up the axle and painted it not long after this:

    [​IMG]Untitled by Michael Halat, on Flickr

    Lastly I got something to organize my zep bottles and top used/tall cans:

    [​IMG]Untitled by Michael Halat, on Flickr
     
  7. Oct 15, 2021 at 9:51 AM
    #2067
    cynicalrider

    cynicalrider [OP] #NFG

    Joined:
    Jul 25, 2012
    Member:
    #83399
    Messages:
    17,069
    Gender:
    Male
    Jersey
    Vehicle:
    01 SR5 TRD 4x4, '23 Bronco Wildtrak, 2017 HSQV FE350
    Drop bracket lift and booger welds
    Finished one project up only to start another. I wrapped up the rebuild on the actuator. Final build pics:

    [​IMG]Untitled by Michael Halat, on Flickr
    [​IMG]Untitled by Michael Halat, on Flickr
    [​IMG]Untitled by Michael Halat, on Flickr
    [​IMG]Untitled by Michael Halat, on Flickr

    It's got Blue RTV on the motor (what I had avail and probably fine for this application), Bel Ray Waterproof grease on the gears, spring and any heavy moving parts, silicone grease on the main housing o-ring and the o-ring on the main shaft, and dielectric grease on the contacts of the wheel.

    I also painted the housing after I stripped it, and liberally antisiezed it, as well as slathered a bunch of waterproof grease on the pockets salt water can collect.

    [​IMG]Untitled by Michael Halat, on Flickr
    [​IMG]Untitled by Michael Halat, on Flickr

    Maybe with all that I can keep corrosion at bay for at least another 10 years.

    My tests:

    https://youtu.be/N87MXLrUH_w

    From there I moved onto prepping for my next wheeling trips. I started on fixing the two stripped t-case skid mounts. The original design is self tapped bolts provided by skid row. The back two have been long since stripped out, so I drilled holes big enough to get a flange nut in, and will weld them into the frame.

    [​IMG]Untitled by Michael Halat, on Flickr

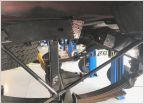
    While I was under there I saw I fell victim to another cv boot clamp hitting the shock issue. Now I need to reboot one of my spares to get this damn thing ready to wheel.

    [​IMG]Untitled by Michael Halat, on Flickr

    I think @turbodb mentioned that there are different misalignments I can get for my ADS shocks that will push it further from the CV. Might need to look into that soon.
     
    alee891, jubei and Tacofire98 like this.
  8. Oct 15, 2021 at 9:54 AM
    #2068
    turbodb

    turbodb AdventureTaco

    Joined:
    Feb 9, 2016
    Member:
    #177696
    Messages:
    8,450
    Gender:
    Male
    First Name:
    Dan
    PNW
    Vehicle:
    2000 Tacoma Xcab 4x4 SR5 V6 TRD
    AdventureTaco
    There certainly are. Reach out to Tim @TMFF and he can hook you up.
     
    TMFF likes this.
  9. Oct 15, 2021 at 4:35 PM
    #2069
    Reh5108

    Reh5108 Well-Known Member

    Joined:
    Feb 18, 2013
    Member:
    #97832
    Messages:
    5,765
    Gender:
    Male
    First Name:
    Ryan
    Idaho
    Vehicle:
    2004 SR5 4X4 2.7L Extra Cab
    OME lift, 4x sliders, Demello rear bumper, custom front bumper, Engo 9000lb winch
    I wonder if this is the reason that fox come with the offset spacers.
     
  10. Oct 18, 2021 at 9:35 AM
    #2070
    cynicalrider

    cynicalrider [OP] #NFG

    Joined:
    Jul 25, 2012
    Member:
    #83399
    Messages:
    17,069
    Gender:
    Male
    Jersey
    Vehicle:
    01 SR5 TRD 4x4, '23 Bronco Wildtrak, 2017 HSQV FE350
    Drop bracket lift and booger welds
    Yeah took a good look at ADS today and they are basically centered in the mount. Looks like it needs to be bumped forward a smidge.

    Got my rear t-case skid mounts fixed and skid back on. Drilled out the stripped holes enough to get a 10.9 flange nut into the frame and welded it on. Then ground it semi flush for the skid to sit flat against.

    [​IMG]Untitled by Michael Halat, on Flickr
    [​IMG]Untitled by Michael Halat, on Flickr
    [​IMG]Untitled by Michael Halat, on Flickr
    [​IMG]Untitled by Michael Halat, on Flickr

    Then rebuilt a spare OEM cv.

    [​IMG]Untitled by Michael Halat, on Flickr
    [​IMG]Untitled by Michael Halat, on Flickr

    The process was way less messier working on the bench in a box.

    Just gotta swap it and all the required shit I need to wheel Monday is done. I am going to try to sneak my Dirt Skum exhaust mount on too though.
     
    turbodb[QUOTED] and jubei like this.
  11. Oct 19, 2021 at 8:06 PM
    #2071
    cynicalrider

    cynicalrider [OP] #NFG

    Joined:
    Jul 25, 2012
    Member:
    #83399
    Messages:
    17,069
    Gender:
    Male
    Jersey
    Vehicle:
    01 SR5 TRD 4x4, '23 Bronco Wildtrak, 2017 HSQV FE350
    Drop bracket lift and booger welds
    Tried to better center my exhaust with the dirt skum dual bolt mount. Bright side is actual stick out depth is perfect and not changing at all now. Downside is it still bias’ towards the front.

    mount setup:
    0AC753EB-DC95-4ECF-8D2C-170D031F53A1.jpg

    Before:

    CBB4BBD5-5B62-44EC-8DCC-41935C731D52.jpg

    After:
    DDB4EDB3-2FFD-43AE-82EE-4AC1B0627406.jpg

    There is still a chance that when it heats up it might touch the side of the bezel. We’ll see.

    welds looking rough….


    1DB4E915-5BEB-4822-9F31-71420DE3465B.jpg

    But at this point I’m over it. Going to paint it all in vht flame proof (this part of the pipe used to be painted in engine enamel which burned off real quick) and call it good. It’s as good as it’s going to get for a rock crawler.
     

    Attached Files:

  12. Oct 19, 2021 at 8:43 PM
    #2072
    malburg114

    malburg114 Well-Known Member

    Joined:
    Dec 26, 2012
    Member:
    #93766
    Messages:
    3,774
    Gender:
    Male
    Las Vegas, NV
    Vehicle:
    2001 Toyota Tacoma TRD
    As long as it doesn’t rattle run it. I have to pull mine with a hose clamp and spacer to keep it from rattling and every couple months just tighten it up
     
  13. Oct 20, 2021 at 3:33 AM
    #2073
    cynicalrider

    cynicalrider [OP] #NFG

    Joined:
    Jul 25, 2012
    Member:
    #83399
    Messages:
    17,069
    Gender:
    Male
    Jersey
    Vehicle:
    01 SR5 TRD 4x4, '23 Bronco Wildtrak, 2017 HSQV FE350
    Drop bracket lift and booger welds
    yeah I mean it never rattled before except when the motor turned off, and only once in a while. Never while running, wheeling slow or fast. But I agree, it’s not perfect but nothing on the truck is anymore :rofl:
     
    malburg114[QUOTED] likes this.
  14. Nov 4, 2021 at 10:06 AM
    #2074
    cynicalrider

    cynicalrider [OP] #NFG

    Joined:
    Jul 25, 2012
    Member:
    #83399
    Messages:
    17,069
    Gender:
    Male
    Jersey
    Vehicle:
    01 SR5 TRD 4x4, '23 Bronco Wildtrak, 2017 HSQV FE350
    Drop bracket lift and booger welds
    Went riding on Sunday to an old campsite.

    [​IMG]Untitled by Michael Halat, on Flickr
    [​IMG]Untitled by Michael Halat, on Flickr
    [​IMG]Untitled by Michael Halat, on Flickr

    Truck performed flawlessly at AOAA on Monday with @EatSleepTacos.

    [​IMG]Untitled by Michael Halat, on Flickr

    The day almost didn't start when his starter was seized but some aggressive tapping got it free'd up.

    We ran a couple trails and I needed to winch up a blue. The leaves made the ground slick and my tires have seen better days. I decided to winch after i got myself in this situation:

    [​IMG]Untitled by Michael Halat, on Flickr
    [​IMG]Untitled by Michael Halat, on Flickr

    Randy ended up making it up with a bunch of throttle but of course I didn't get the success on video, only the stuggle bussing.

    Then we decided to hit this trail after a quick lunch. It's one Randy has run before and he wanted to give it another shot.

    [​IMG]Untitled by Michael Halat, on Flickr

    The drop in on this one was STEEP. It zig zagged a round a bunch of rocks to the bottom of the hill. Once we were in it we kinda knew the only way out was through.

    [​IMG]Untitled by Michael Halat, on Flickr

    Of course the pics don't show how steep it actually was.

    Once we were down in it, I ended up getting myself into a dumb situation. I was against a tree on my drivers side (this became the theme of the trail) and I had a stump wedged into my spindle. Of course neither of us brought our chain saws, so Randy winched my front over enough to free up my spindle.

    From there we just kept moving forward down the trail. The entire trail was basically driving on the side of the mountain, off camber, leaned drivers side.

    Then we got to a section that was basically a right hand turn up the mountain, around a bunch of rocks, and then back down going left. It was a section that when I went through it felt SUPER sketch, I skinny pedaled down some sections to avoid tagging the bed side. That's when Randy got into some shit.

    [​IMG]Untitled by Michael Halat, on Flickr

    It started with this:

    [​IMG]

    And got worse from there. We were able to pull that out, but as he was moving forward he was being pulled downward closer and closer to another tree. So the hope was to just side winch forward a little up hill, but that pulled him still closer to the tree because as his front was being pushed up hill, his ass end was pivoting downwards.

    This is how we ended up halfway through the forward winching.

    [​IMG]Untitled by Michael Halat, on Flickr

    And this is how we ended up after winching.

    [​IMG]Untitled by Michael Halat, on Flickr

    At this point Randy had the truck basically almost up on the tree.

    So we needed to pull his truck up a hill, against rocks, sideways... so we came up with this:

    [​IMG] by Michael Halat, on Flickr
    [​IMG]Untitled by Michael Halat, on Flickr

    It would pull him THEORETICALLY up the hill at both his rear slider and his bumper while swinging him forward. I say theoretically because even with a full wrap on the drum, his winch line was just spinning on the drum.

    So he ended up needing to do this:

    https://www.instagram.com/tv/CViGiJllfHq/

    After we got through that, we realized how late it was getting and that we need to start making time on the trail. We needed to stack rocks to keep me off the cab/winch a little a couple more times. Also found out both my rear bumper bolts on the drivers side yeeted themselves and now I couldn't count in that pushing me off trees and I was concerned about pulling on the bumper squeezing by trees. Eventually we got off of the trail and booked it back to the parking lot since we were already at closing time for the park. I let Randy go ahead since he had LT and we hauled ass on the roads back to the lot. I hit a big hit that reminded me that nothing was secured in my bed and my rear bumper is only being held on by two bolts, so I slowed down.

    Well I got back to the parking lot and found out he had a big hit too that did this:

    [​IMG]

    Here is a section I thought would be cool looking but was less impressive on video.

    https://youtu.be/V_oQhB9lHBo

    This was the majority of the damage I took. I have always been okay with dents on the doors/fenders/bedsides because they all were theoretically easily replaceable but I have been proud of not getting any cab damage for as long as I've been wheeling. I can't say that anymore.

    [​IMG]Untitled by Michael Halat, on Flickr

    This trip was a great shake down run, because I leave tonight with a bunch of people for 4 days in MA/VT.

    First thing was to repair the stuff that failed, like the rear bumper bolts...

    Got me some long bois with some blue loctite all around now:

    [​IMG]Untitled by Michael Halat, on Flickr

    They are M12x1.25 if anyone ever needs to know.

    My 15 min res failed too (it started leaking in the parking lot when we got back and when i pushed it it all pissed out) so I grabbed a bottle thats sized similarly and redid it. This time even though I used a sealer it leaked after the first test...

    [​IMG]Untitled by Michael Halat, on Flickr

    So I said fuck it and went ham with RTV I had lying around.

    [​IMG]Untitled by Michael Halat, on Flickr

    I also had the issue of no source of nav now that my mob armor tablet mount failed on me for a third time. I had a spare phone I have been using for nav on the bike with a quad lock case, so I decided to get the automotive mount for the quad lock. The beauty of this is now I can easily move that nav phone back and forth between the bike and truck. But I hate that I don't have the nice big screen of a tablet.

    Old setup:

    [​IMG]IMG_0764 by Michael Halat, on Flickr

    New setup:

    [​IMG]Untitled by Michael Halat, on Flickr

    I re-did a case that was an odd size I had before for bigger trips/harder wheeling. Now I can put all the stuff that was in that case plus the chain saw now.

    [​IMG]Untitled by Michael Halat, on Flickr

    Now I'm all packed up. Looking forward to 4 days of adventure for the first time in 2 years.

    [​IMG]Untitled by Michael Halat, on Flickr
     
    turbodb, slander, MY50cal and 3 others like this.
  15. Nov 4, 2021 at 10:23 AM
    #2075
    EatSleepTacos

    EatSleepTacos Well-Known Member

    Joined:
    Mar 24, 2015
    Member:
    #151688
    Messages:
    59,828
    Gender:
    Male
    First Name:
    Randy
    West Valley, AZ
    Vehicle:
    2017 4Runner
    Great trip report. I pulled out all my winch line to put on the bubba grabber and I found that the first 8’ or so were melted. I assume from spinning the drum on it. So I cut it off and will have a slightly shorter line now.
     
  16. Nov 4, 2021 at 10:31 AM
    #2076
    cynicalrider

    cynicalrider [OP] #NFG

    Joined:
    Jul 25, 2012
    Member:
    #83399
    Messages:
    17,069
    Gender:
    Male
    Jersey
    Vehicle:
    01 SR5 TRD 4x4, '23 Bronco Wildtrak, 2017 HSQV FE350
    Drop bracket lift and booger welds
    I always thought that with a full tight wrap it should never spin like that, but maybe the force in the particular scenario did it in. So pissed we couldn't see if our mess of a recovery setup would have worked :rofl:
     
    EatSleepTacos[QUOTED] likes this.
  17. Nov 4, 2021 at 10:32 AM
    #2077
    betterbuckleup

    betterbuckleup Well-Known Member

    Joined:
    Jun 26, 2017
    Member:
    #222483
    Messages:
    4,695
    Gender:
    Male
    First Name:
    Ian
    Concord, CA
    Vehicle:
    2000 Tacoma SC 2.7 4x4 5spd
    What do you mean by spinning the drum on it? Isn't the end of the line anchored to the drum so that's won't happen?
     
  18. Nov 4, 2021 at 10:41 AM
    #2078
    EatSleepTacos

    EatSleepTacos Well-Known Member

    Joined:
    Mar 24, 2015
    Member:
    #151688
    Messages:
    59,828
    Gender:
    Male
    First Name:
    Randy
    West Valley, AZ
    Vehicle:
    2017 4Runner
    That little screw sheared off
     
  19. Nov 4, 2021 at 10:42 AM
    #2079
    EatSleepTacos

    EatSleepTacos Well-Known Member

    Joined:
    Mar 24, 2015
    Member:
    #151688
    Messages:
    59,828
    Gender:
    Male
    First Name:
    Randy
    West Valley, AZ
    Vehicle:
    2017 4Runner
    I was under the same impression but now we know the end of the line has to be secured in some fashion AND a wrap on the drum.
     
    betterbuckleup likes this.
  20. Nov 4, 2021 at 10:47 AM
    #2080
    6 gearT444E

    6 gearT444E Certified Electron Pusher

    Joined:
    Feb 3, 2018
    Member:
    #243372
    Messages:
    7,770
    Deep South
    Herculiner Hootus
    Nice trip report, looks like a good time! Always makes for a fun story when somebody gets body damage or stuck, otherwise what's the point LOL. What's that home made bottle you gooped up with RTV with the wires coming out?
     

Products Discussed in

To Top