1. Welcome to Tacoma World!

    You are currently viewing as a guest! To get full-access, you need to register for a FREE account.

    As a registered member, you’ll be able to:
    • Participate in all Tacoma discussion topics
    • Communicate privately with other Tacoma owners from around the world
    • Post your own photos in our Members Gallery
    • Access all special features of the site

Dashcam install (StreetGuardian)

Discussion in '3rd Gen. Tacomas (2016-2023)' started by venezian, Jun 19, 2022.

  1. Jun 19, 2022 at 3:41 PM
    #1
    venezian

    venezian [OP] Well-Known Member

    Joined:
    Dec 8, 2015
    Member:
    #171740
    Messages:
    1,138
    Gender:
    Male
    Los Angeles
    Vehicle:
    2022 7545E
    My install of StreetGuardian 2K dashcam.

    Purchased the hardwire kit for clean install as well parking mode.

    [​IMG]

    1. Remove the negative battery terminal

    2. Remove the A pillar

    3. Remove the rubber molding from the top of the doors.

    Make sure to route the rear camera cable behind the air bag. There is plenty of space to tuck it out of the way.

    [​IMG]

    [​IMG]

    4. Remove the driver door sill cover
    5. Remove the driver kick plate cover

    6. Apply the included pre-cut felt on the camera to get rid of vibrations

    [​IMG]

    7. Camera comes with two plates. Dry fit and go with the one that is appropriate for the rake of your windshield. I went with the slimmer one.

    8. Use a strong edge to slide the plate to secure it to the camera. Work smart, not hard.

    [​IMG]

    9. Wire the hardwire kit down the side, easily tucking behind since you removed the rubber.

    10. Organize your cables first and loosely zip tie them.

    11. Did you remove the negative battery terminal? Are you sure it’s not touching any metal surface?

    12. Apply the ground to the existing ground bolt near the bottom of the kick plate.

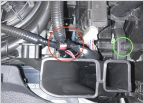
    13. Identify two fuses to tap into. See pic for the two fuses I’m using. You need one fuse that’s always hot and one that’s one with the key on.

    [​IMG]

    [​IMG]

    14. Plug the cables in to camera. Power, rear camera and GPS module.

    15. Connect the negative battery terminal.

    16. Test camera functionality

    17. secure wires, rubber molding and assemble kick plate and door sill

    18. secure camera and GPS unit to windshield. Rear camera to glass.

    Make sure the camera is not attached to the sliding glass or too close to the sliding glass.

    [​IMG]

    [​IMG]

    I’m sure there’s a thing or two I left out so ask me anything.
     
    tacoshell88 likes this.

Products Discussed in

To Top